Veeam replication and backup
Veeam Backup & Replication is a software solution that protects your data by performing backup, replication, and recovery operations. With this product, you can recover your data fast from all types of infrastructure: virtual, physical, and cloud.
Start the installation by mounting the Veeam Backup & Replication image downloaded from Veeam’s product download page. Use the application of your choice to mount the ISO image or burn the image to a removable device with sufficient storage.
Veeam Backup & Replication is a comprehensive data protection and disaster recovery solution that helps businesses protect their virtual, physical, and cloud workloads.
If you are looking for a comprehensive data protection and disaster recovery solution, Veeam replication and backup is a good option to consider.
Here will cover every single steps
Steps to Veeam replication and backup:

Click to Install

Select Community Edition and click to next

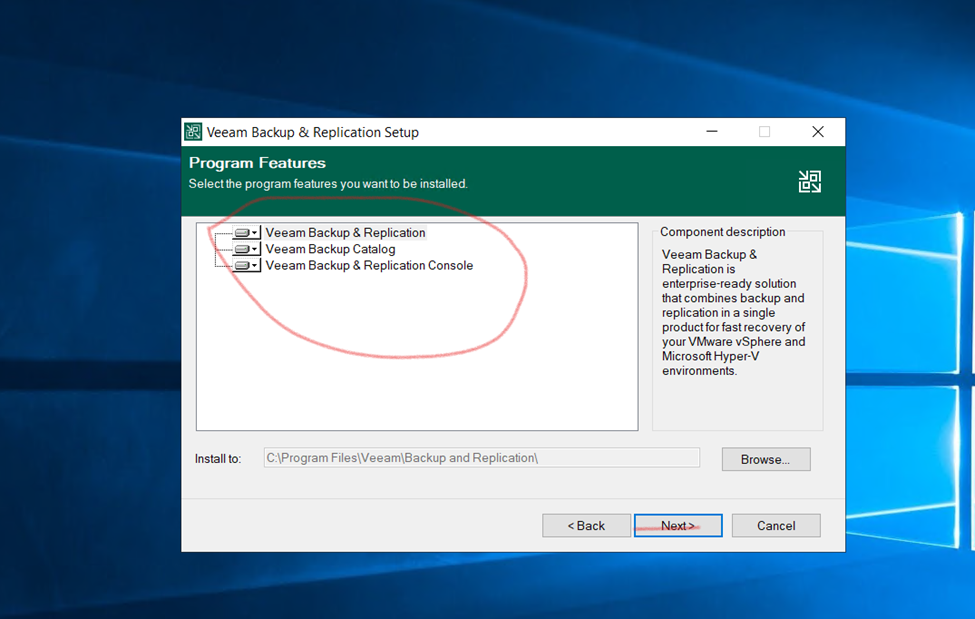
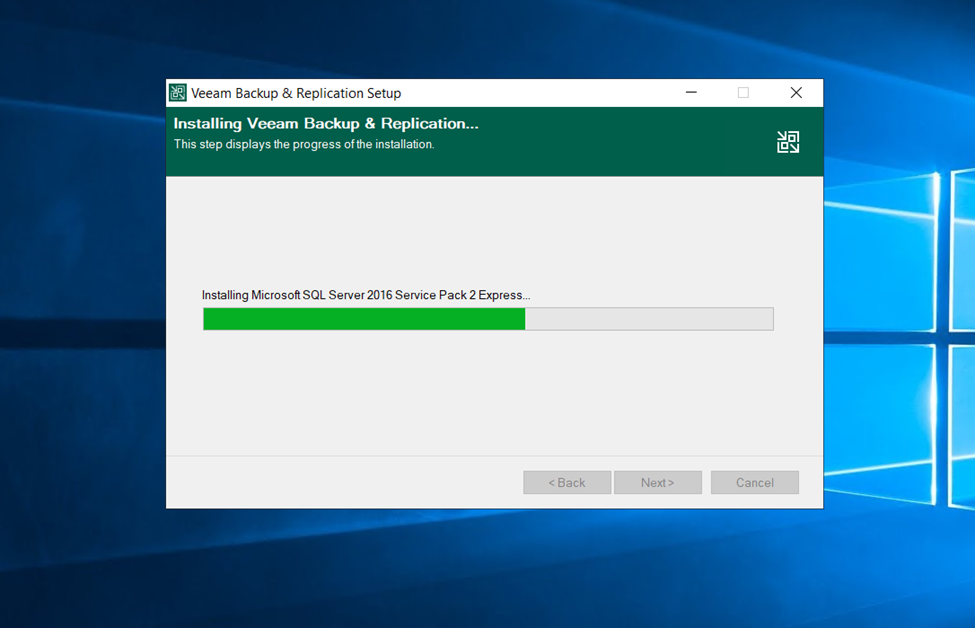
Installing Program Features

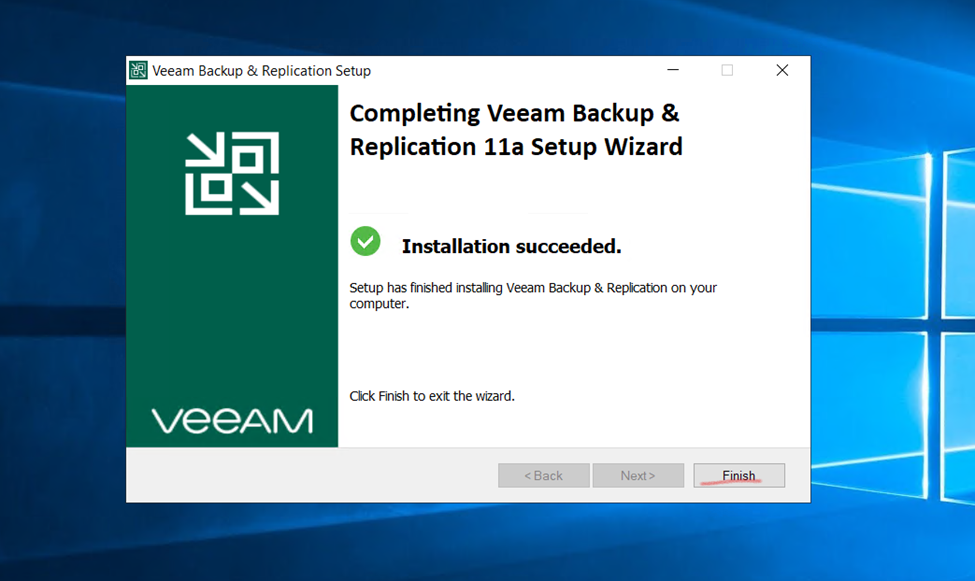
Veeam replication and backup Installation is Completed.
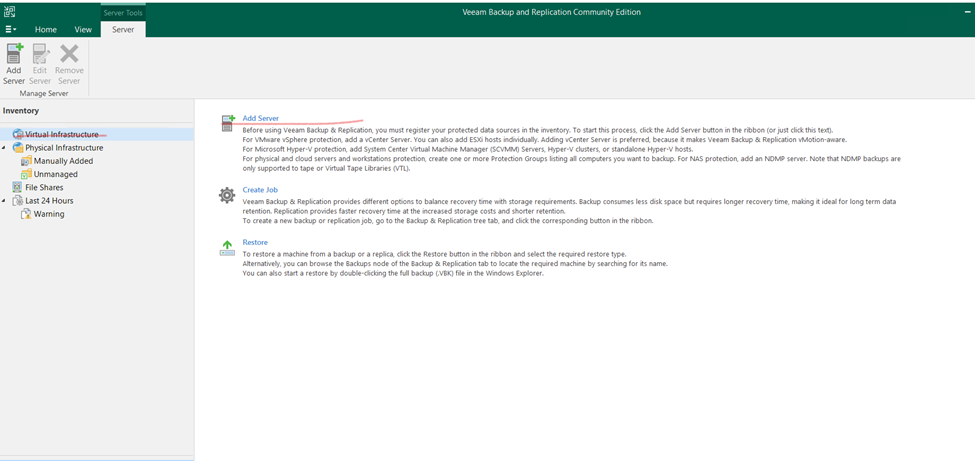
here,
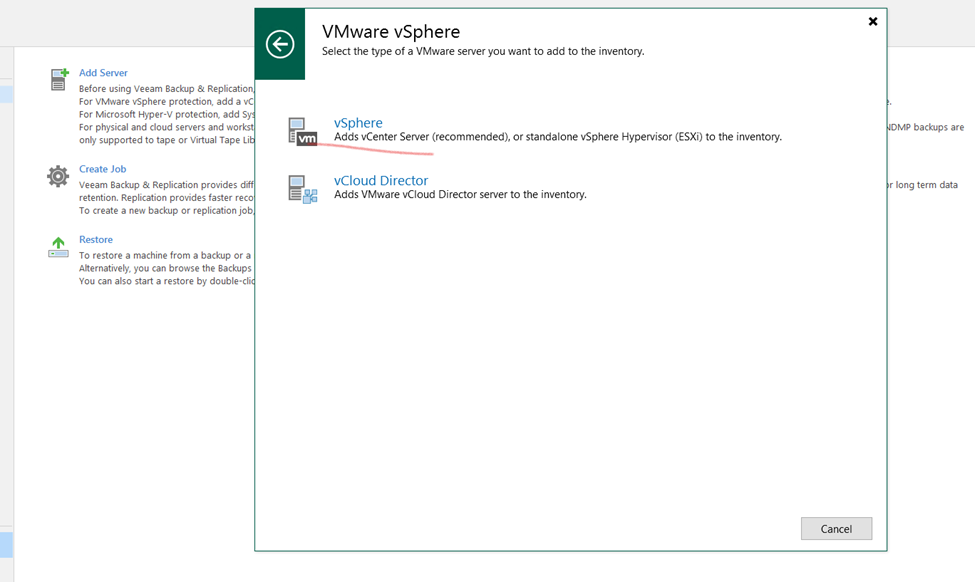
First Adding Virtual bare metal Esxi Server.
Adding Esxi Server into Veeam Backup & Replication
SELCT your Vmware vSphre Virtualization
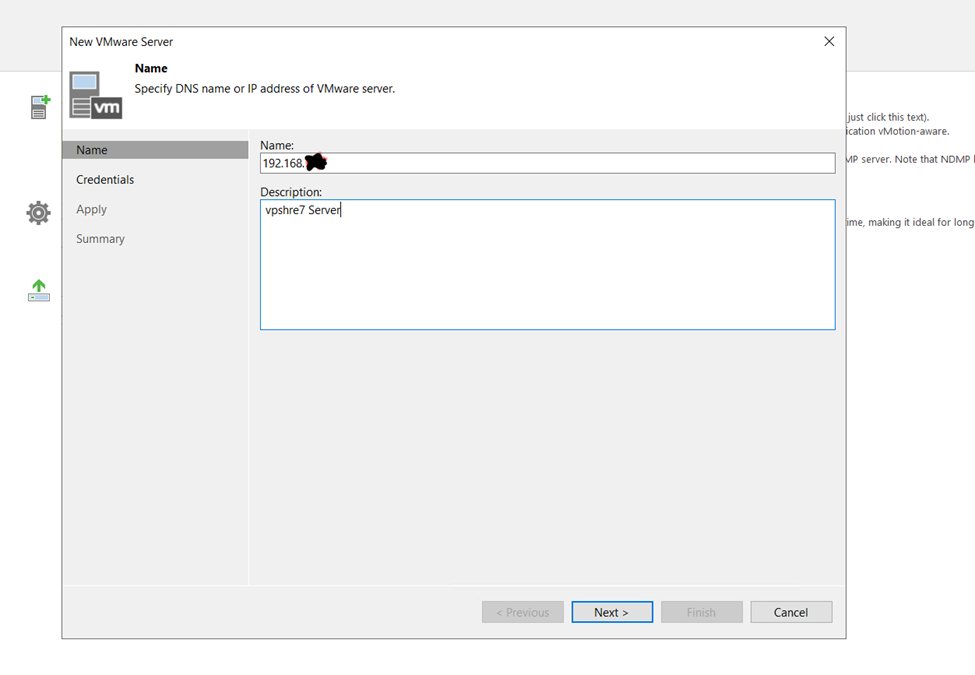
Enter your Vsphre hosts details
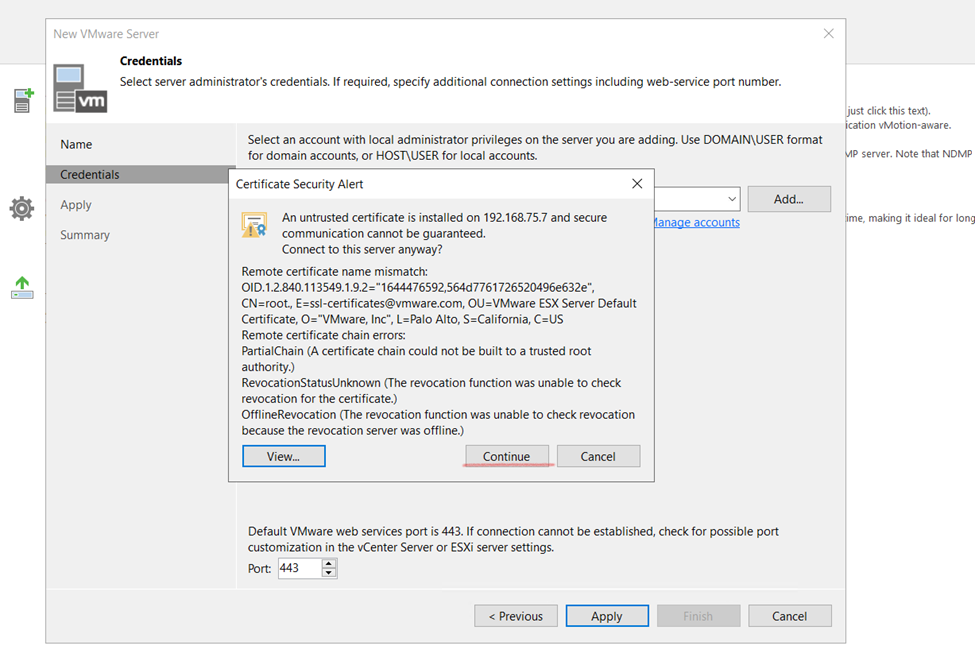
Vpshre username and password

Generate Certificate
click to apply and add
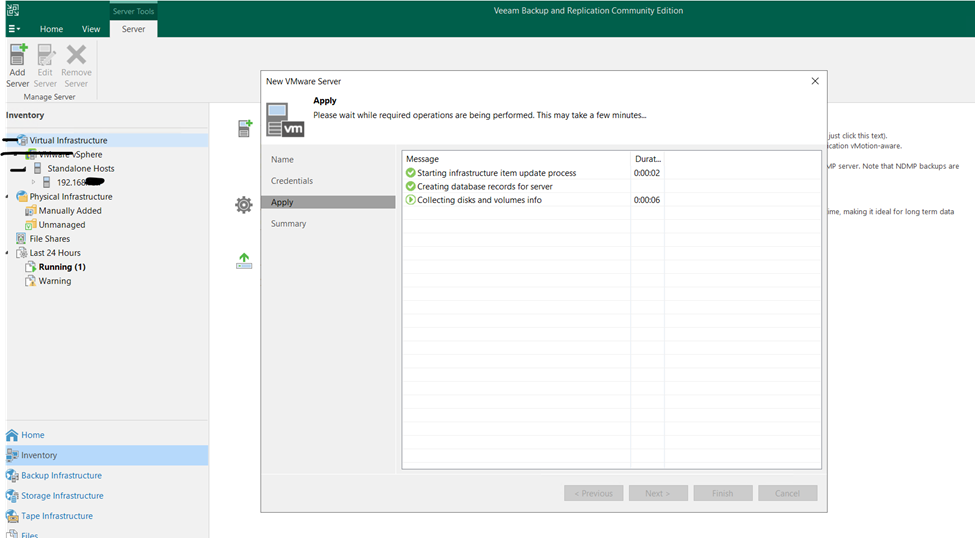
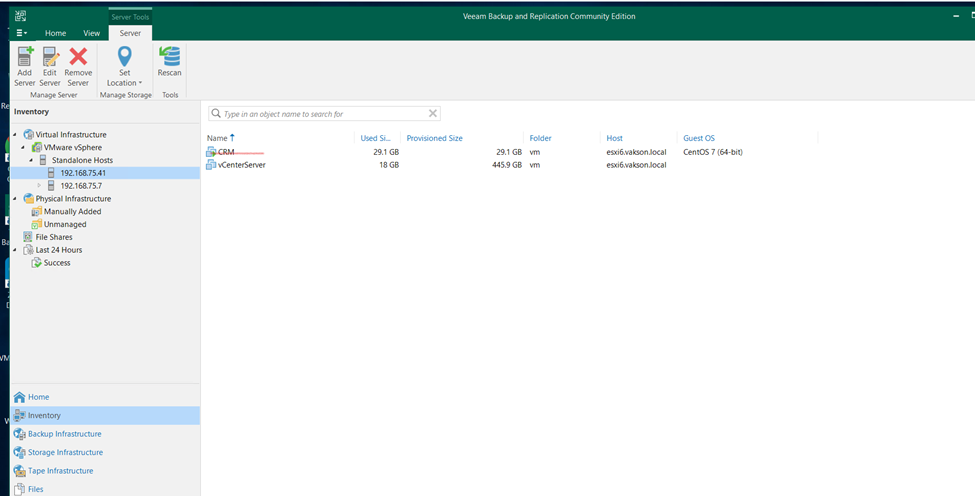
Finish it and check the added Vsphre satatus

so, as you can check the screen attached Vsphre Server all vm is appearing
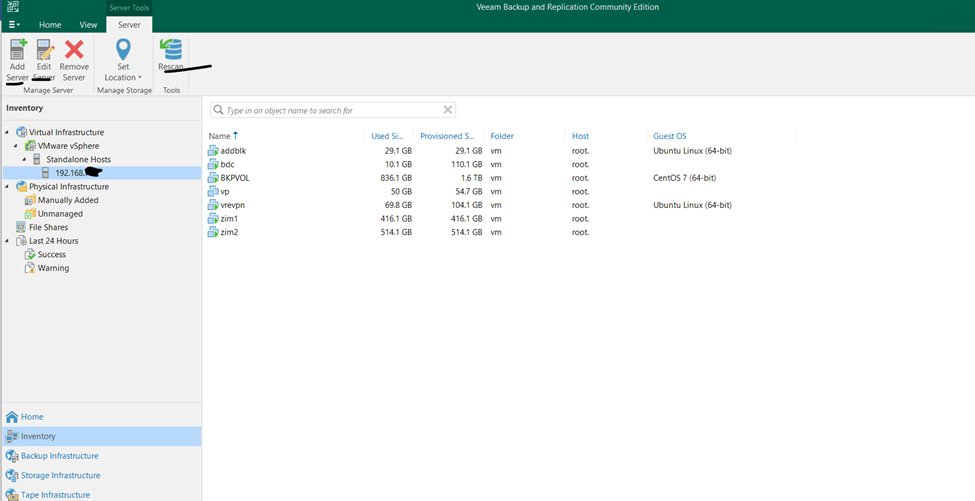
Hypervisor VSphres Server Attached

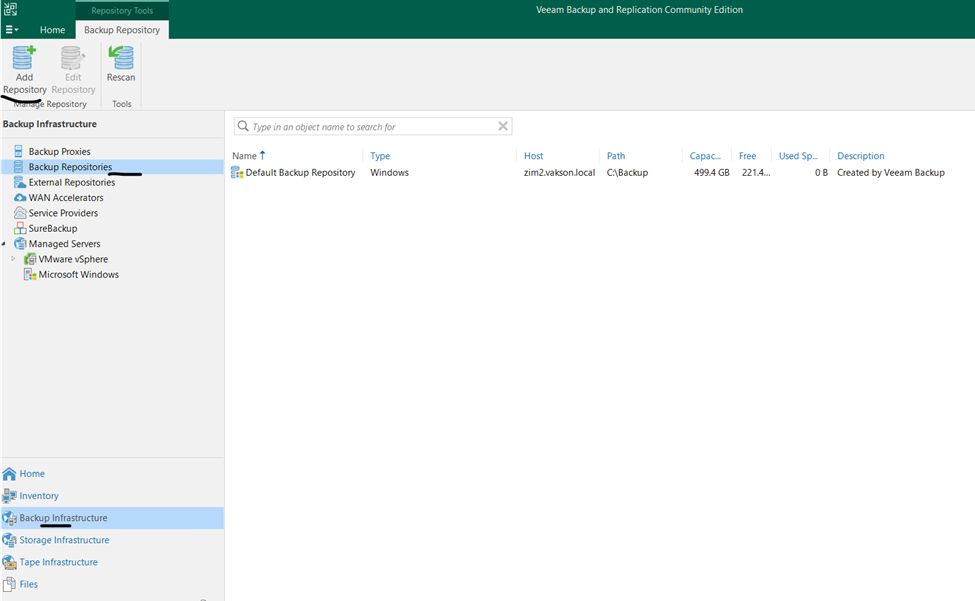
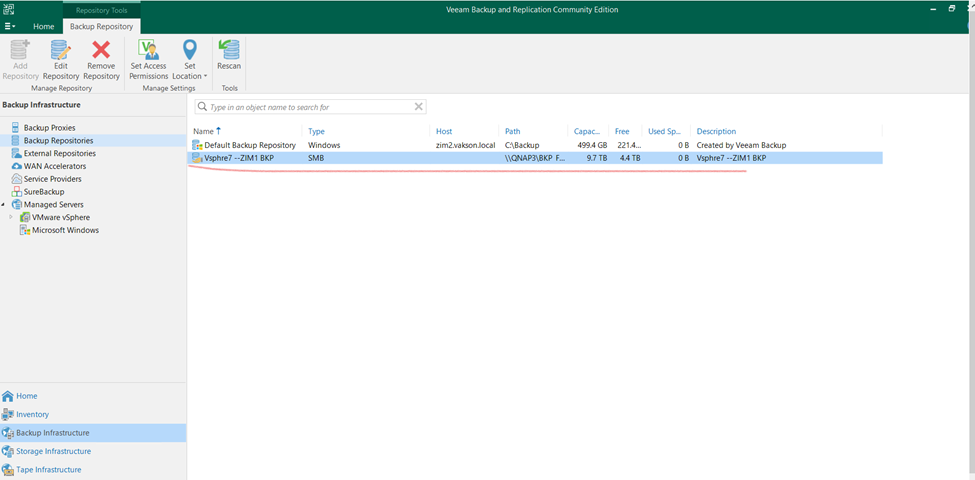
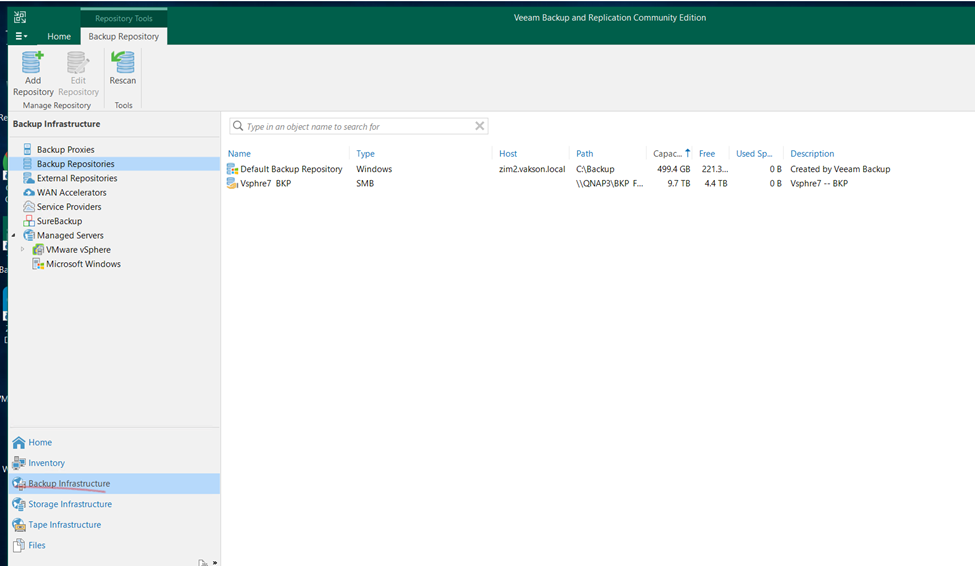
SO HERE I AM ADDING EXTRAL BACKUP REPOSOTORIES
Click to Veeam
Backup infrastructure
Backup Repositories
(Using this method to externalally taking backing to another server not to same server)
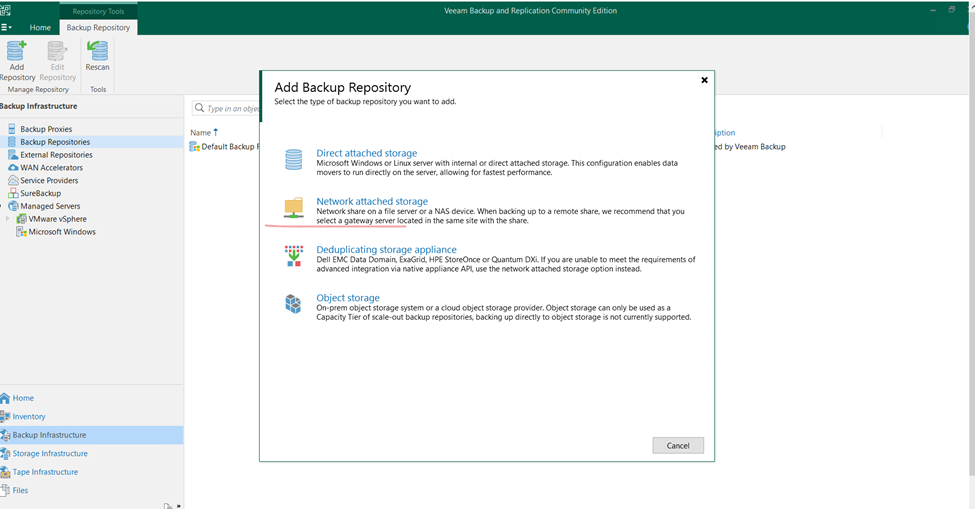
Now click to add
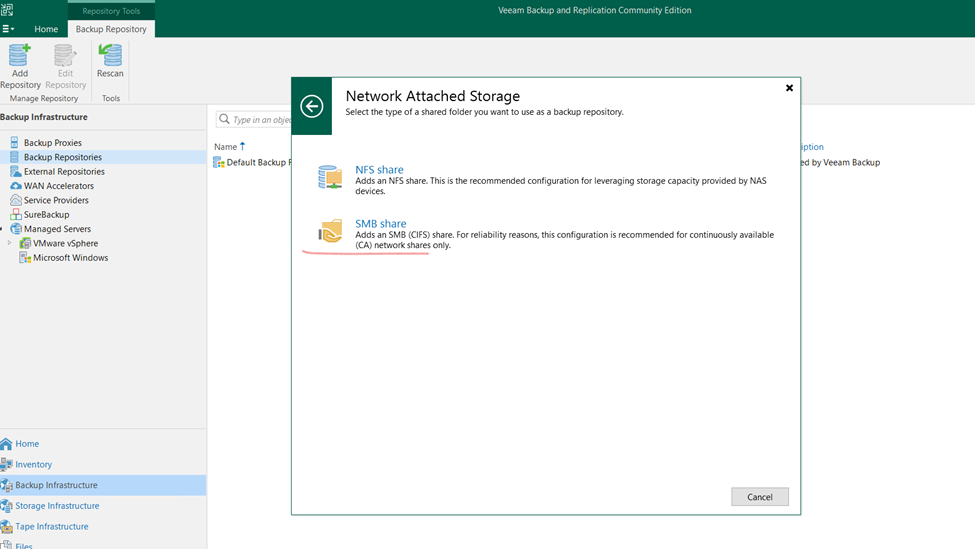
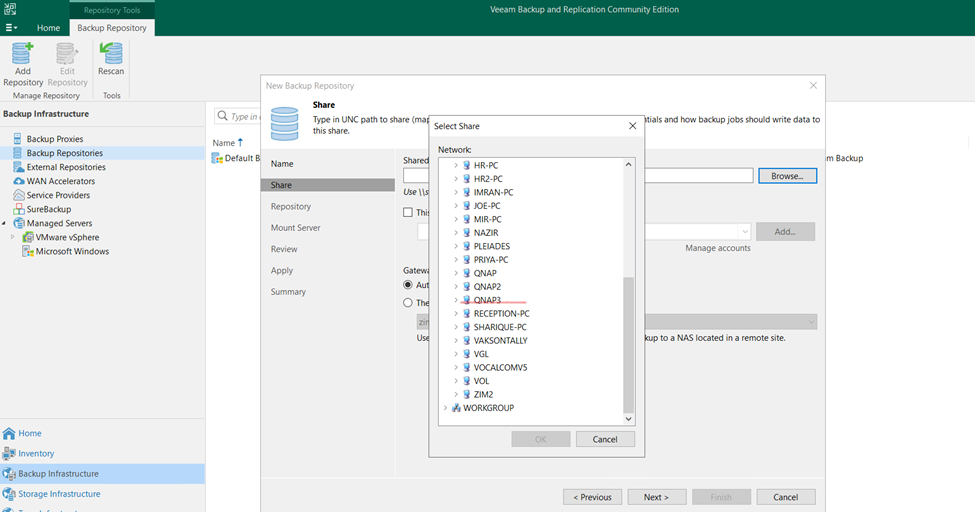
Selecting Network Storage
SMB Share
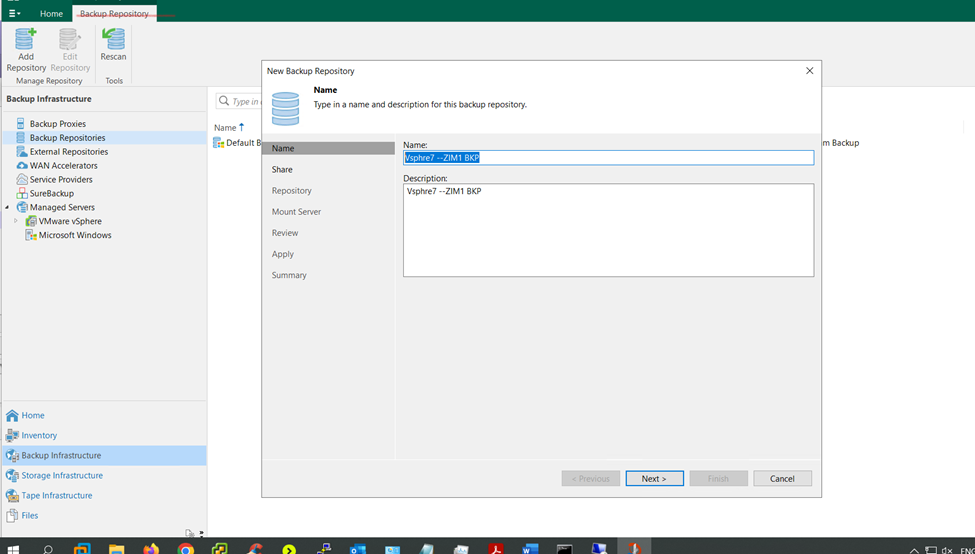
Give the name to Repository
SELECTING BACKUP Storage server
Backup Server Location

Backup Server Location

in below scree that’s the backup repository location
click to next

Mount Server
Click next

Review and check and click to next
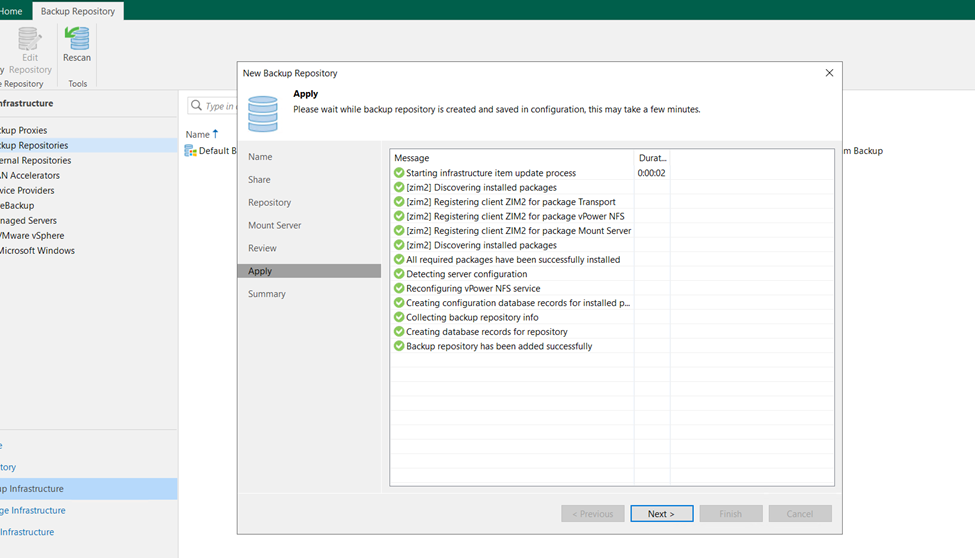
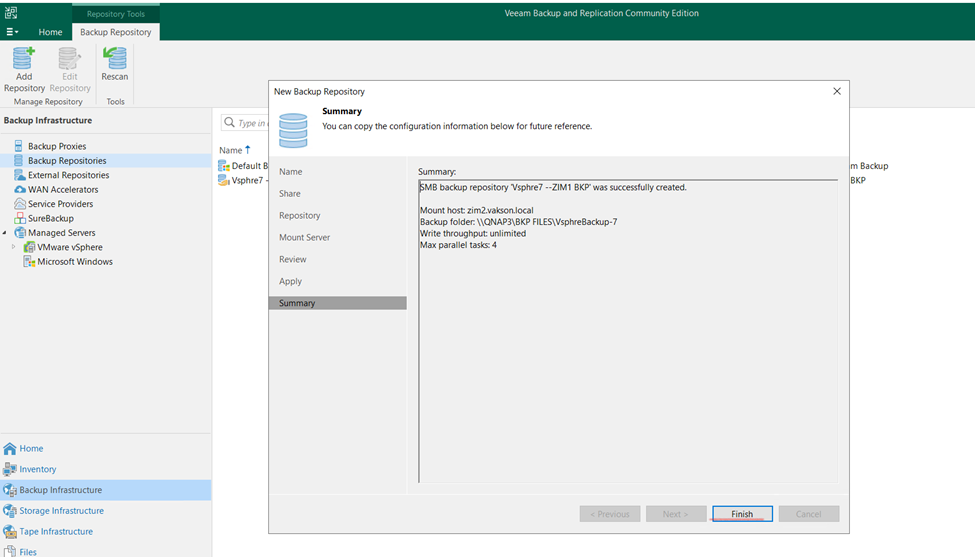
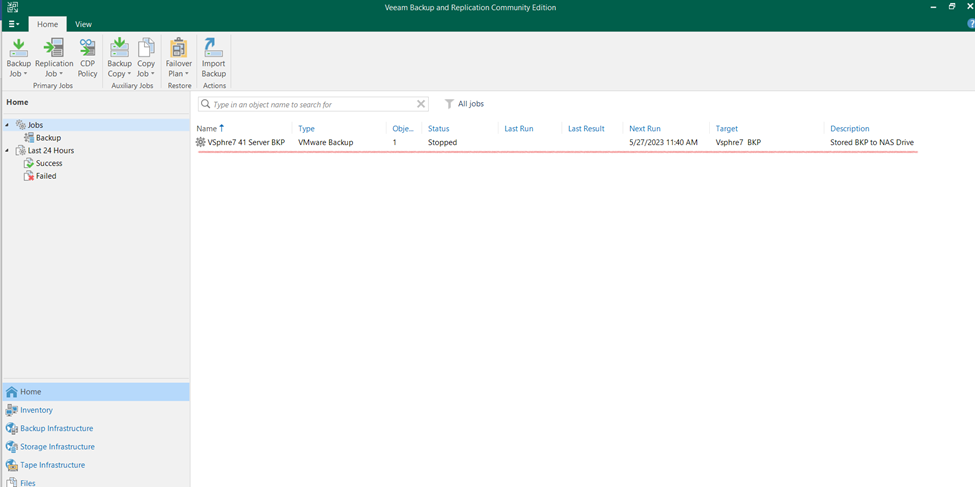
so, Backup repositories created successfully
Click yes and okay

newly created backup repository
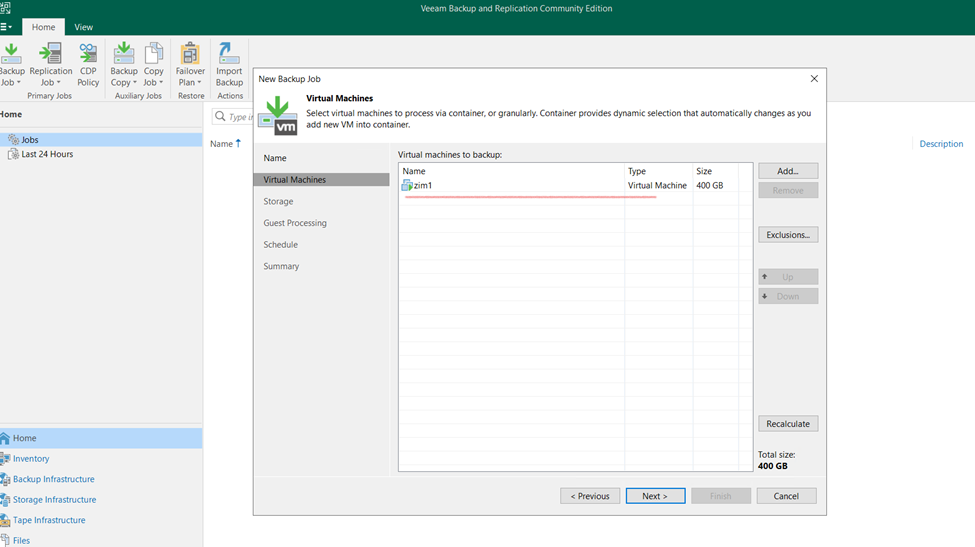
now I wanted to take my VM BACKUP NOW Creating VM BACKUP

Assign VM Backup name

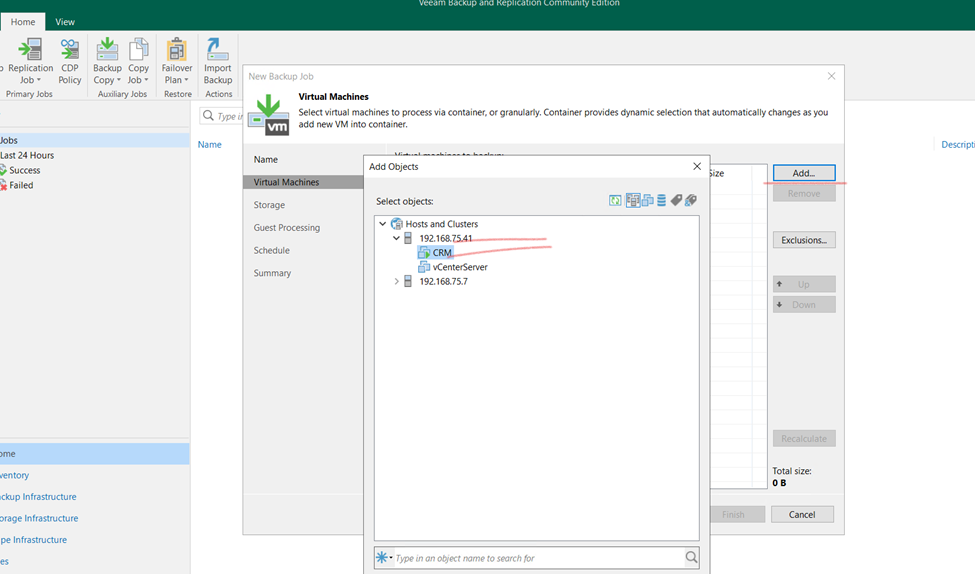
here, I will create backup from vsphre virtual machines
select vsphre vm
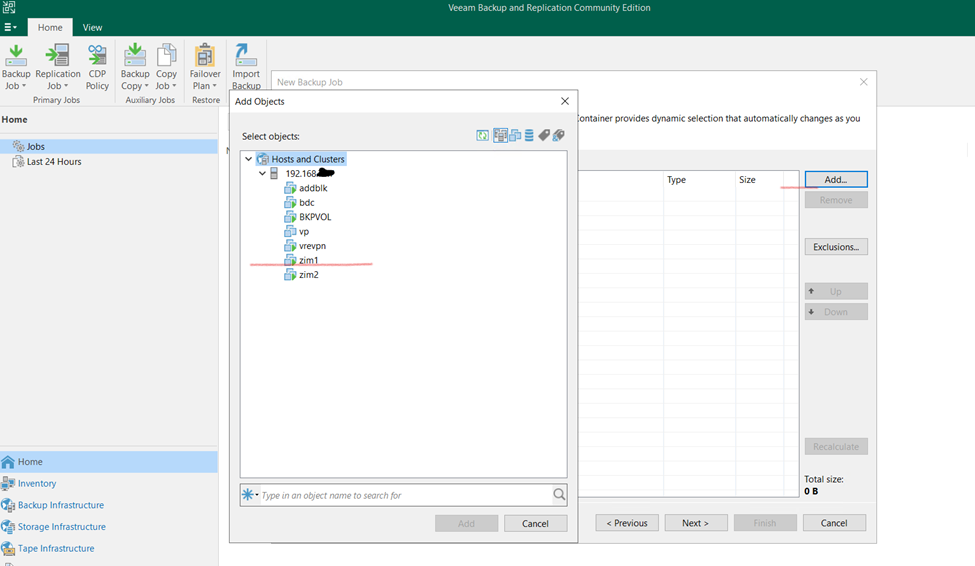
ADD MACHINE need vm username and password
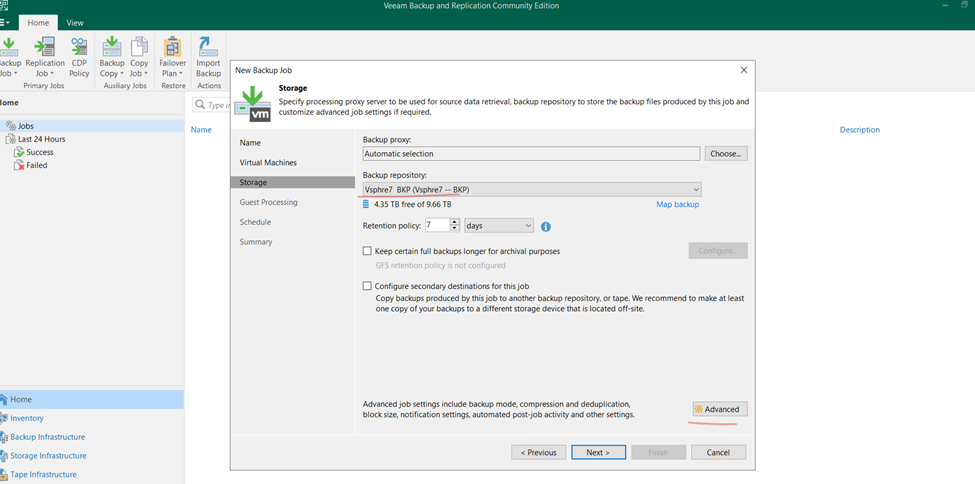
Select backup repository

Incremental backup

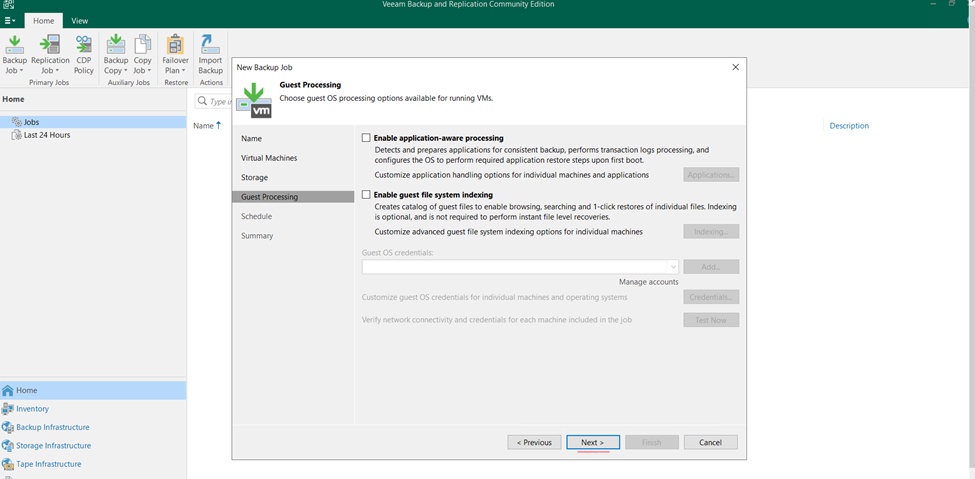
Guest processing make as default and click to next
schedule backup synchronize time and apply
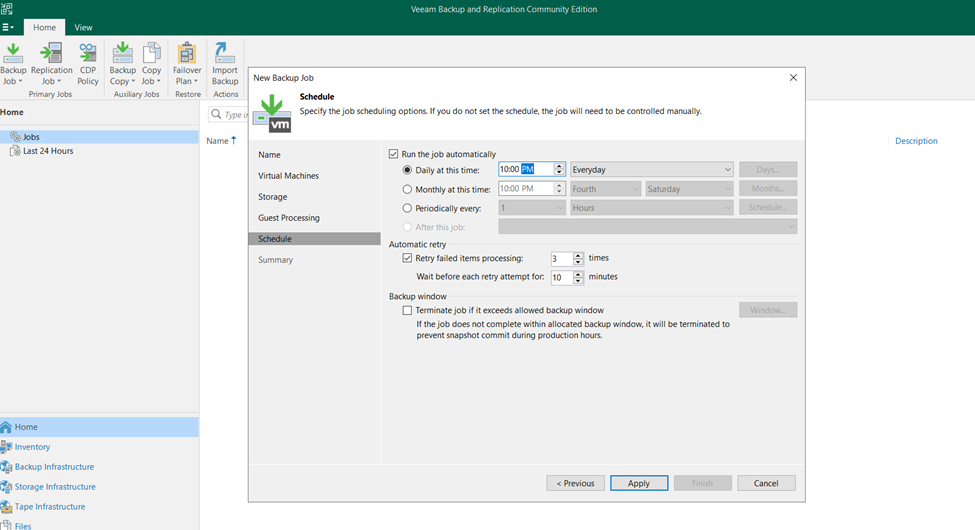
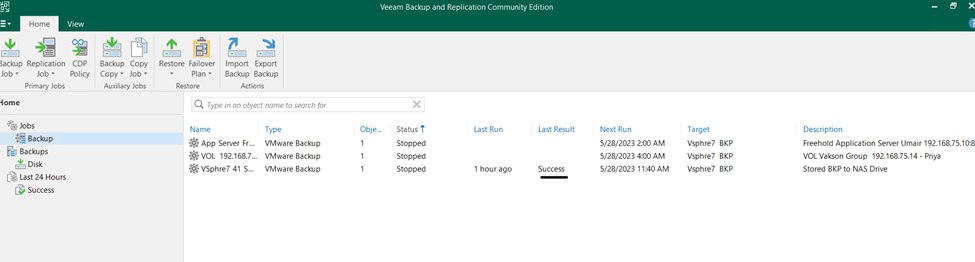
so finally finish VM Backup schedule

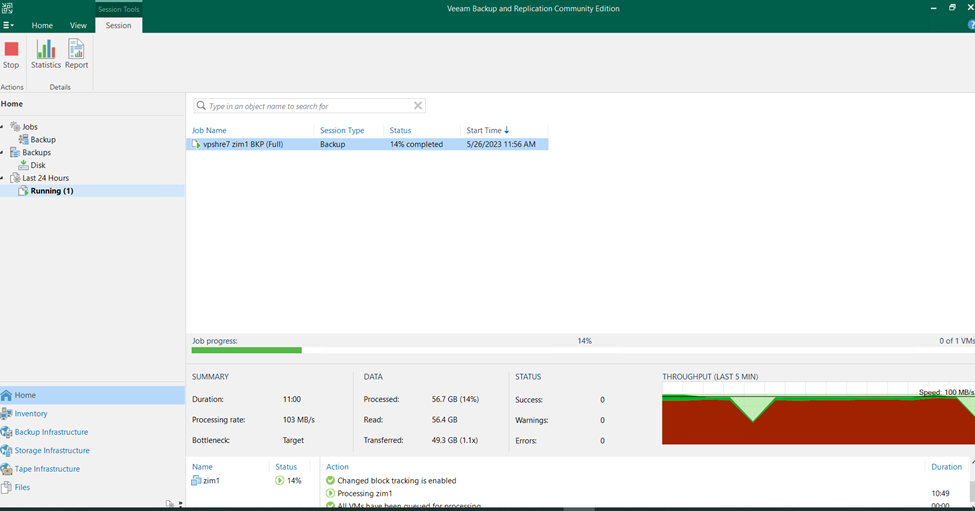
created vm backup
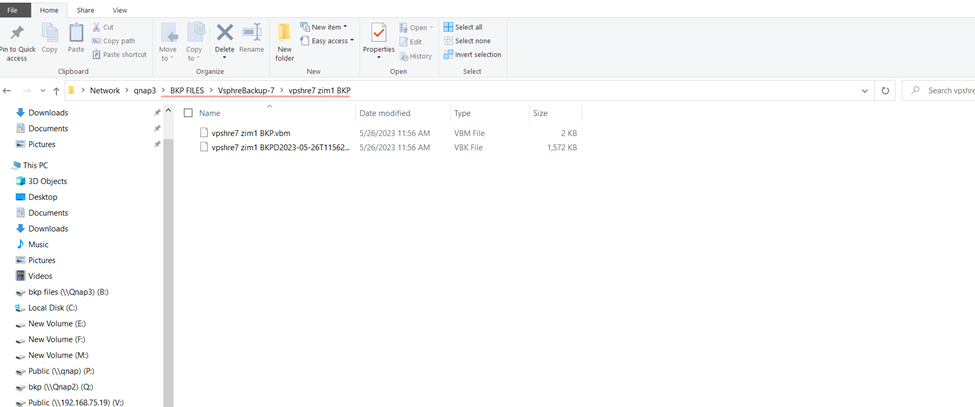
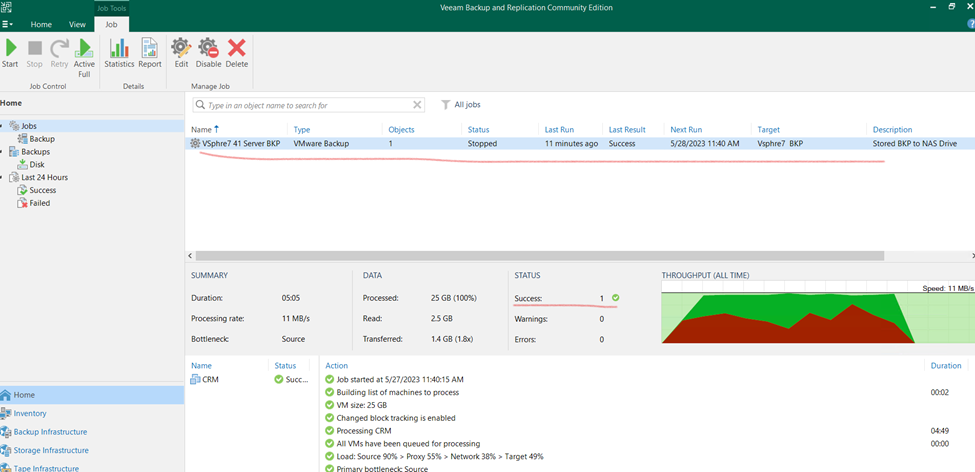
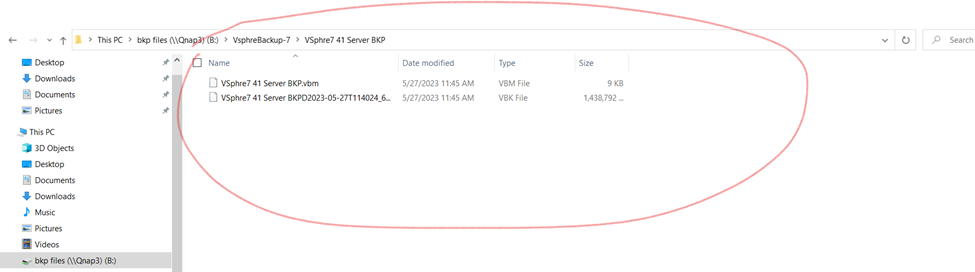
so check the vm backup status once backup done check the backup repository directory
as you can check here backup vbm and vbk file created
Here Taking Backup to Linux Apache Server Using Veeam Backup & Replication
So here I am having Apache server running on Cnetos 7 server in vpshre 6.7.
First, I will schedule the backup and also will restore the backup.
Having this running server
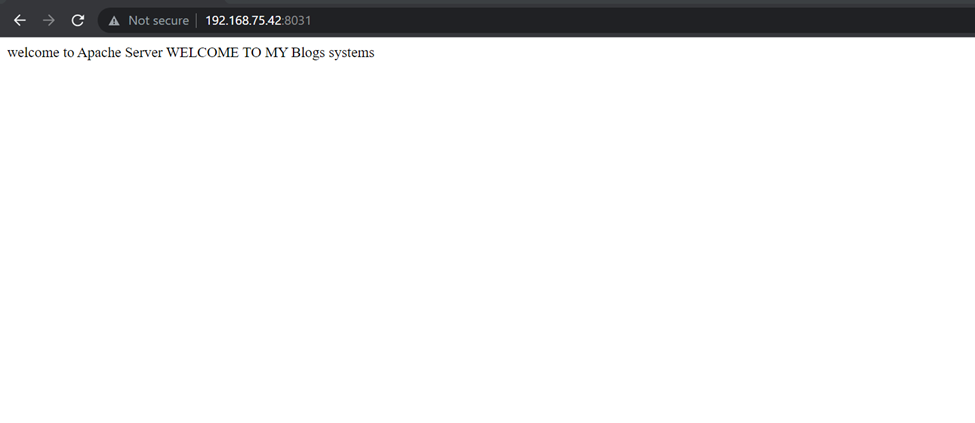
Running Server

Creating backup to crm application server
Click on Backup Infrastructure
Having backup repositories
Click to home and select backup job having virtual machine need to select that.

Assign the name

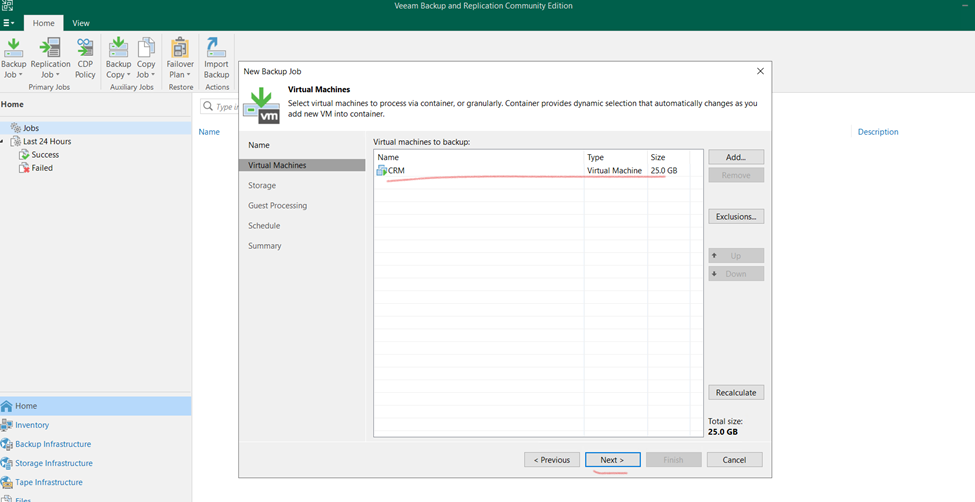
Virtual Machine Select EXSI Host and select VM for Backup and ADD that
Once done and click next
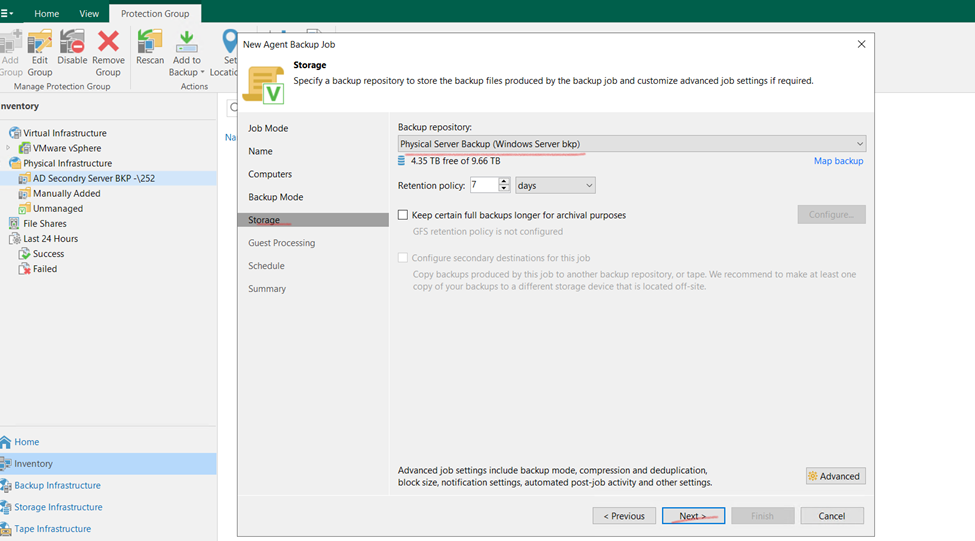
Select backup repositories and click to advanced for schedule backup time
Select Incremental backup days (it’s up to scenario)
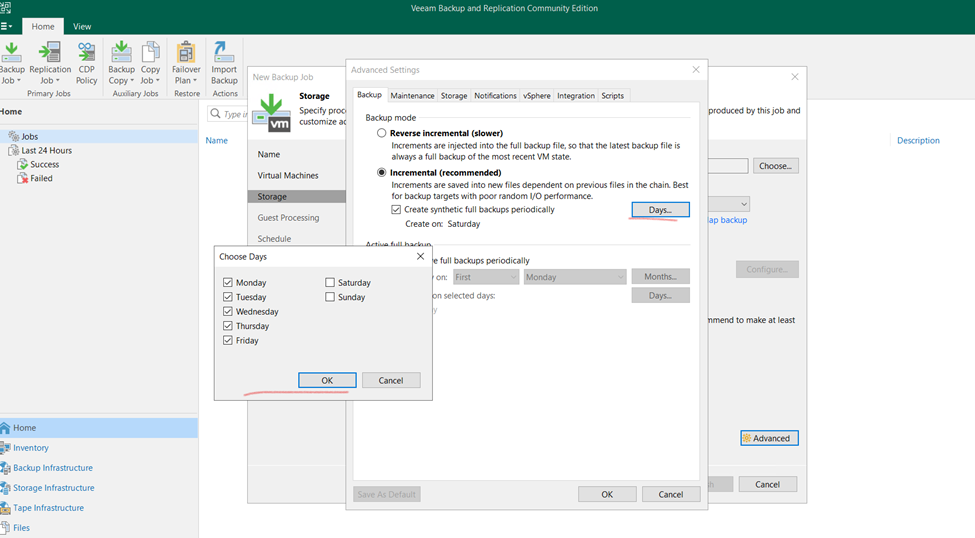
And click too next

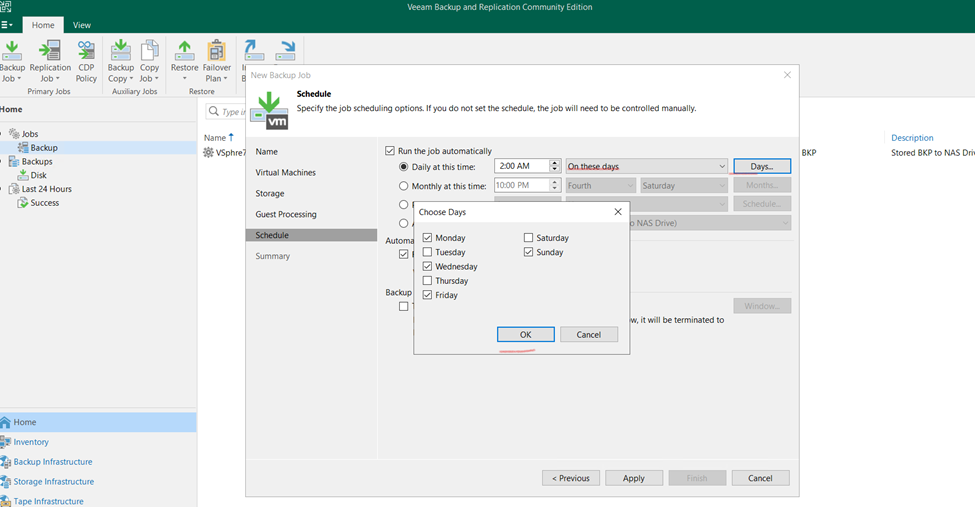
Here schedule time need to select click apply and finish

Or
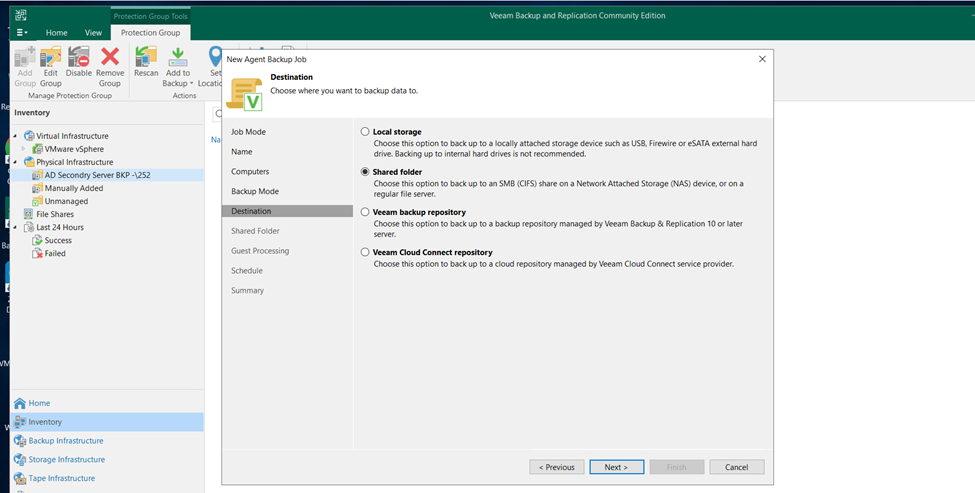
backup location and click to finish
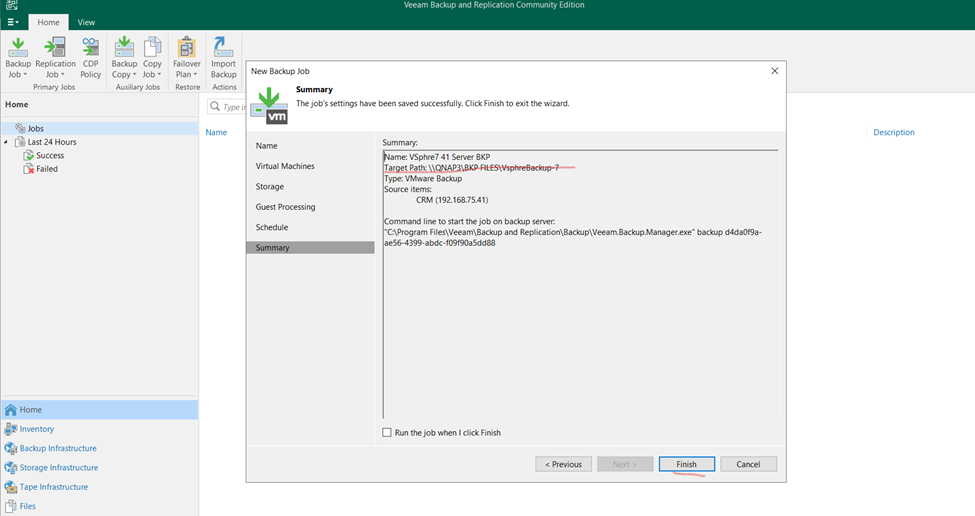
So, schedule backup job is created
Now it’s started on schedule time.
Once schedule backup done will delete the current running machine and will restore server

BACKUP IS COMPLETED
Backup stored on Backup repositories attached
Here,
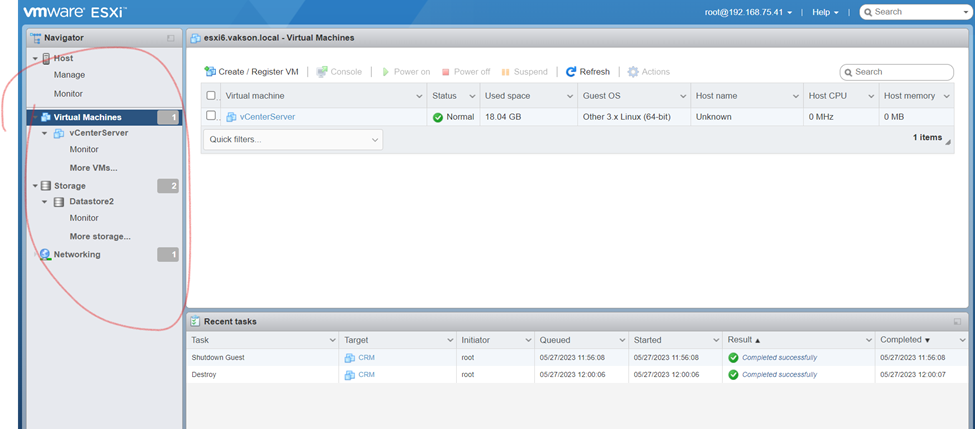
CRM Server Deleting
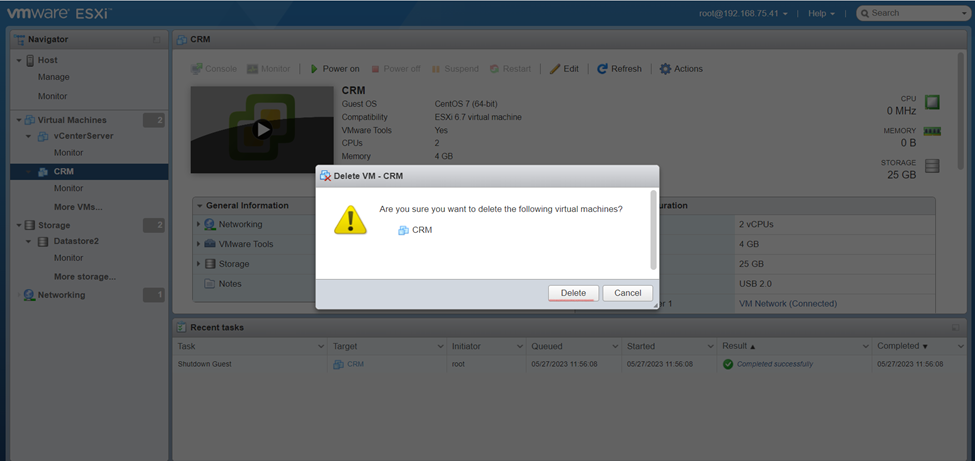
Deleted Server
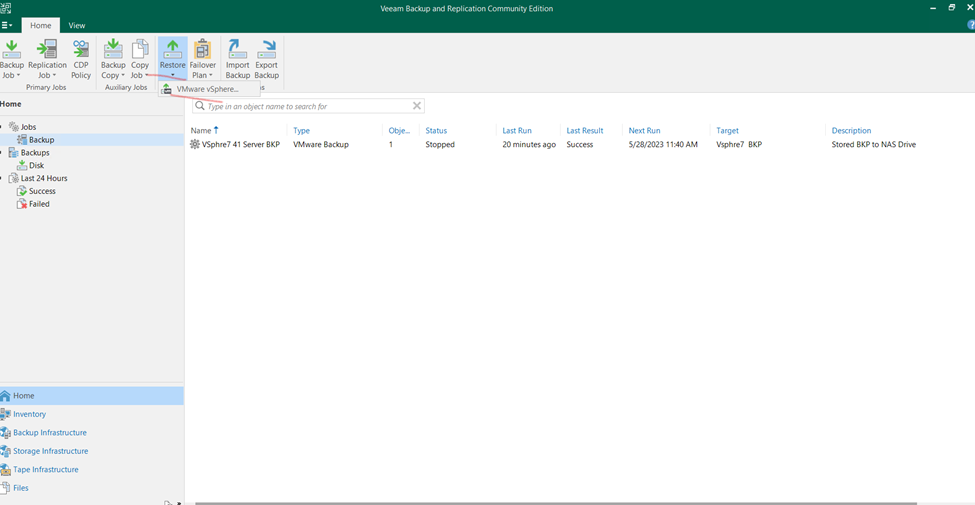
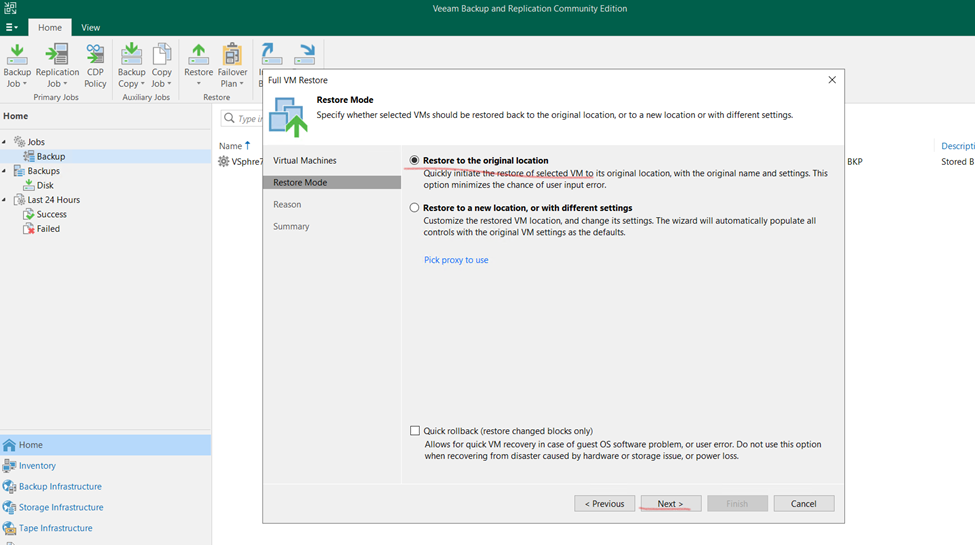
Restoring Entire VM
Click on Restore Select Vmware Vsphre
Select restore from backup
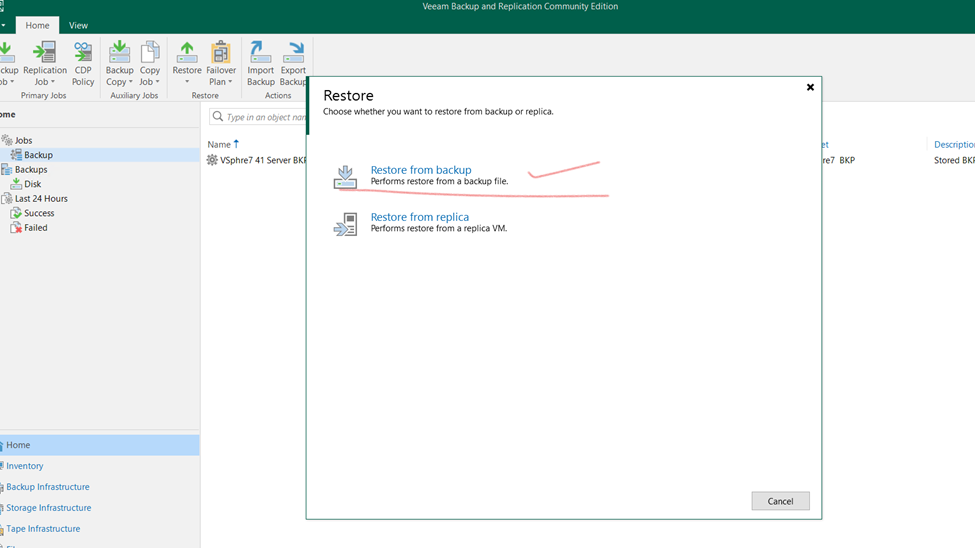
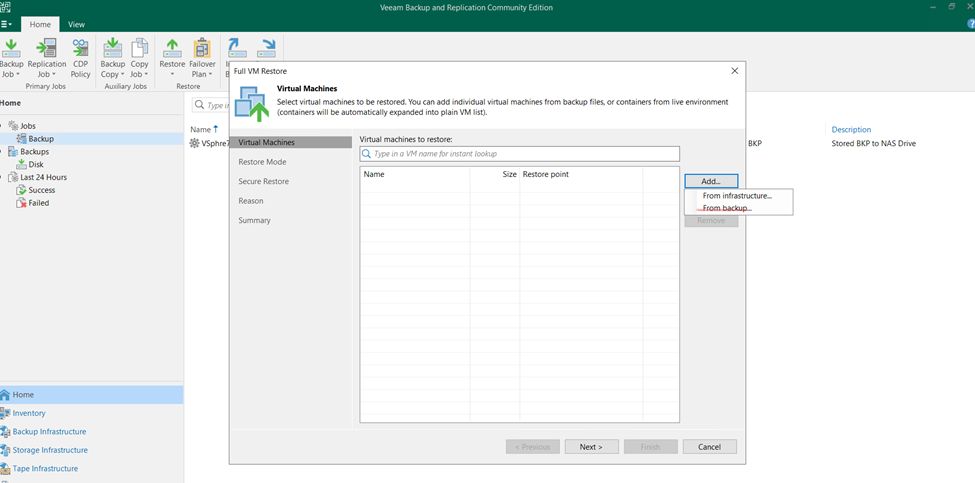
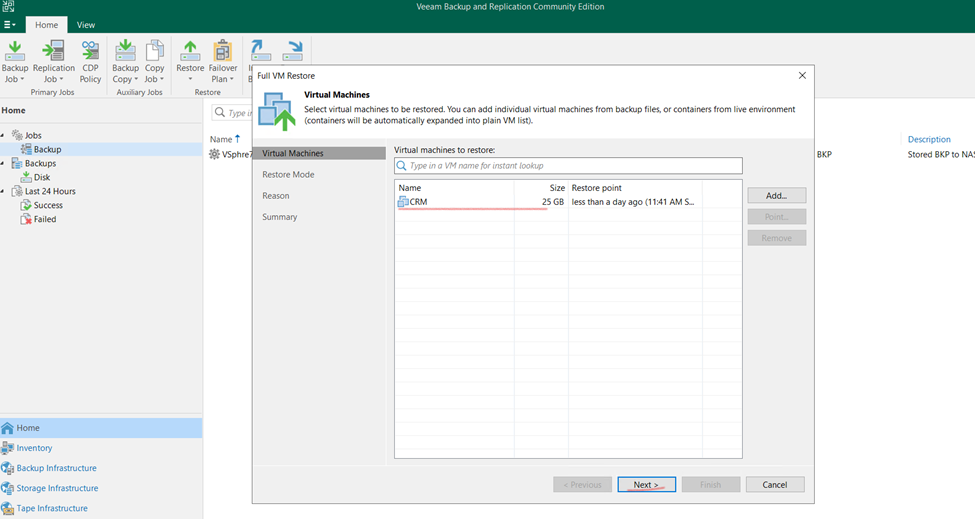
Restoring entire vm

Entire vm
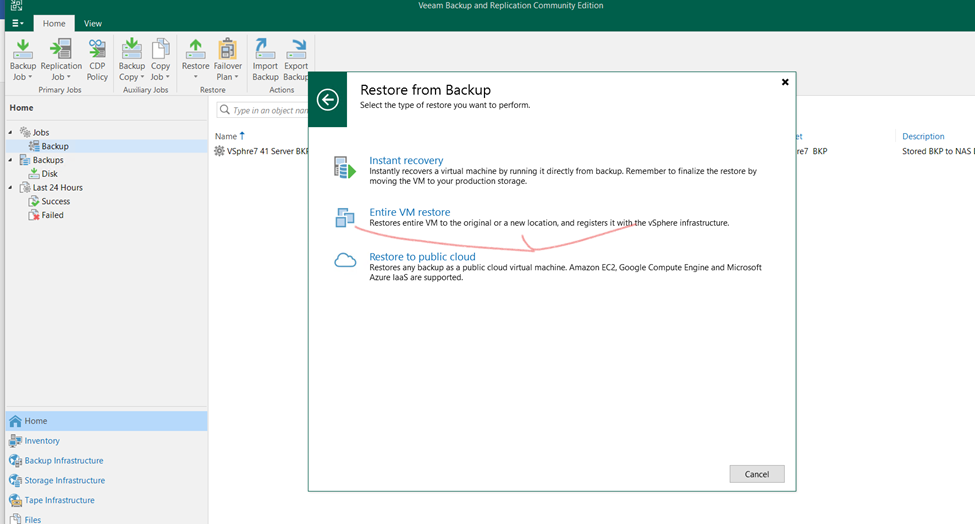
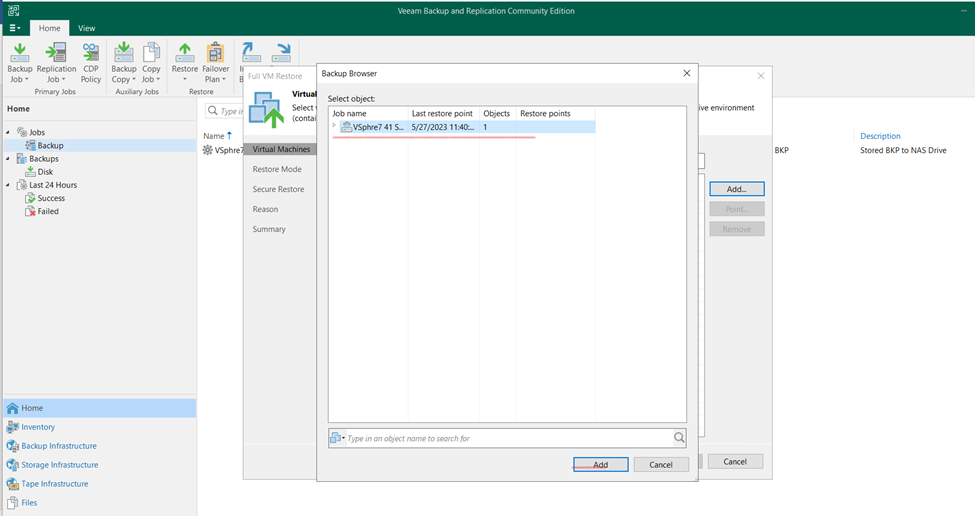
Click on from backup
Select the backup repositories and click to add
Click too next
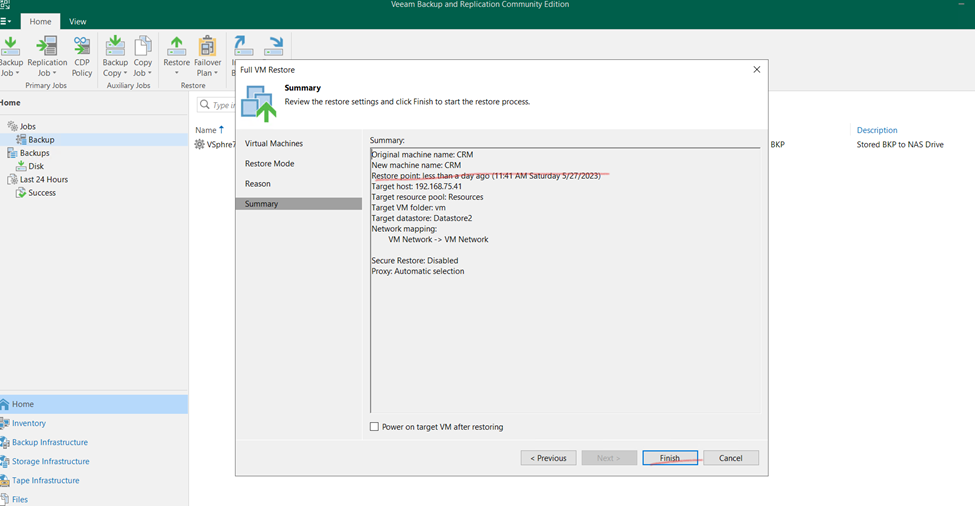
Select the restore to original location
Click to next
Now checking files available in which location
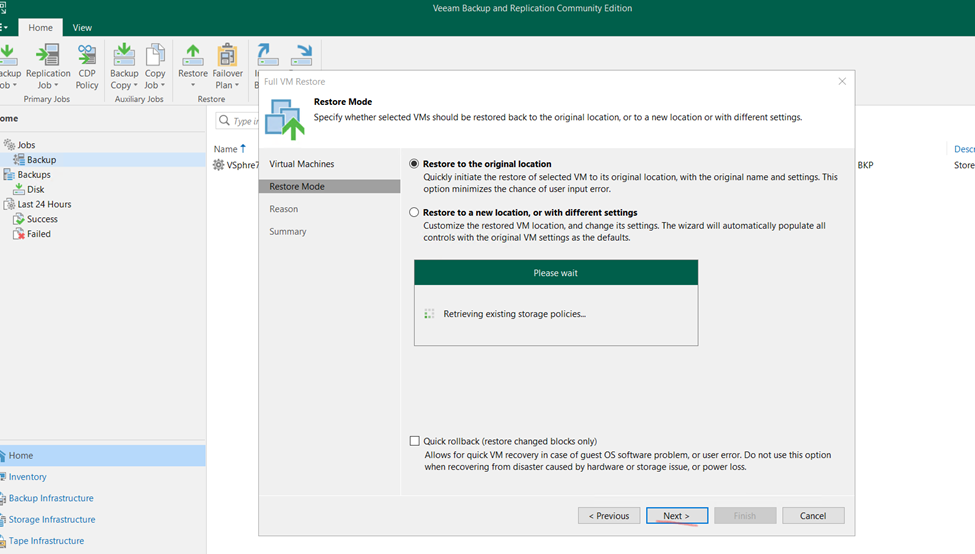
Now click next
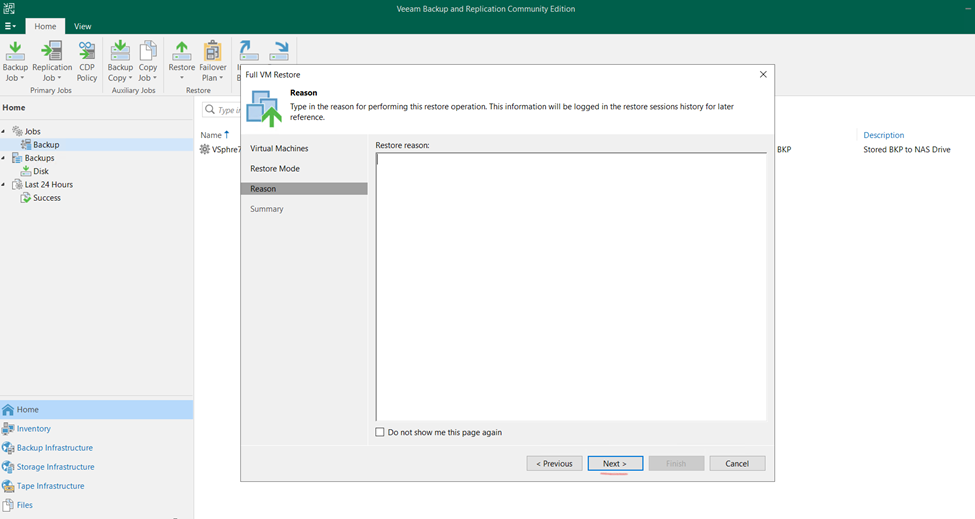
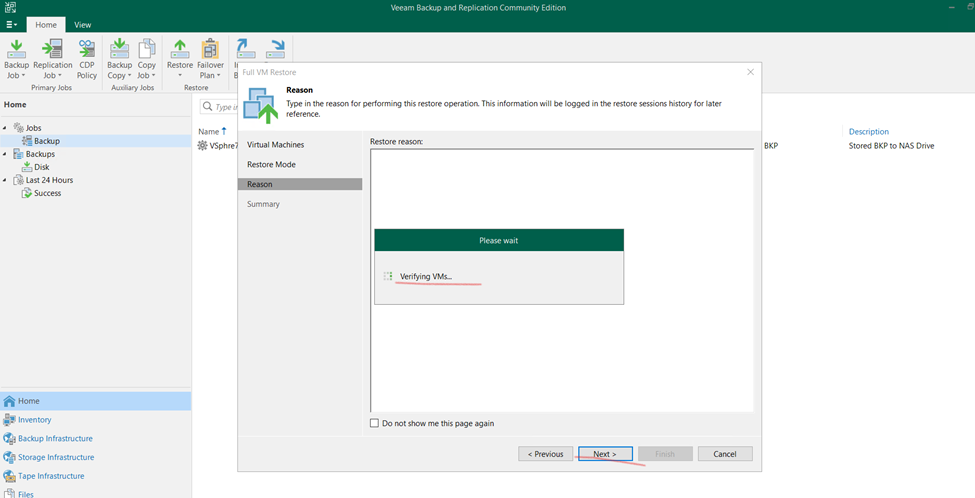
Verifying vm
And click to next
Now click to finish
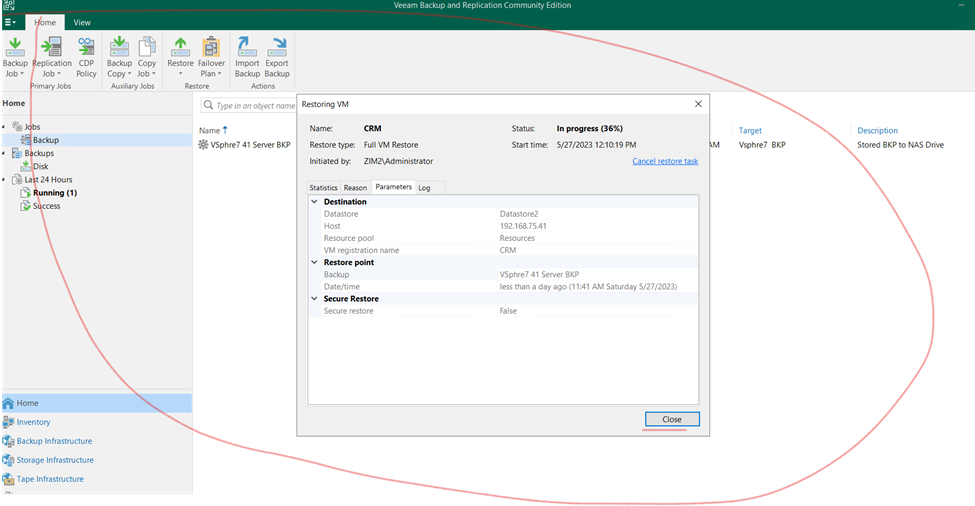
Now need to wait and once done recheck the machine
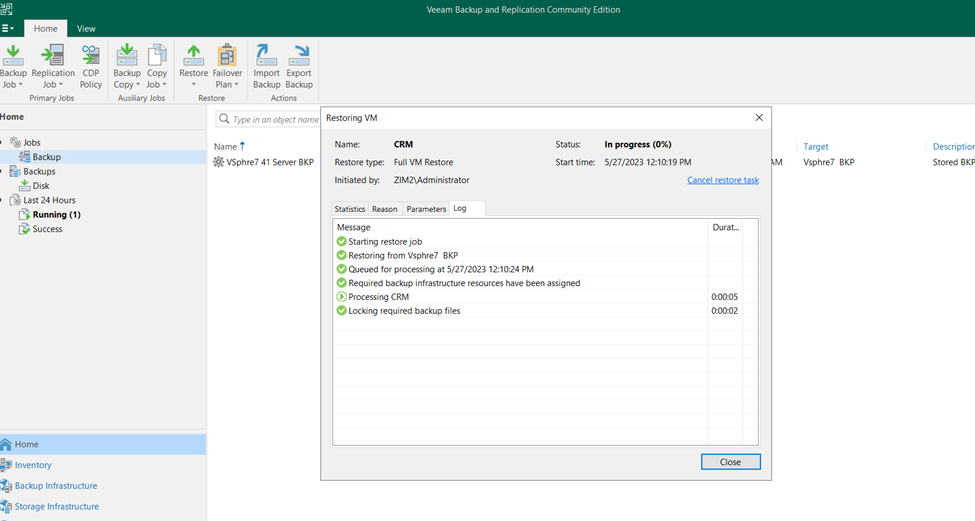
Process still running

Restore done and close

Now, as you can check on exsi server same virtual machine restore
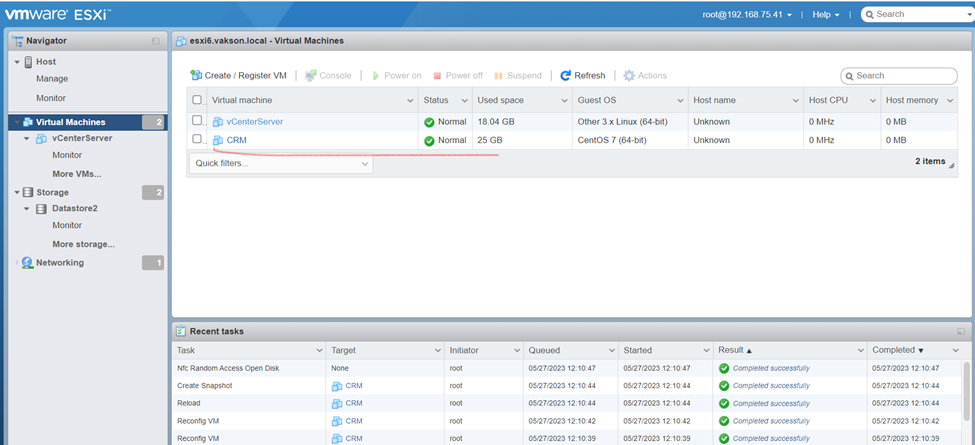
turn on restored server and checking the Server status

So, after restoration server running fine.

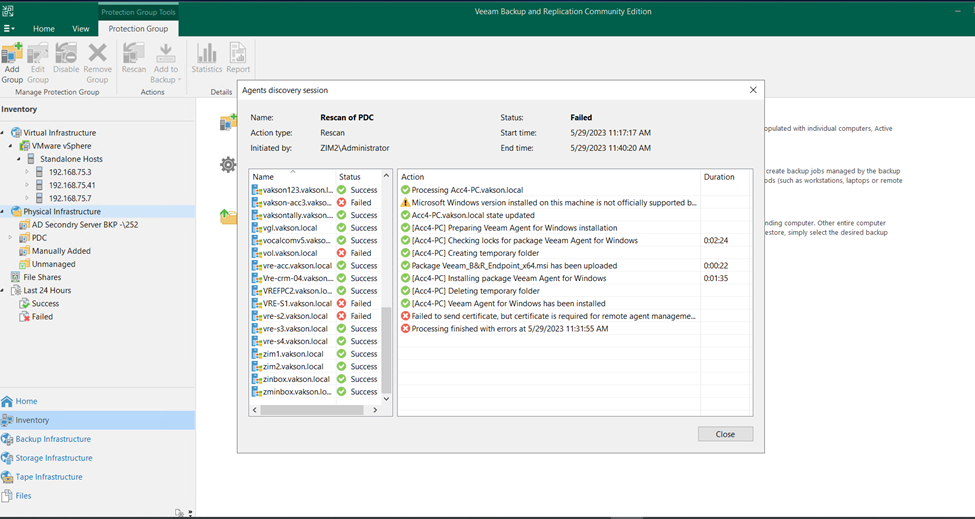
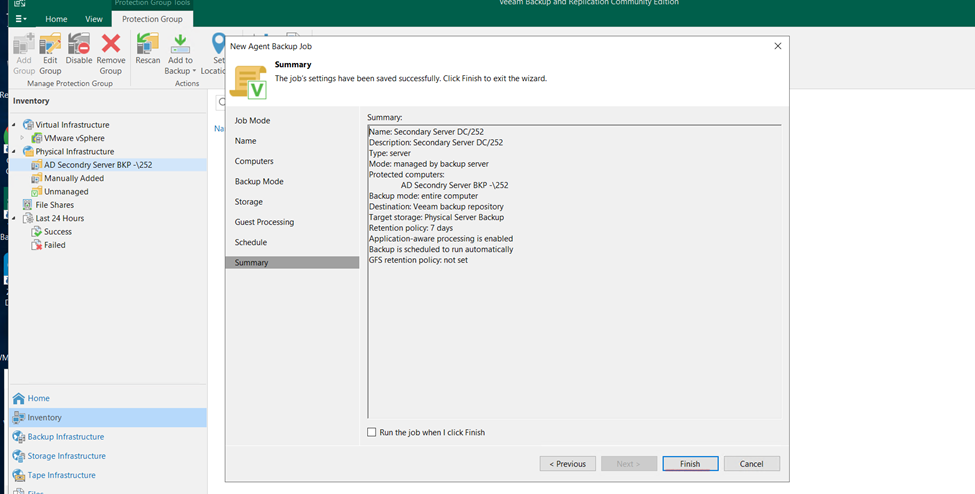
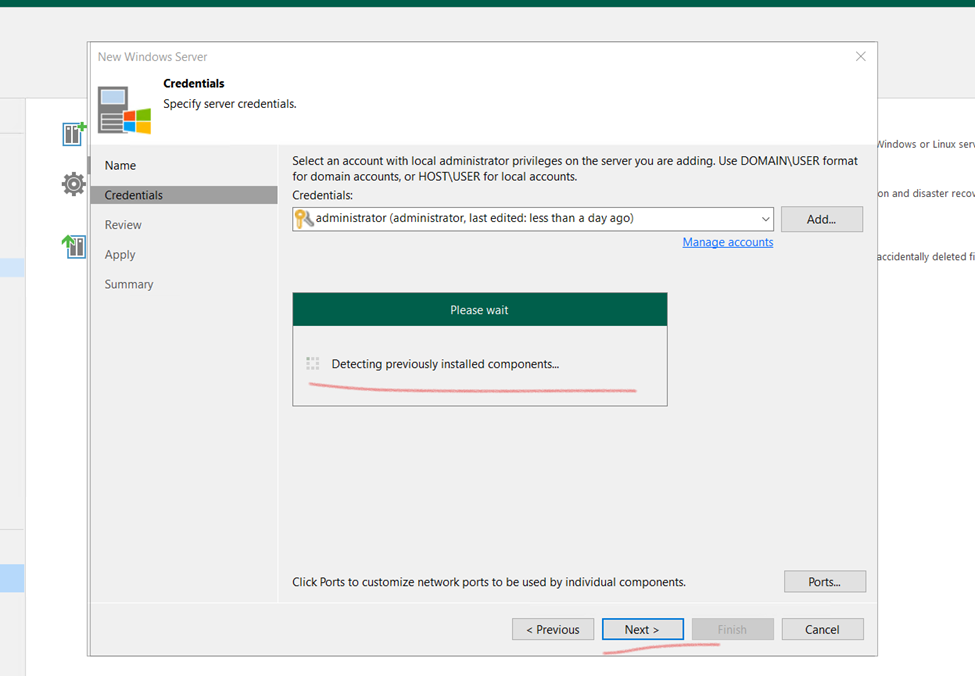
Physical Server Backup using Veeam Solution
Click on Inventory and select Physical infrastructure click on

Click on Protection Group
Type the name and select to next

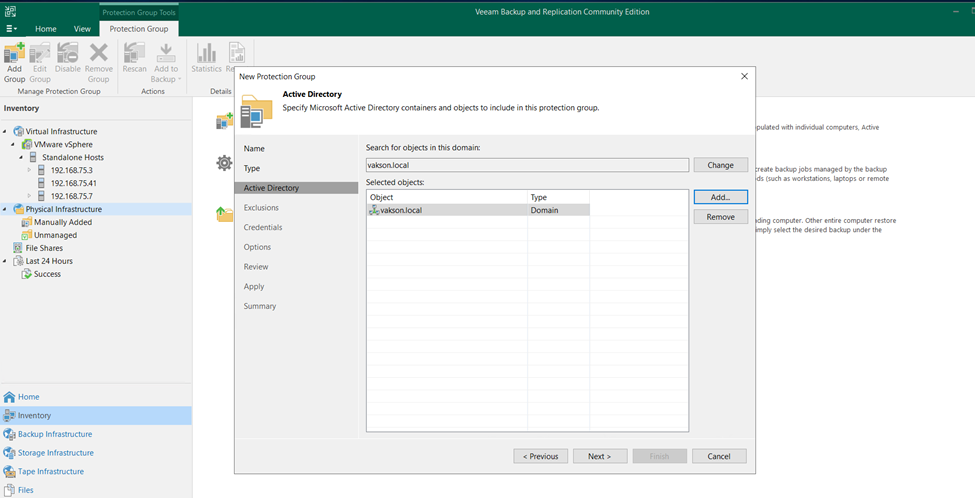
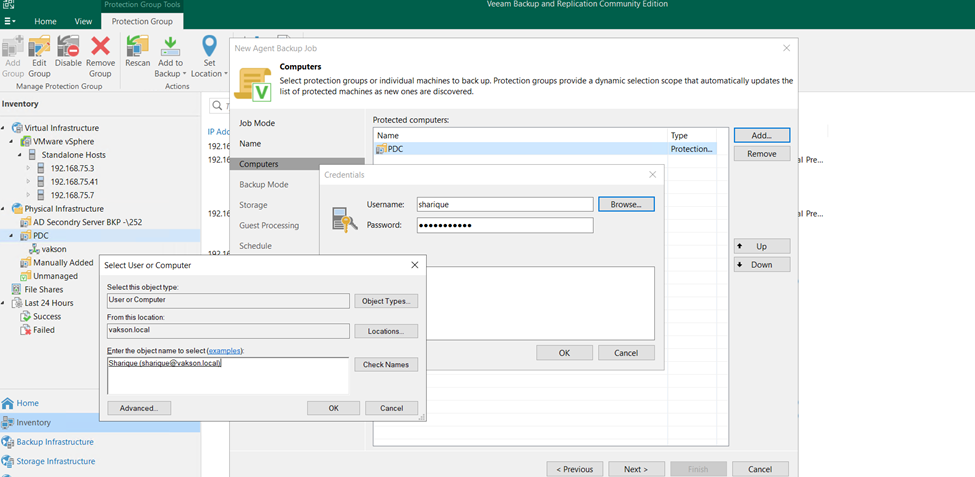
Here we can take Individual computer backup also but I need to take backup of Domain Controller
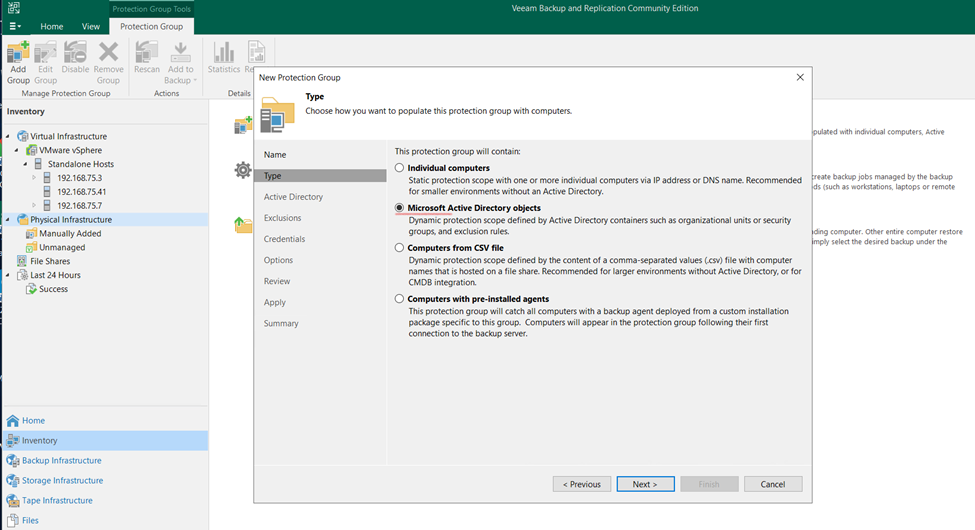
Select AD

Select DC and click to next
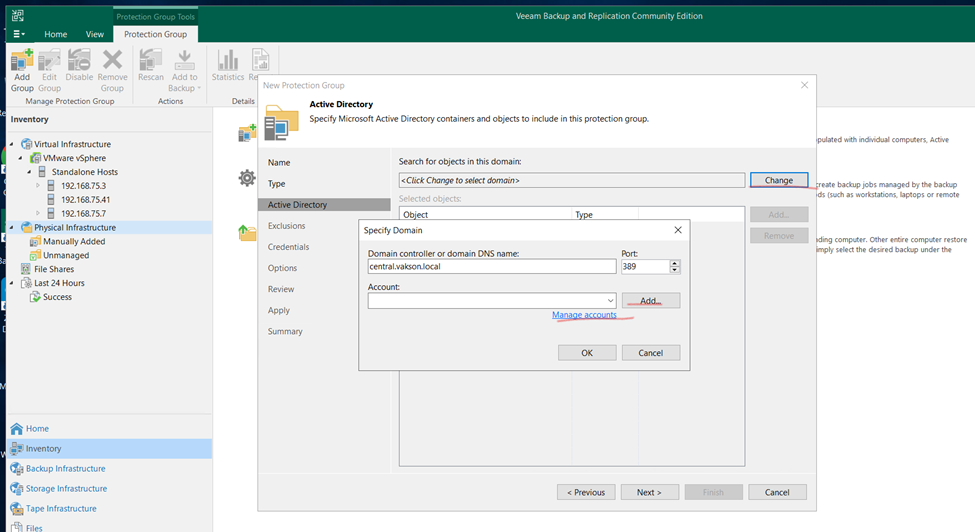
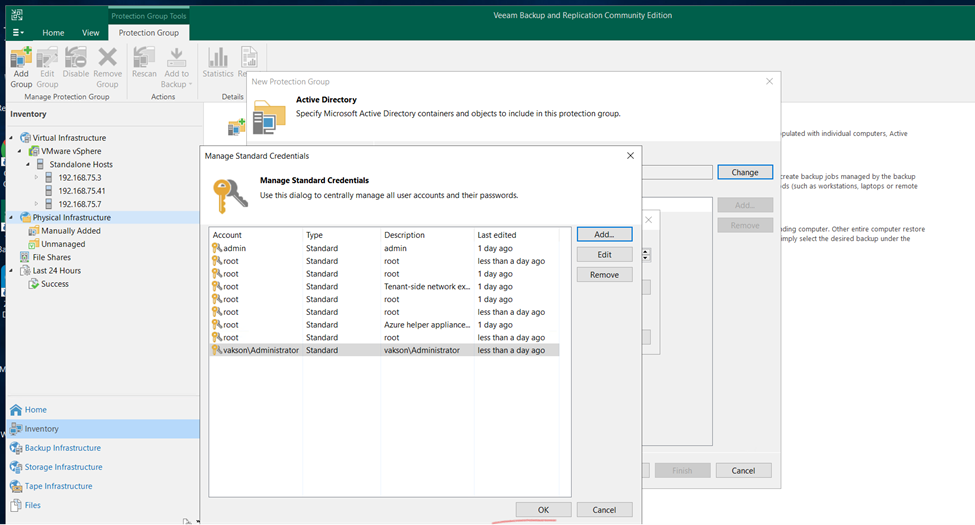
Click on add button

Click to Browse

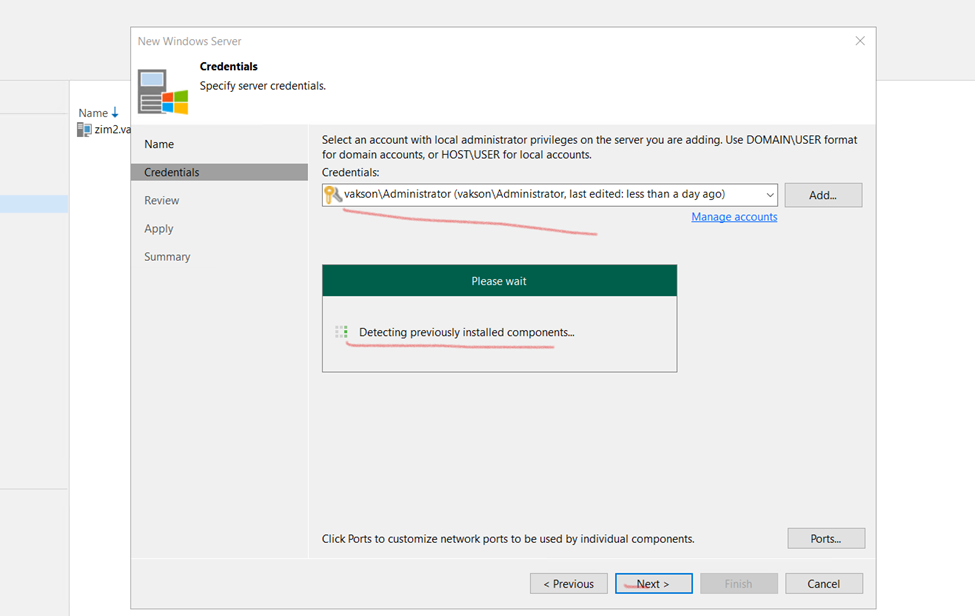
And type the Domain Controller username and password
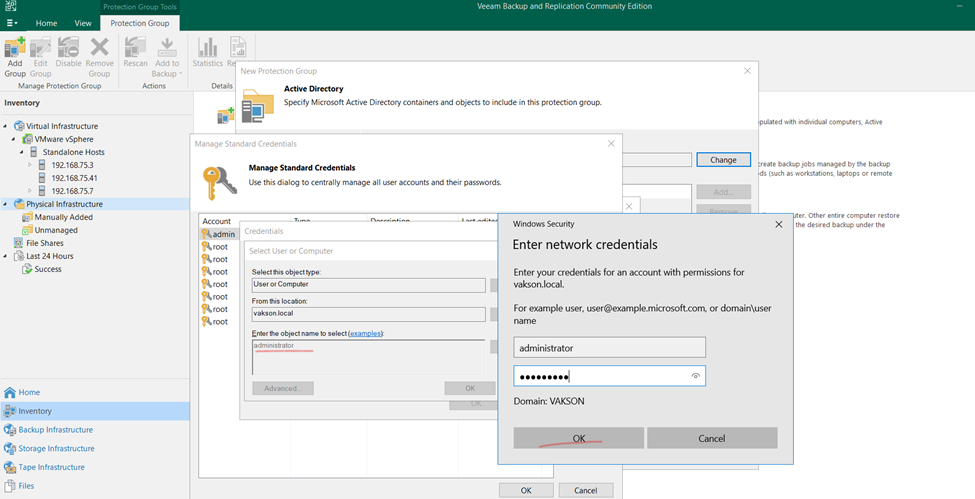
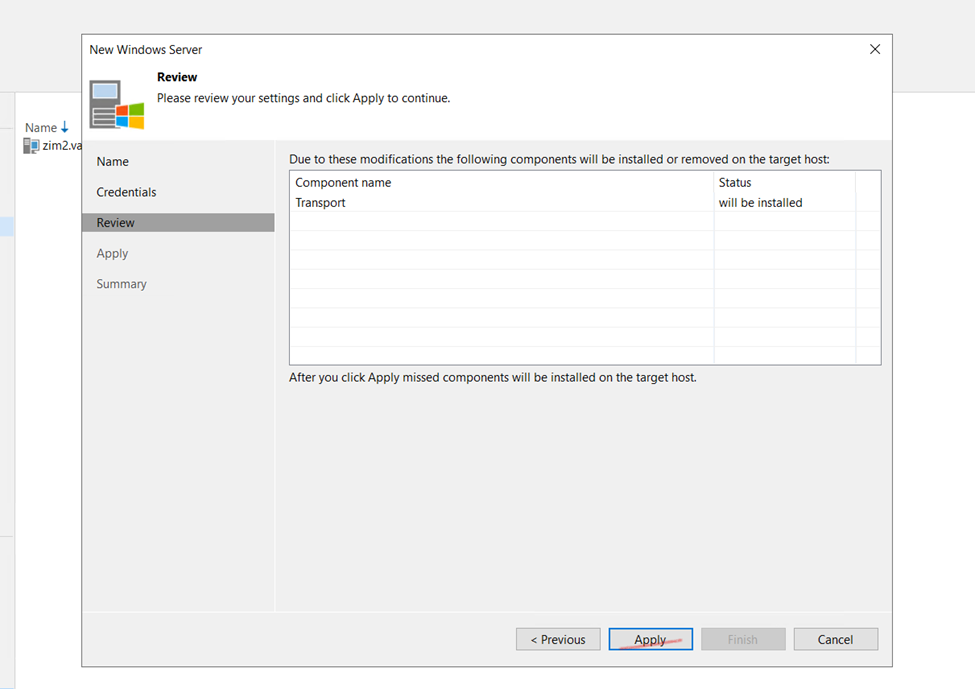
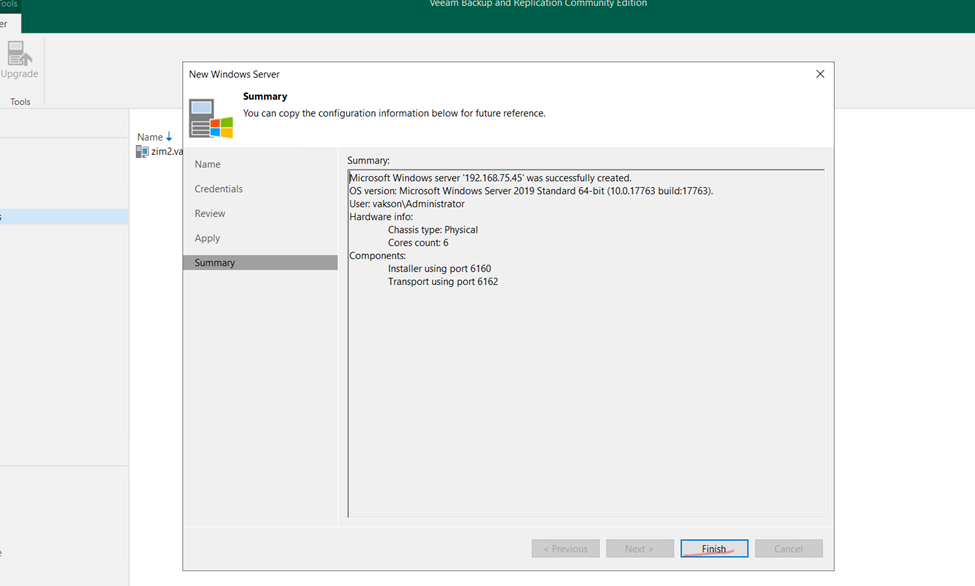
Once added click okay and next
Click to next
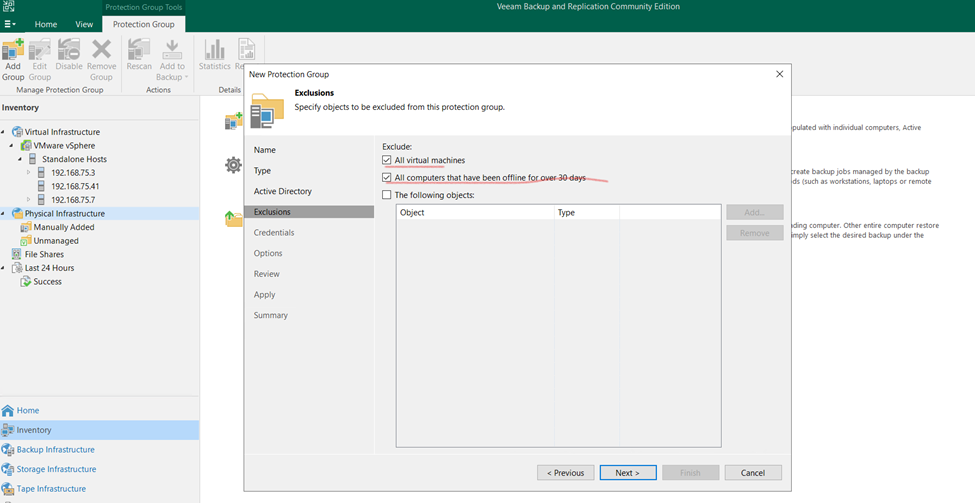
If will select all AD User it will Select all computer attached to DC
So here I’m selecting Only Secondary DC

Here selected all DC Infrastructure
And click too next
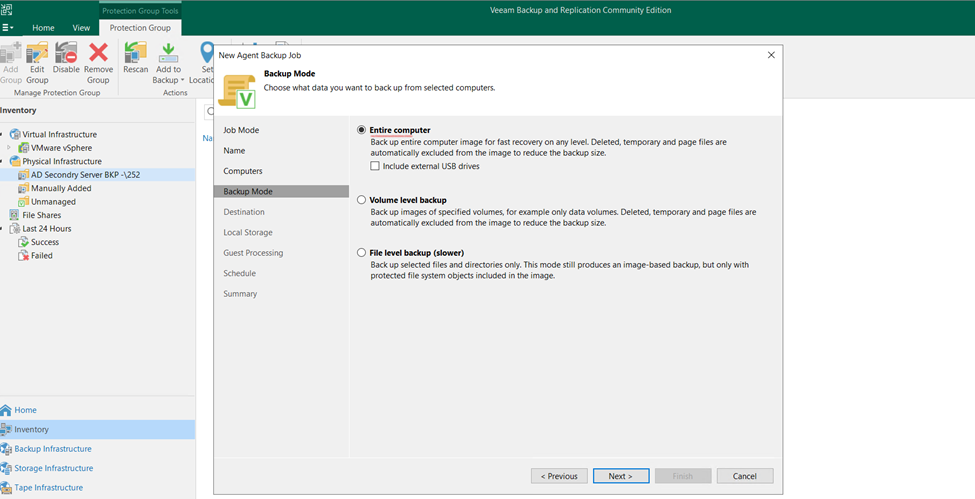
Selected VM also if Hyper V if installed so it can take all Backup
Click next
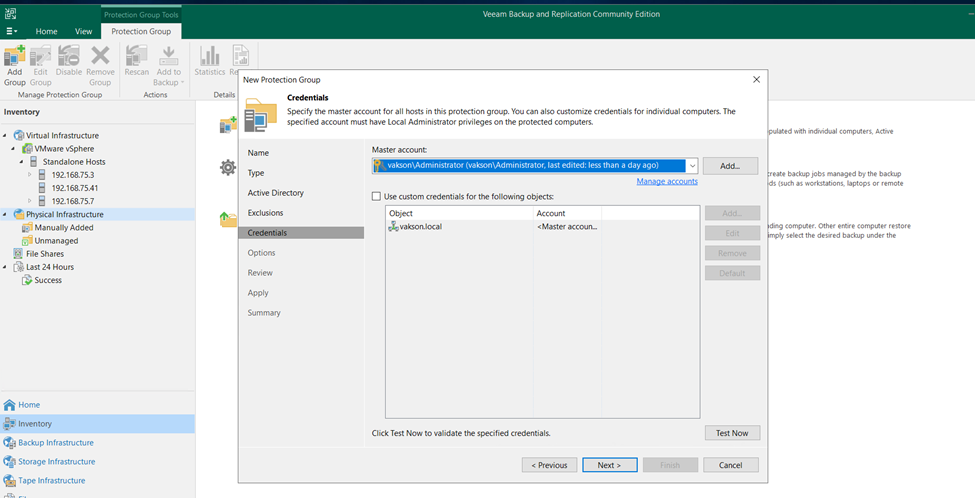
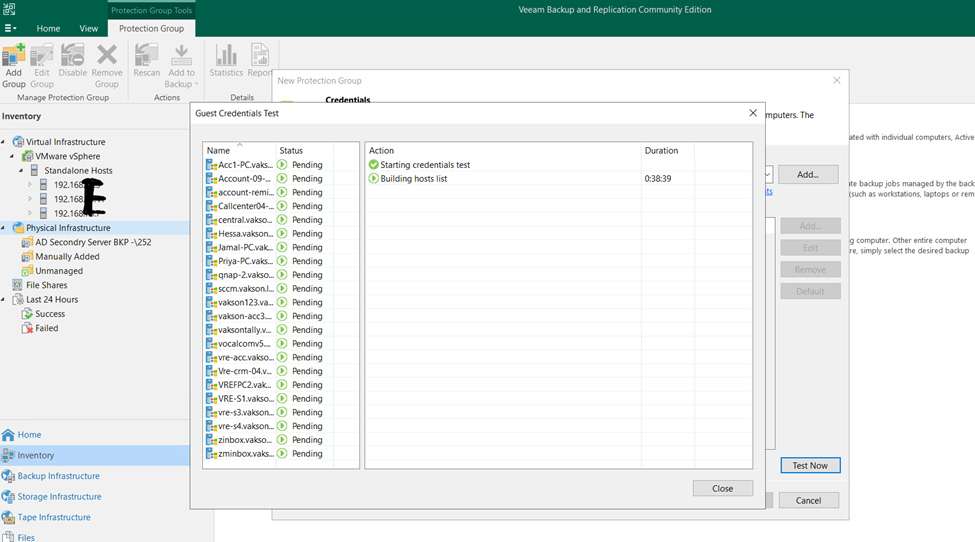
Test Now
Selected Secondary DC Backup Days

Click okay and apply and click to finish

Now click to finish
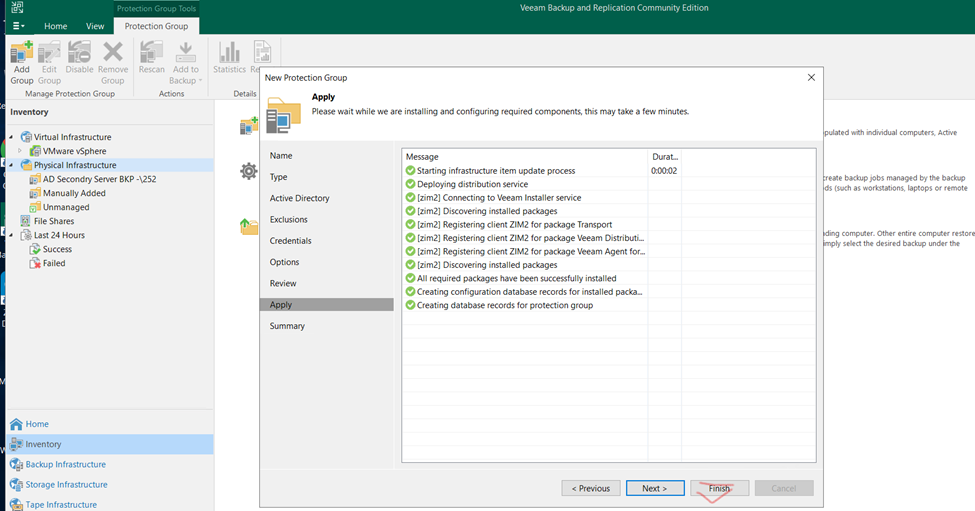
Protection Group Created


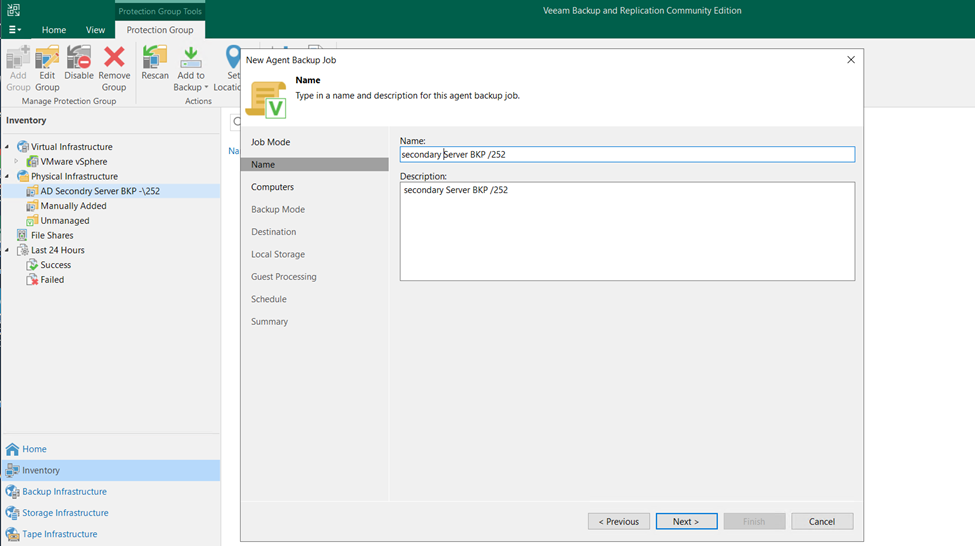
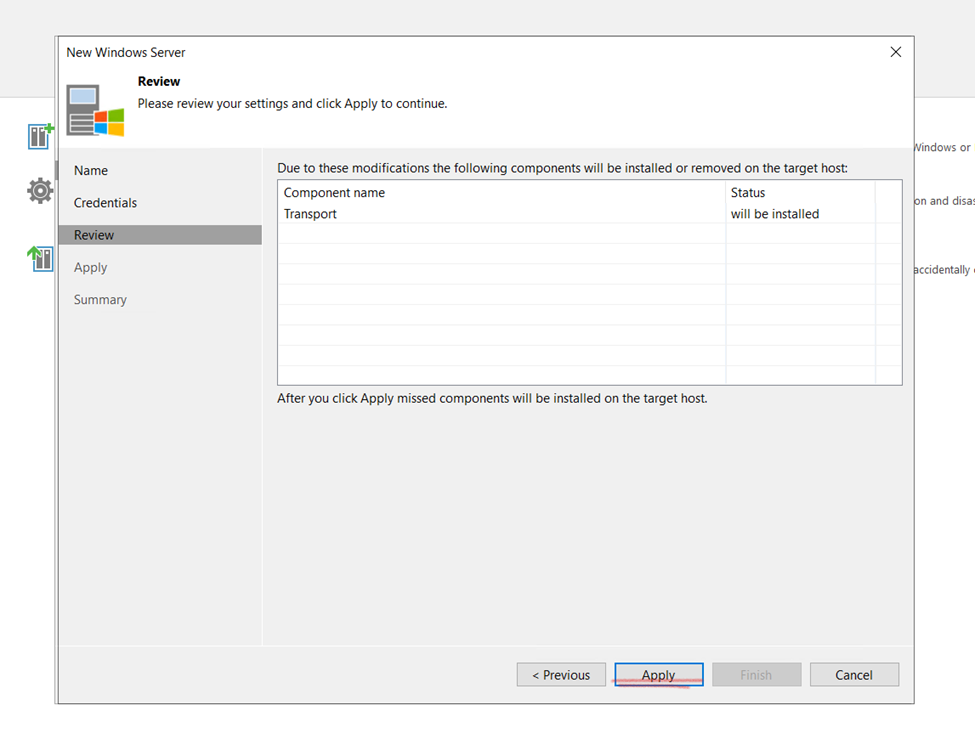
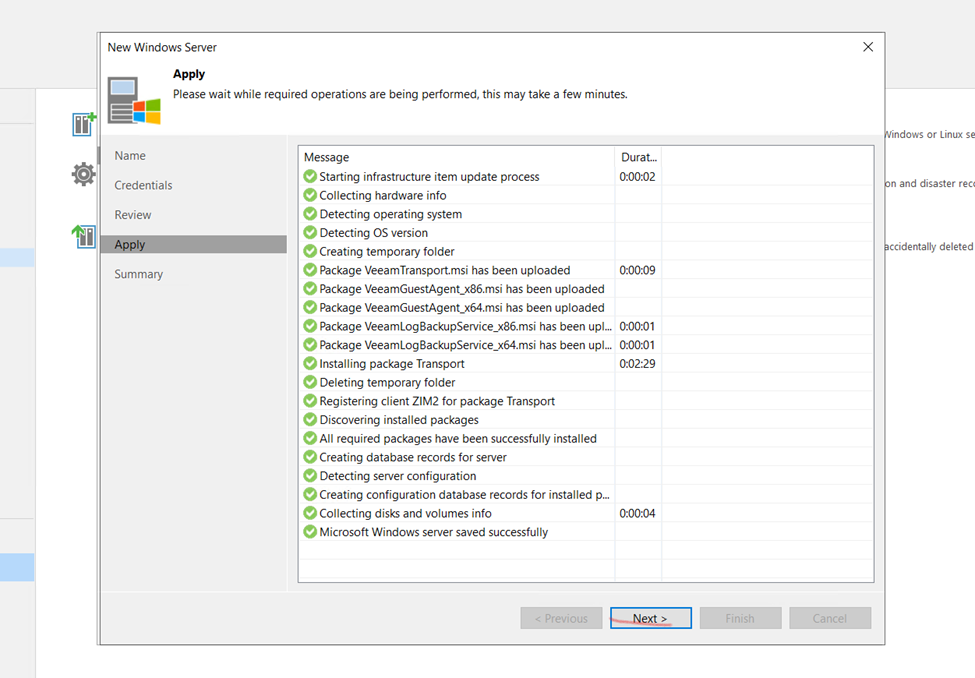
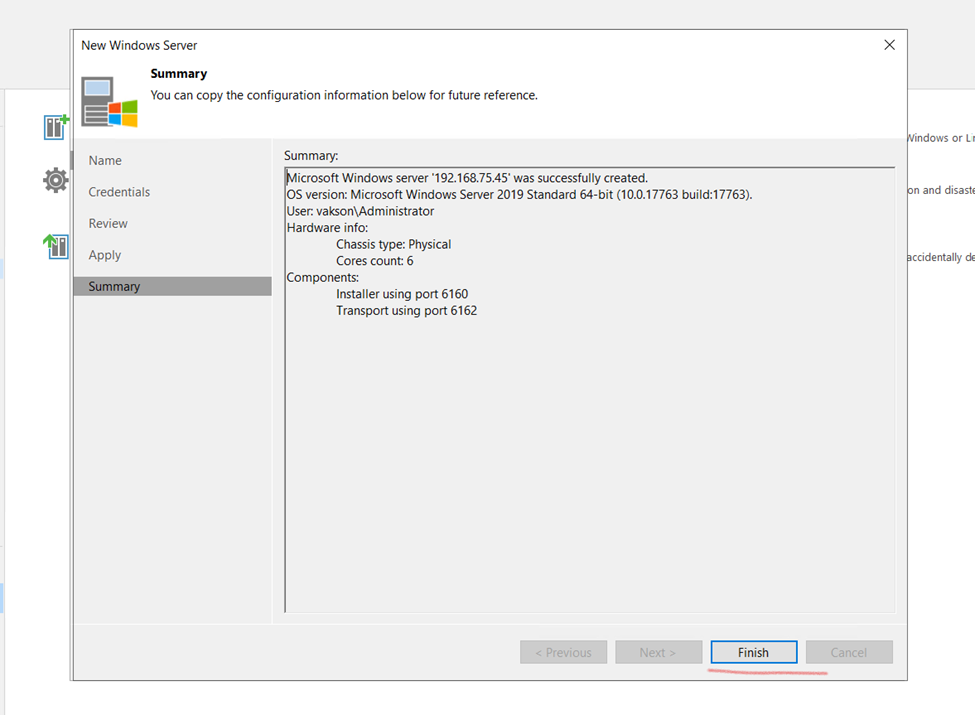
Now Creating Back Schedule for Physical Server
Right click Select new backup job (Linux or Windows)

Click to new job and create
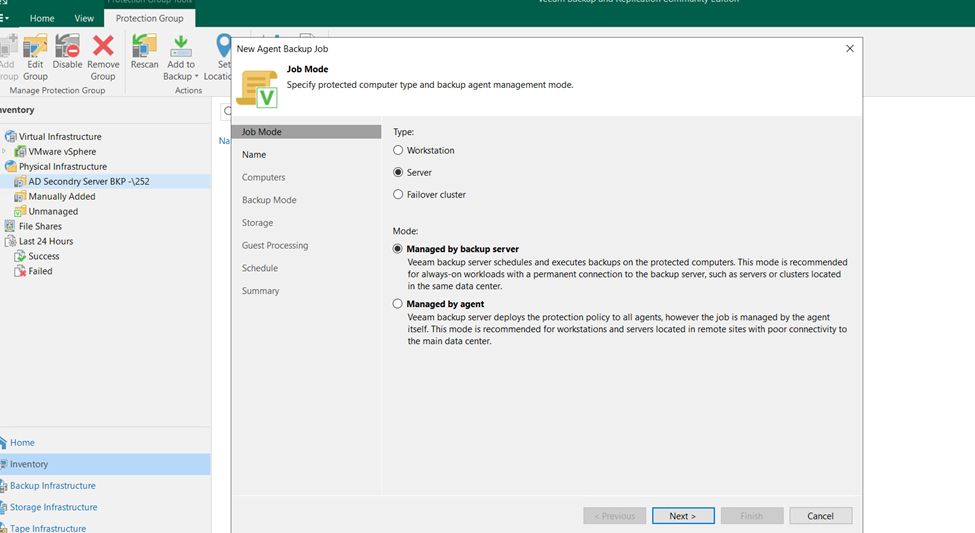

Or Individual Computer and Server


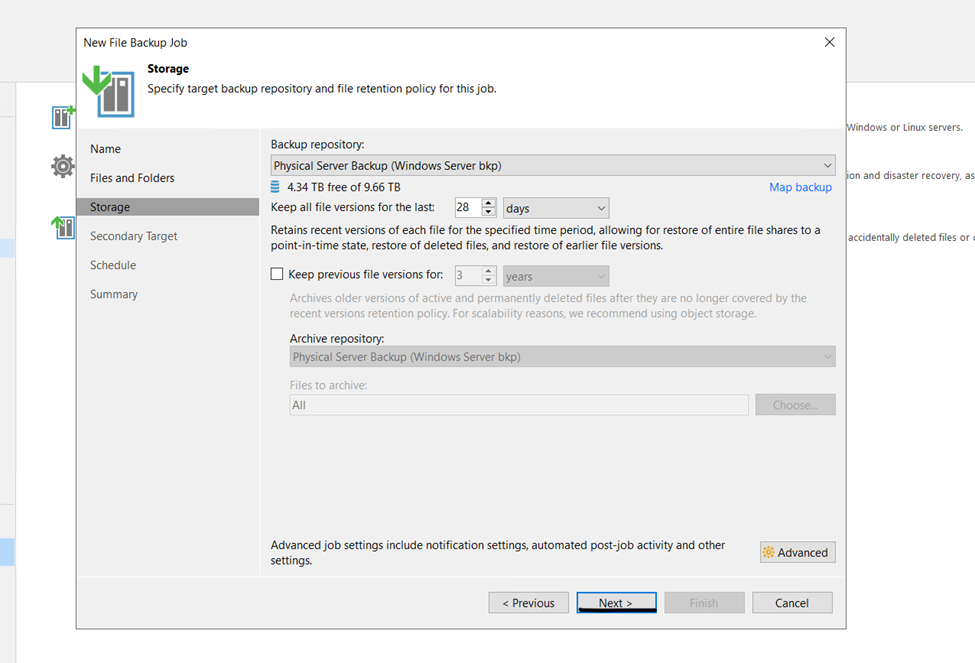
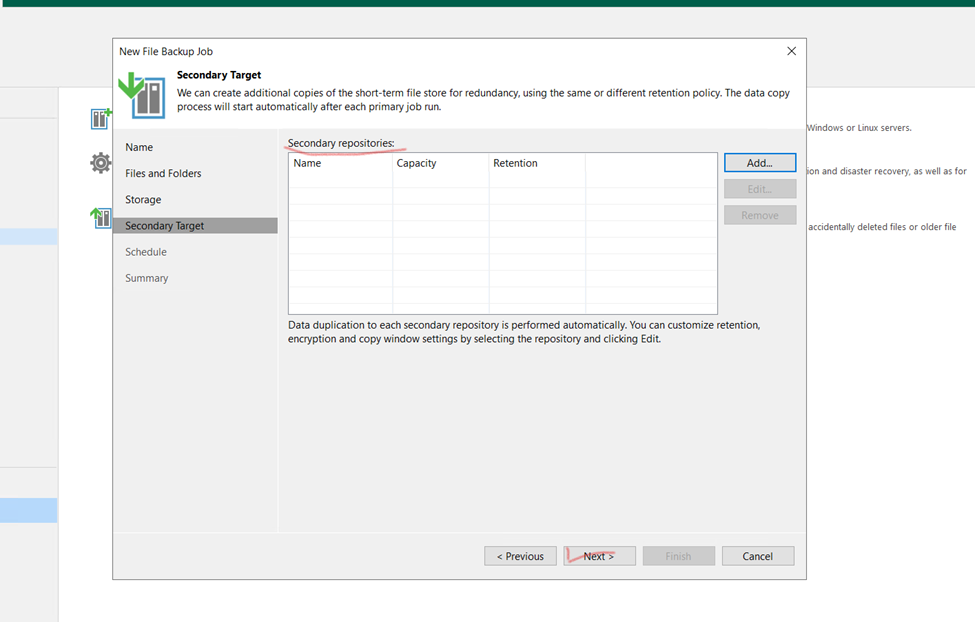
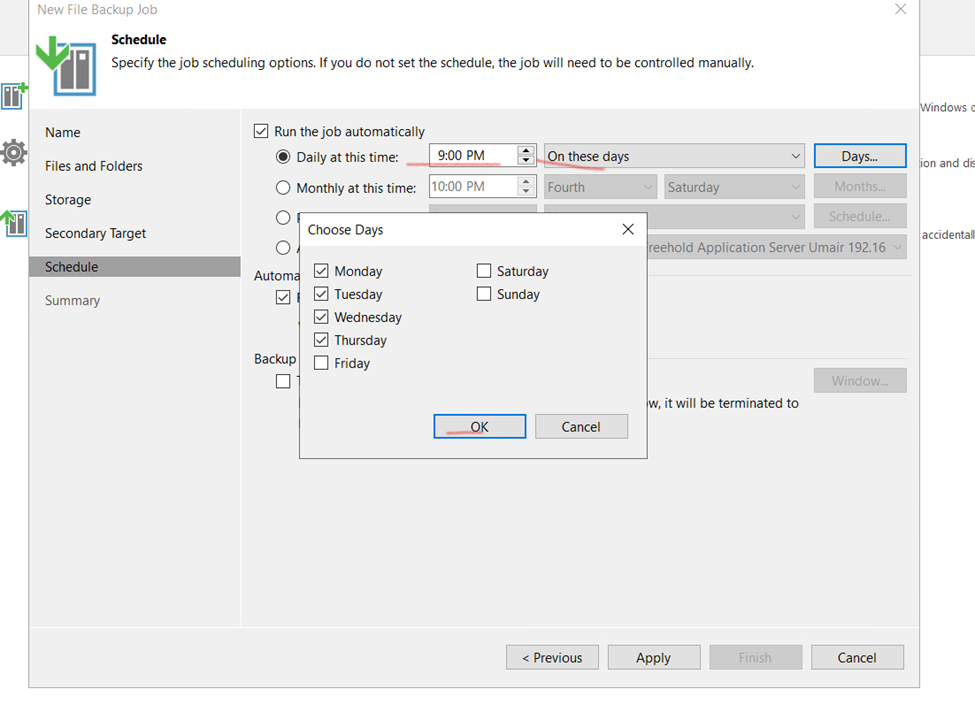
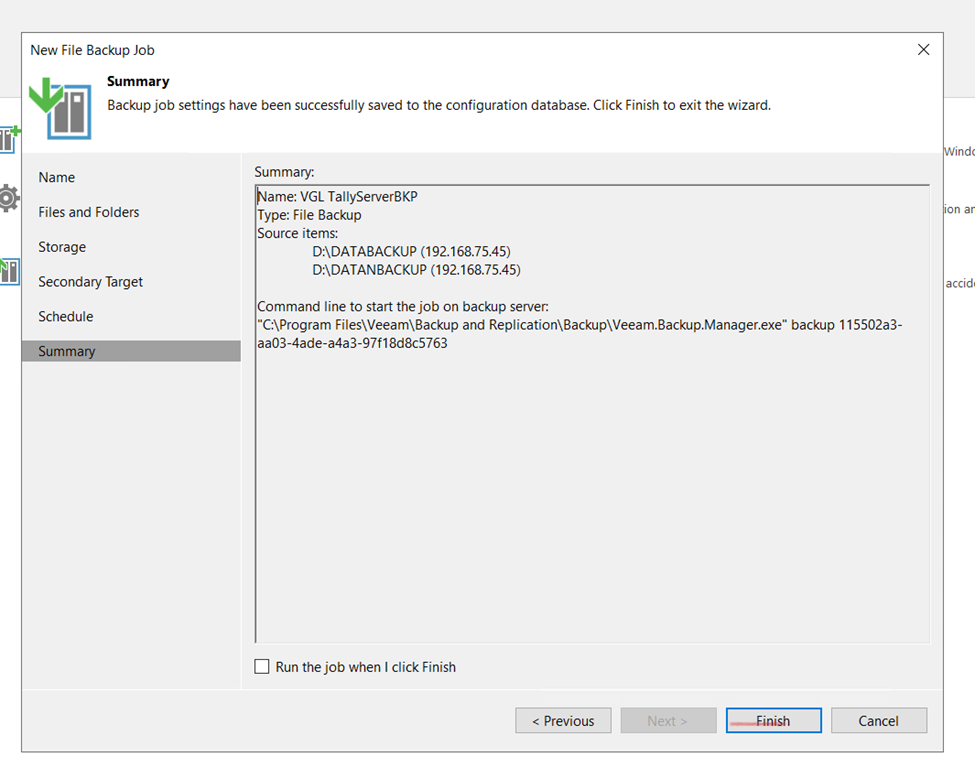
Veeam copy files


Veaam Files Level Backup
Adding Physical File Backup Server for backup.
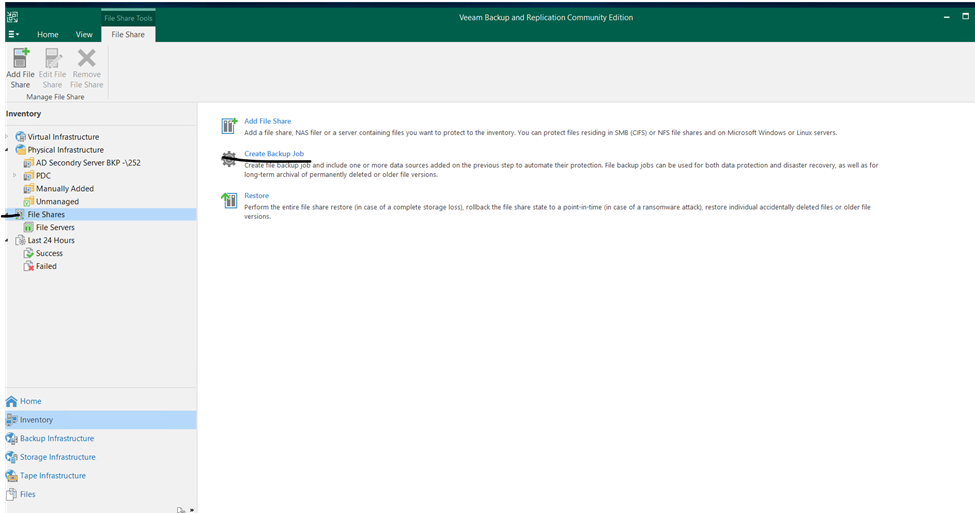
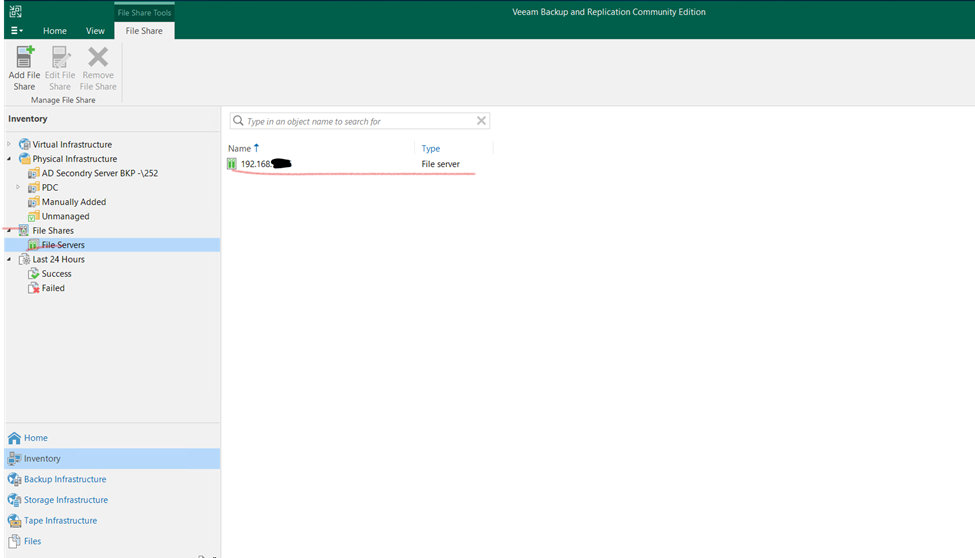
Click on Inventory the select File Shares and click to Add File Share
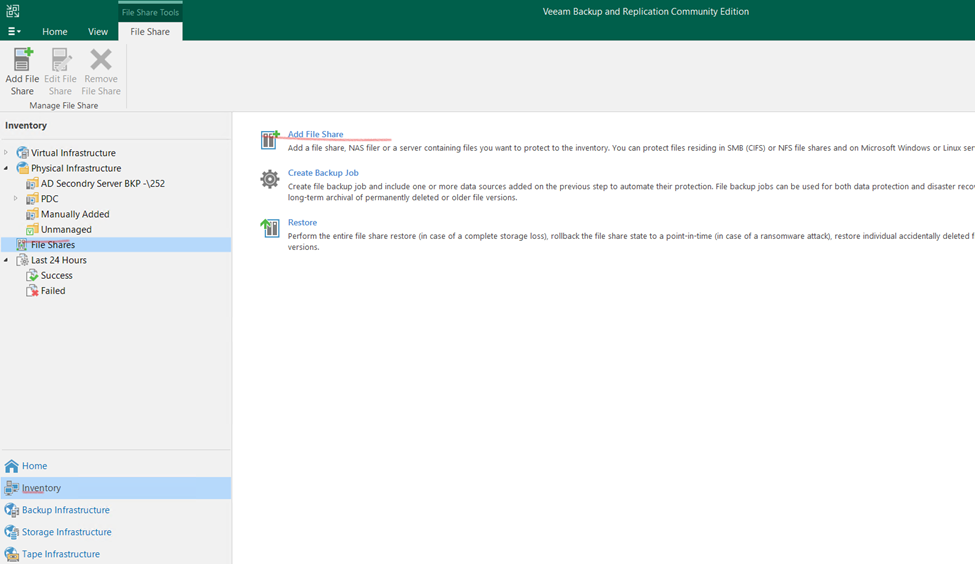
Here adding file Sever select that

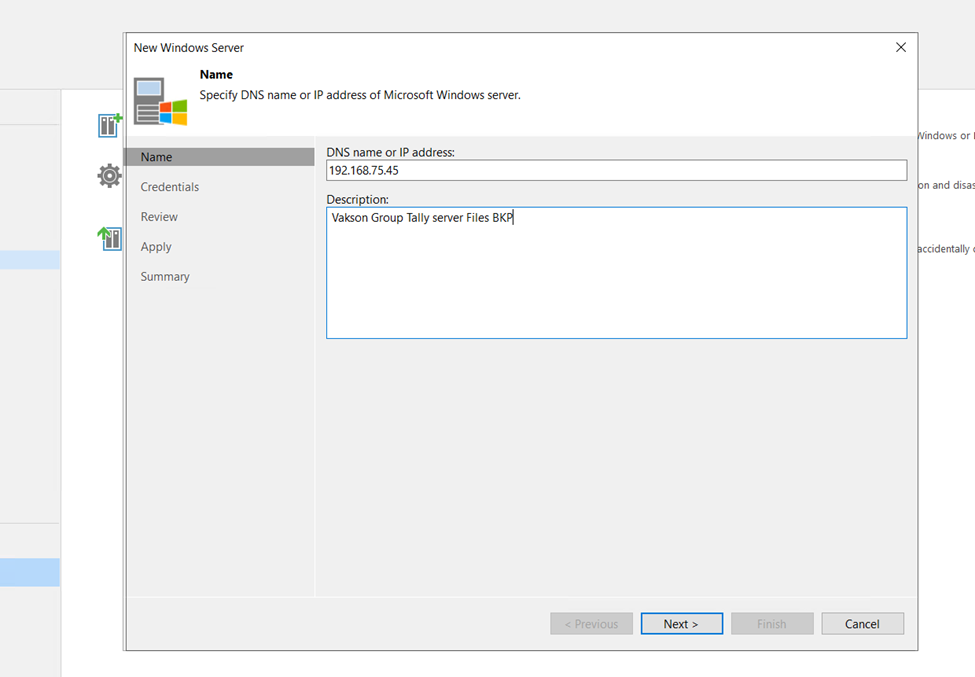
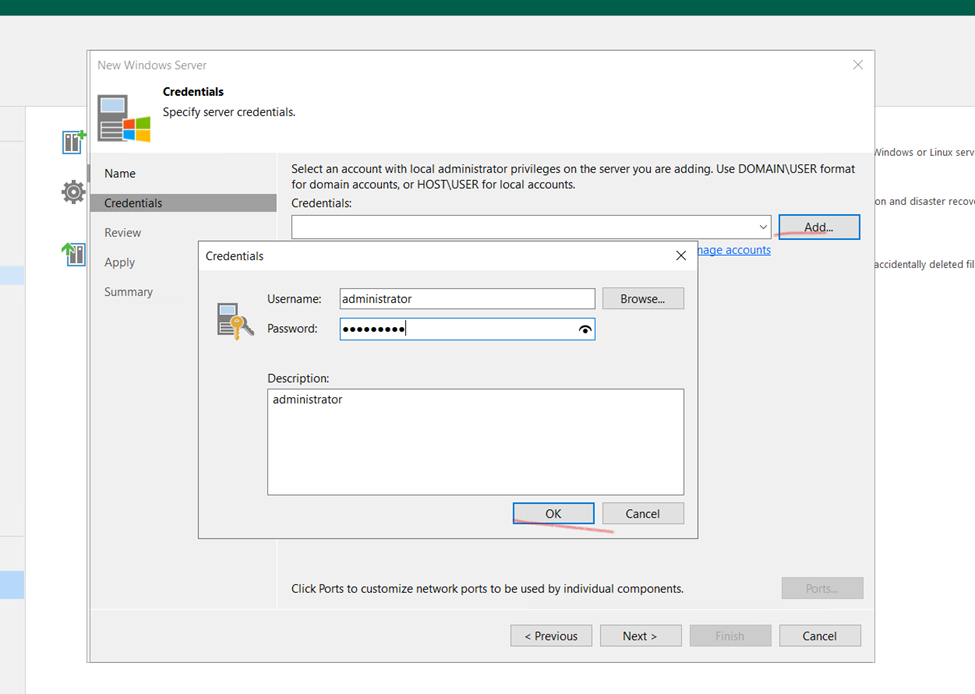
Add the file server Win or Linux
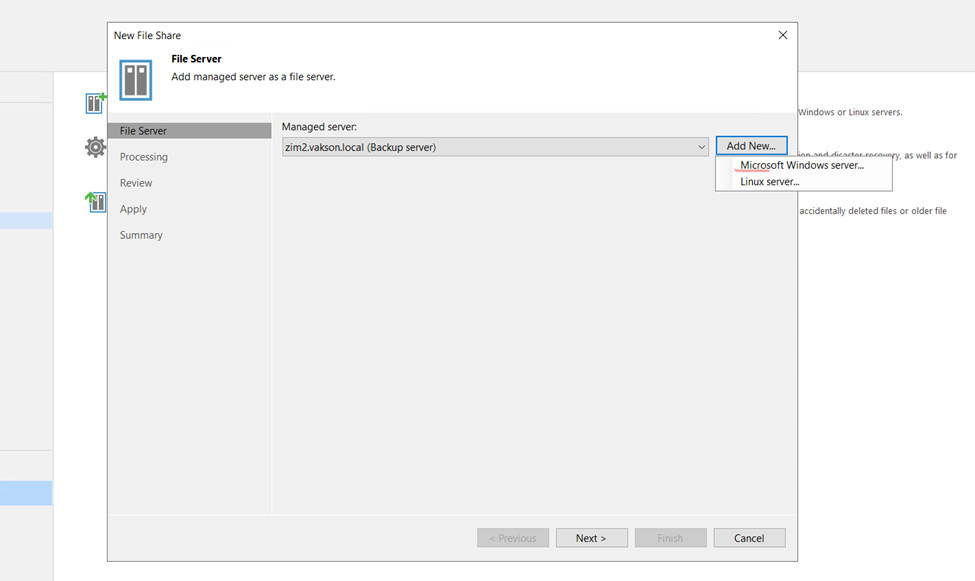
Server Identification

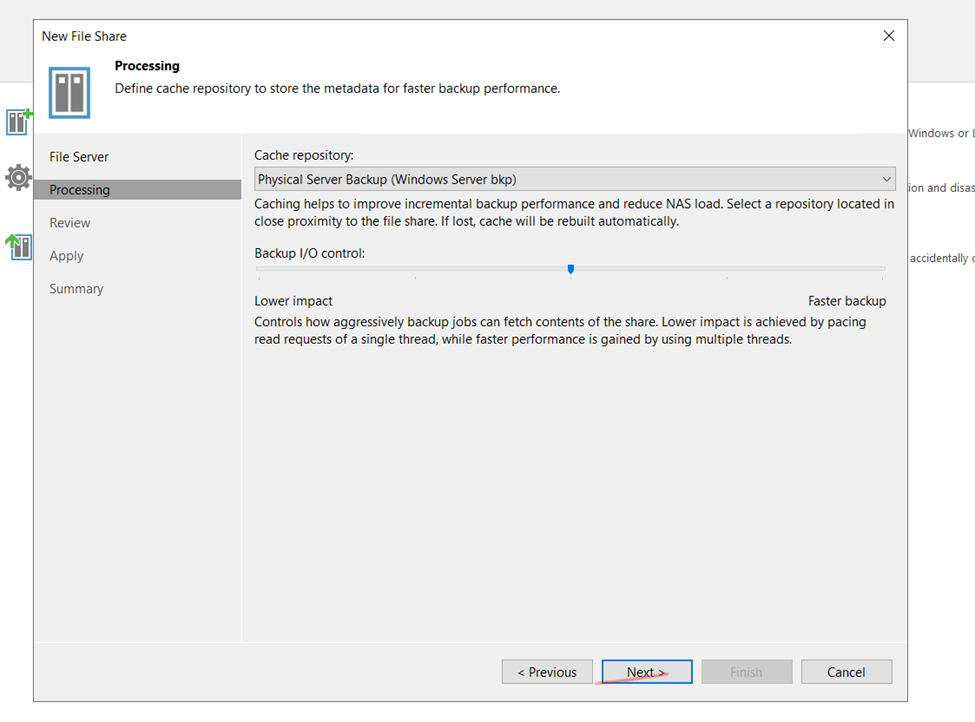
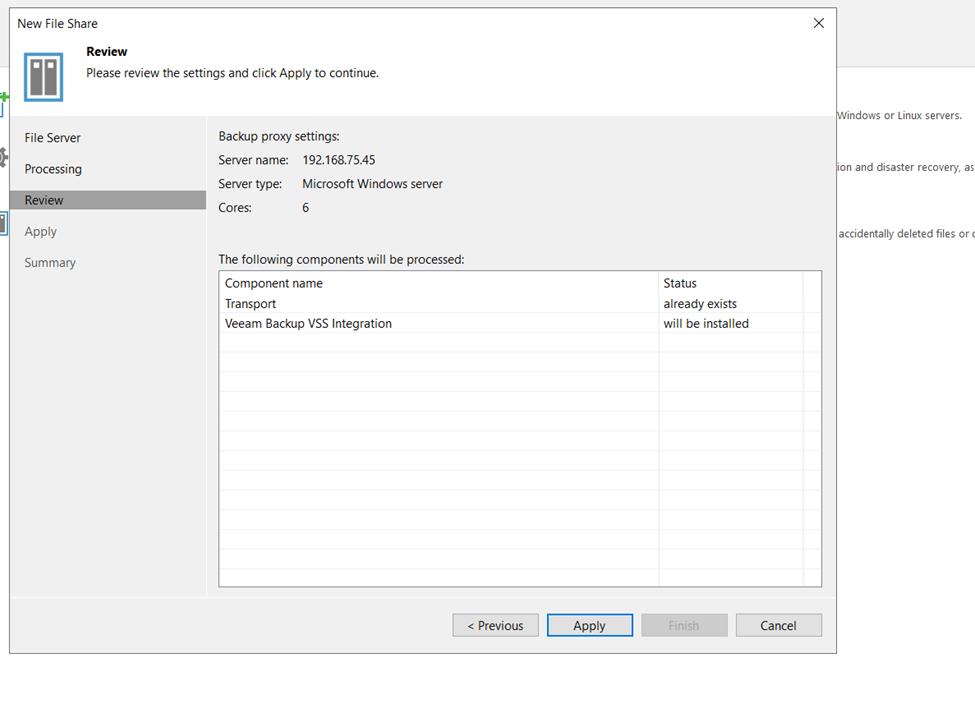
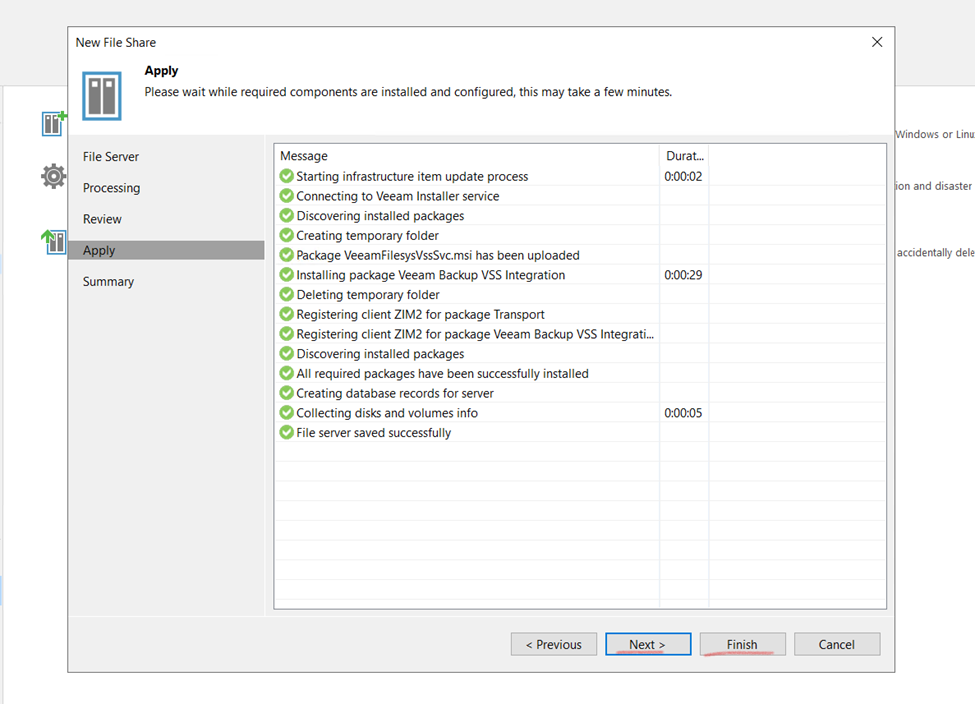
File Server Backup repositories is Added
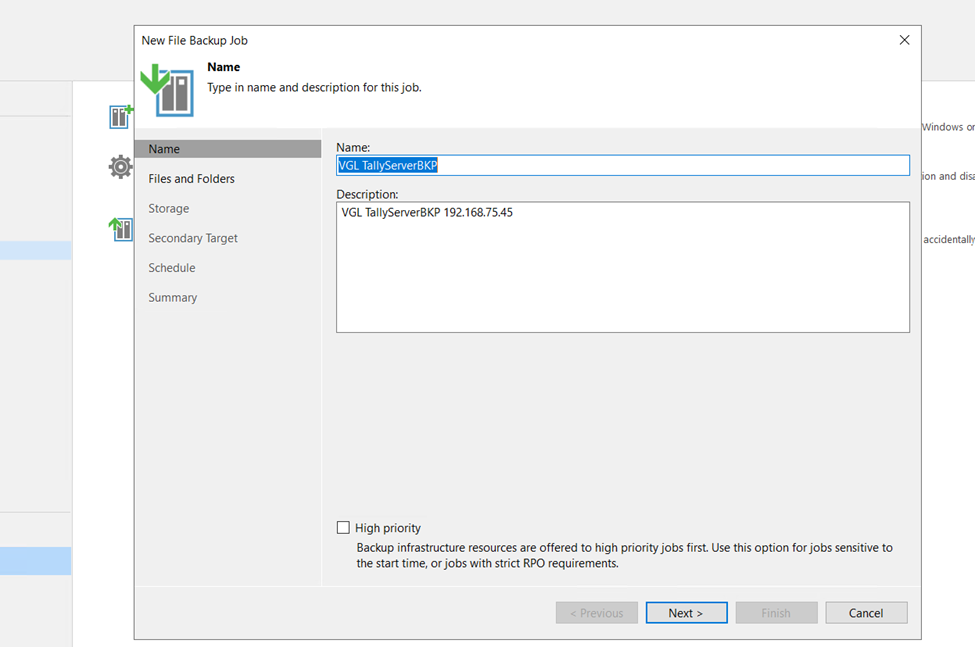
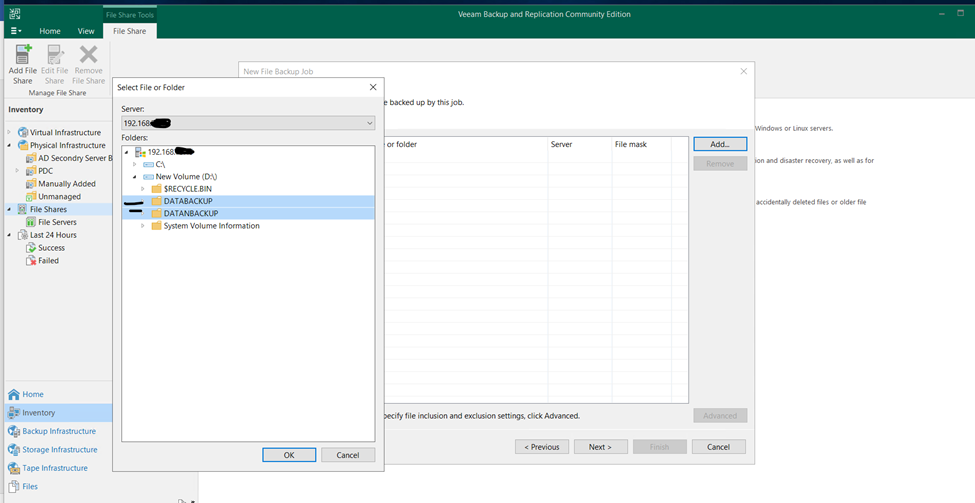
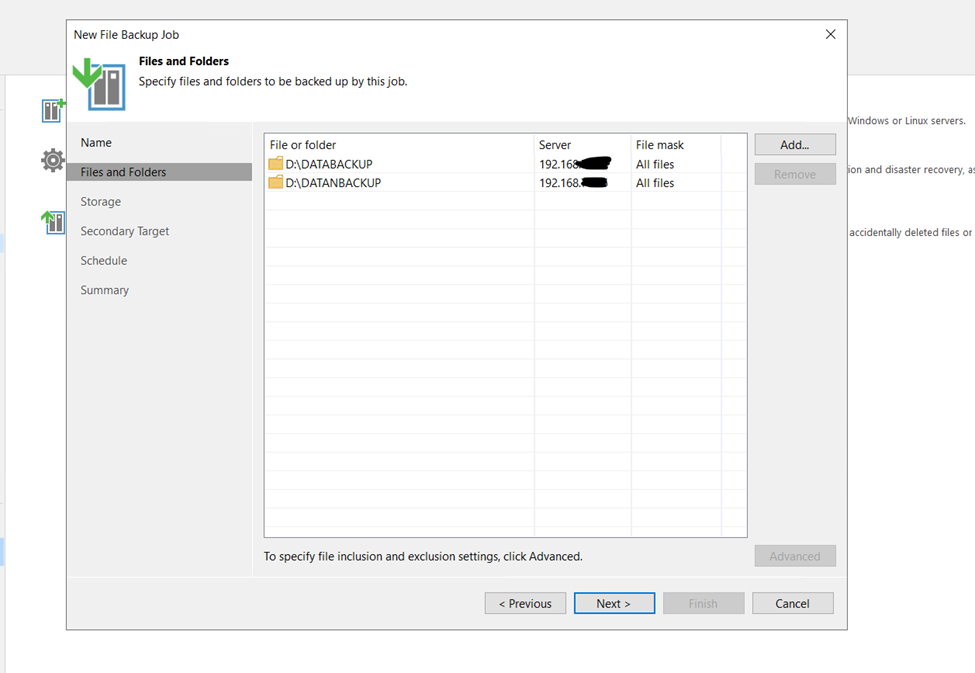
Now here creating and Scheduling File server Backup