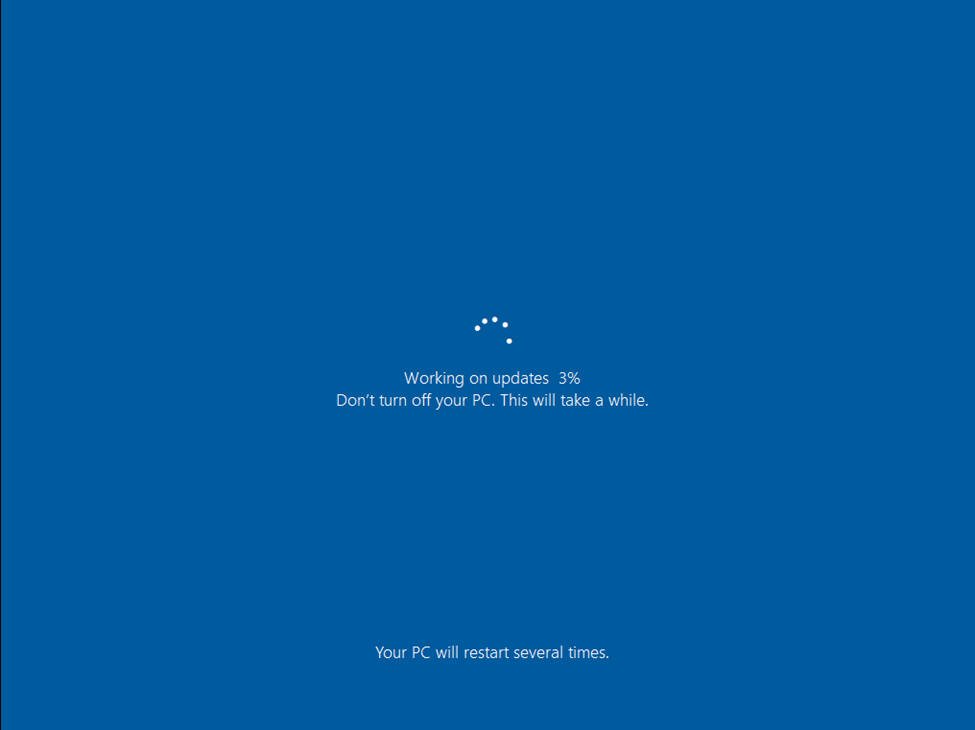
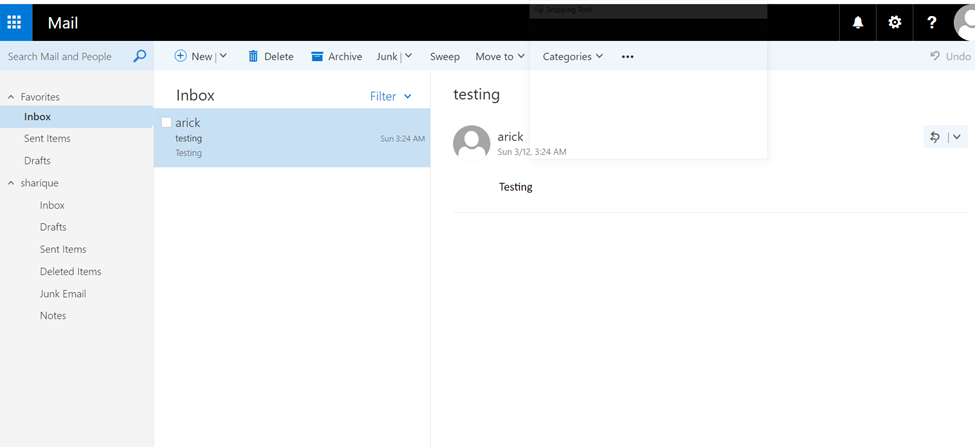
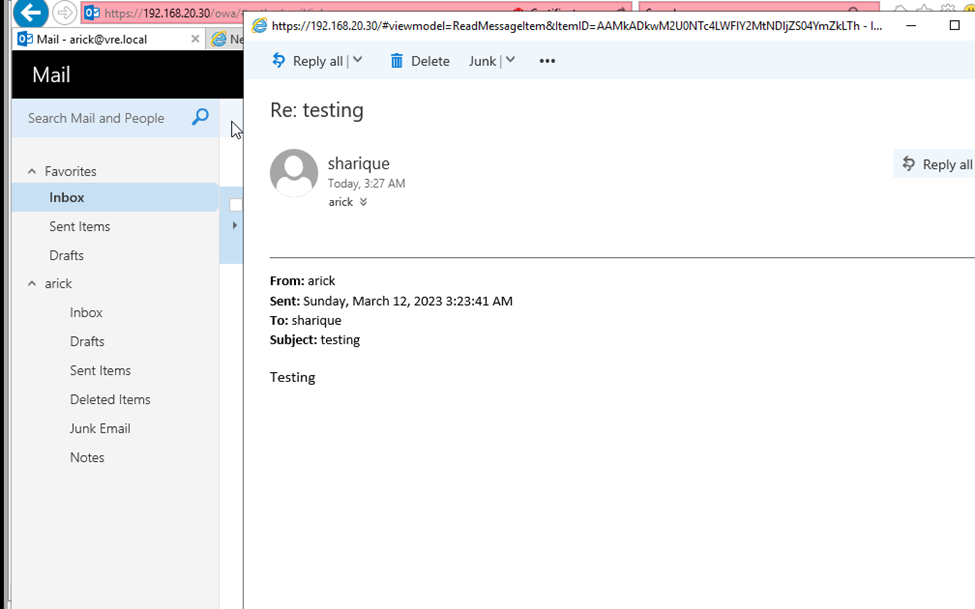
Microsoft Windows Server offers the possibility to perform a ‘Full’ backup or a ‘System State’ backup. A Full backup makes a copy of the system drives of a physical or a virtual machine, including applications, operating systems, and even the System State. This backup can be used for bare metal recovery—this allows you to easily reinstall the operating system and use the backup to recover.
System State backup
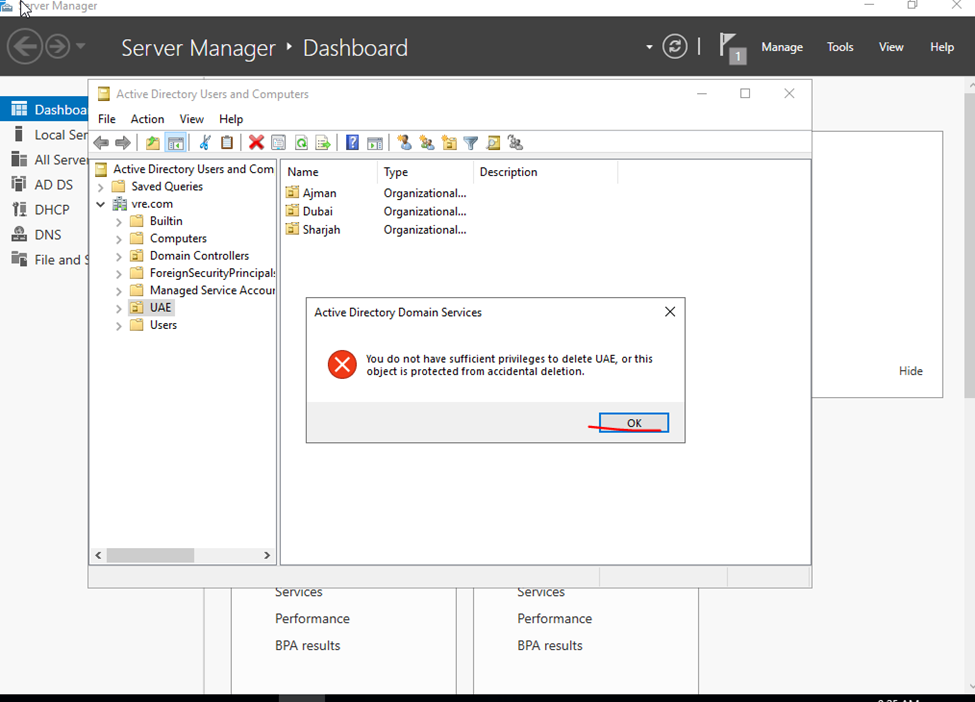
System State backup on the other hand creates a backup file for critical system-related components. This backup file can be used to recover critical system components in case of a crash. Active Directory is backed up as part of the System State on a domain controller
The System State includes the following list plus some additional items depending on the roles that are installed:
Domain controller: Active Directory DC database files (NTDS.DIT), boot files & system protected files, COM+ class registration database, registry, system volume (SYSVOL)
Domain member: Boot files, COM+ class registration database, registry
A machine running cluster services: Additionally backs up cluster server metadata
A machine running certificate services: Additionally backs up certificate data
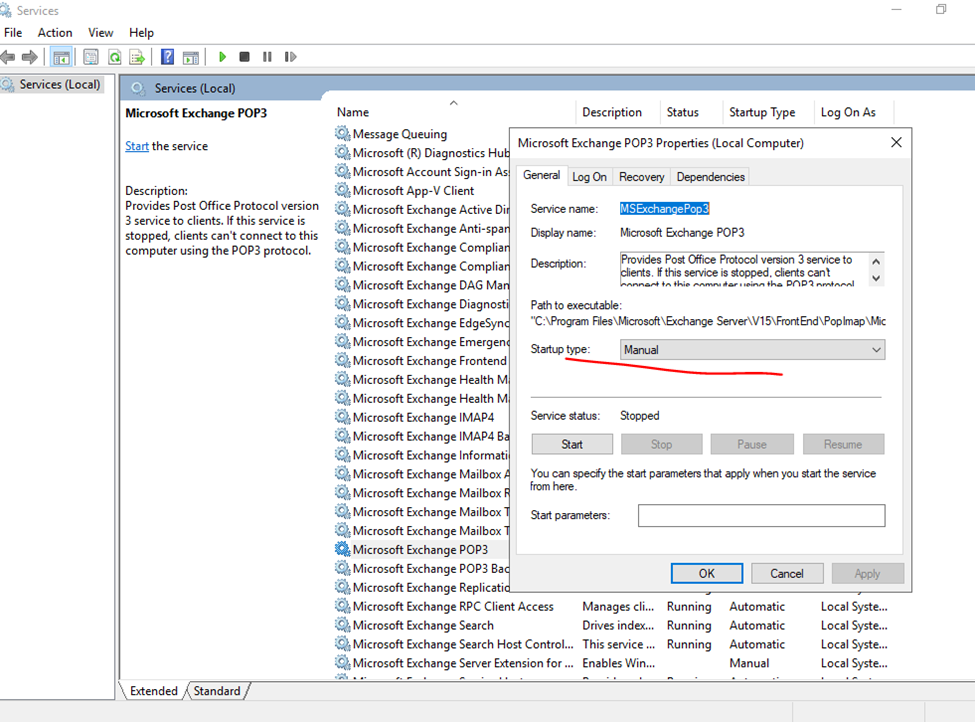
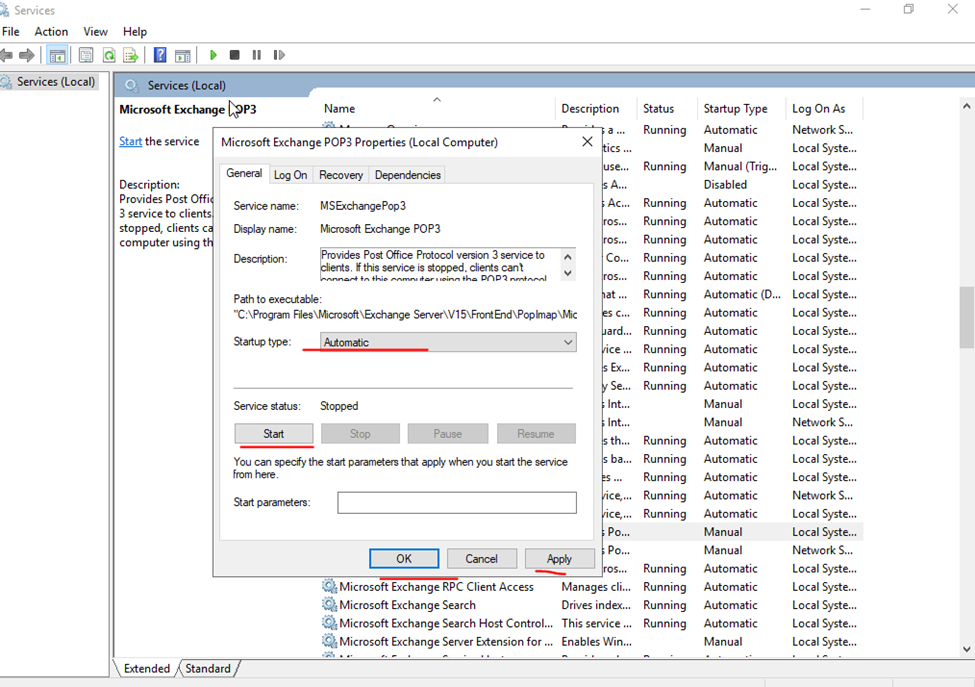
Configure the Volume Shadow Copy Service (VSS)
It is important to ensure that the AD database is backed up in a way that preserves database consistency. One way to preserve consistency is to back up the AD database when the server is in a powered-off state. However, backing up the Active Directory server in a powered-off state may not be a good idea if the server is operating in 24/7 mode.
For this reason, Microsoft recommends the use of Volume Shadow Copy Service (VSS) to back up a server running Active Directory. VSS is a technology included in Microsoft Windows that can create backup copies or snapshots of computer files or volumes, even when they are in use. VSS writers create a snapshot that freezes the System State until the backup is complete to prevent modifying active files used by Active Directory during a backup process. In this way, it is possible to back up a running server without affecting its performance.
VSS
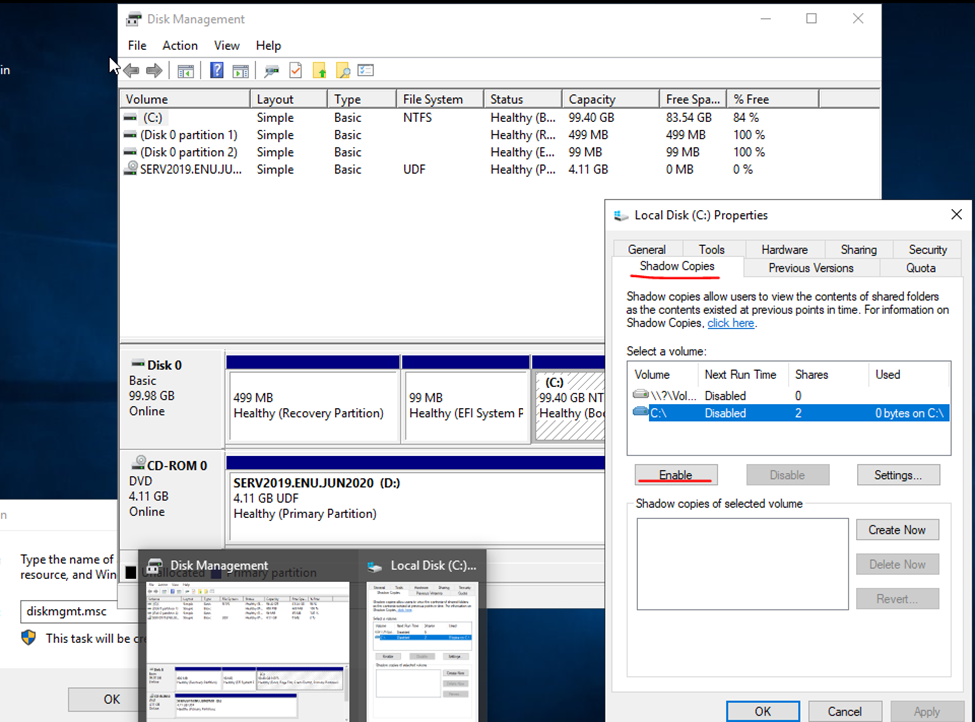
Go to properties click on shadow and enable it
Click yes and okay
Go to setting and select no limit and press ok.
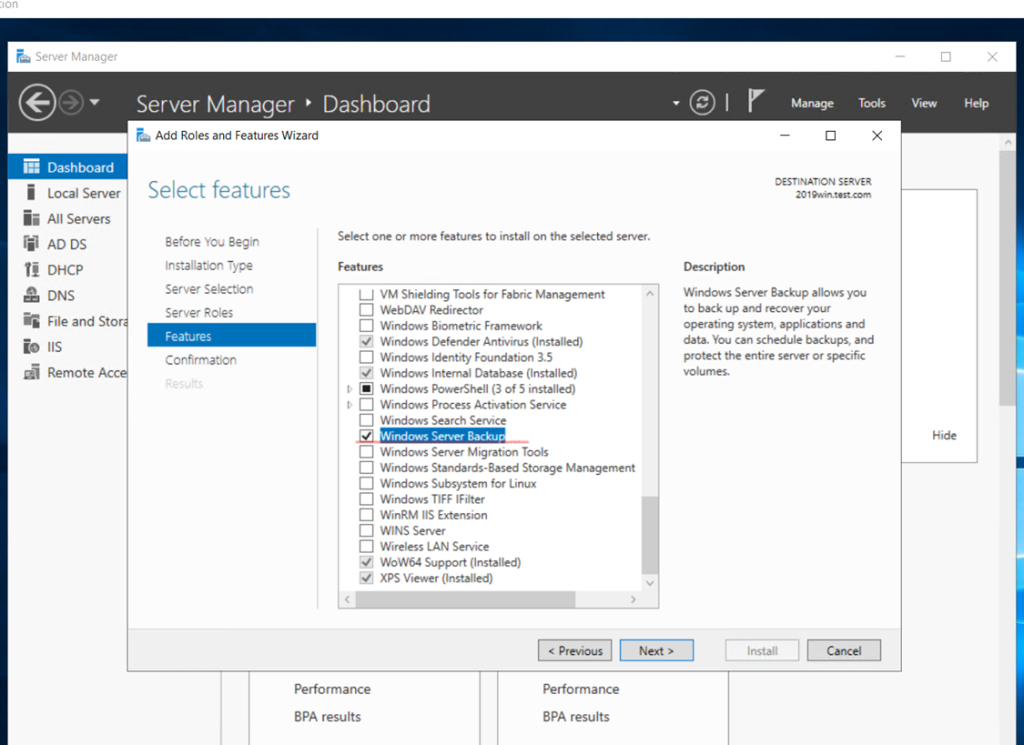
Install the Windows Server backup feature
Click to server manager and select the option once features option display select windows server backup
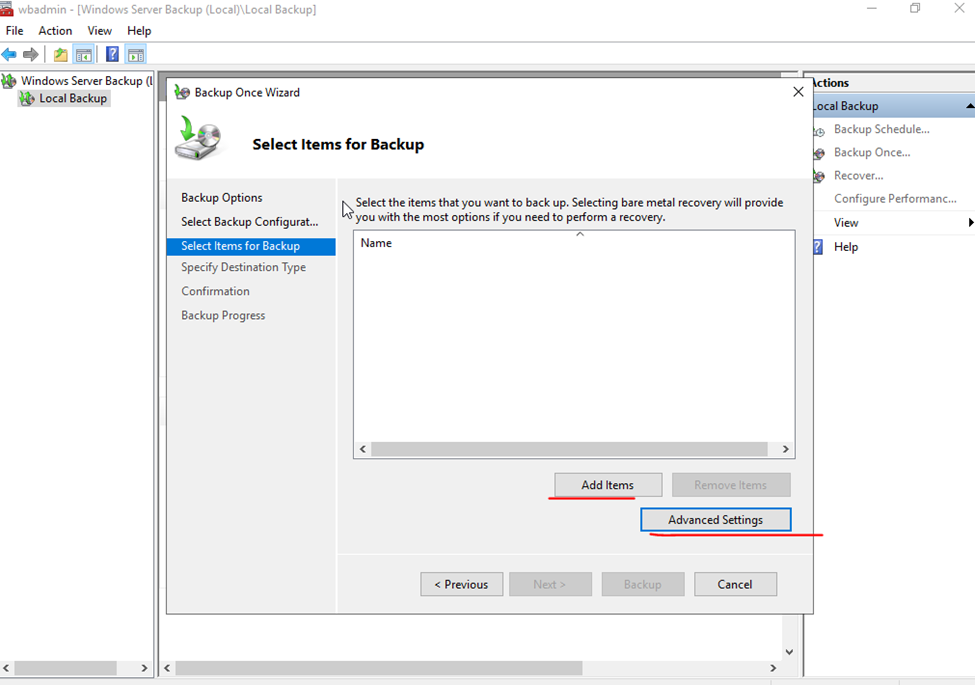
Once the server backup opens, click on Backup Once
Select Backup Destination screen you can choose the actual partition where you want to store the backup. Once you are done, click Next to proceed to the next
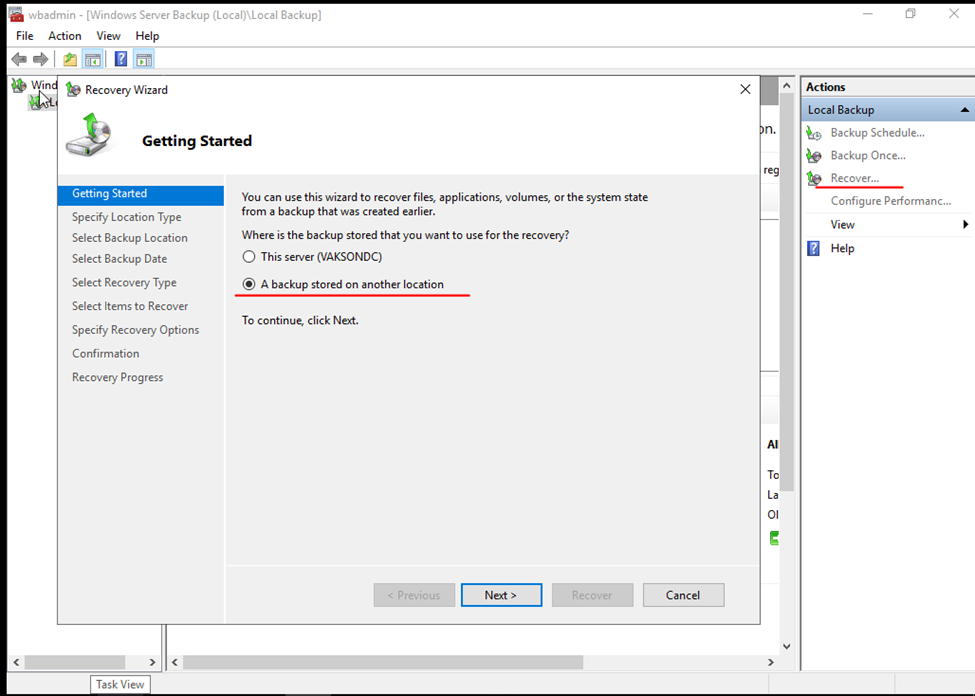
Restore
Boot in DSRM
Start the restore process by booting your server in Directory Services Restore Mode (DSRM). To do this,
Reboot the server.
In the boot menu, press F8 for advanced options.
Scroll down and select the Directory Services Restore Mode.
Press Enter, and this will reboot the computer in a safe mode. It won’t start the directory services.
The other option is, run msconfig and select Safe Boot > Active directory repair in the boot tab. Finally, restart your server, and it will start in the DSRM mode.
Run your DC in Safe mode
Type win+r and msconfig
Click to boot option
Running server in safe mode and AD Repair mode
if cannot login in safe mode try with .\administrator whatever Server admin username
Log into the server with the local administrator account. The domain services will not be available so the local account will be the only account available.
Open Windows Server Backup.
Select Recover.
Select This Server for where the backup is stored.
Select the backup you want to restore then click next.
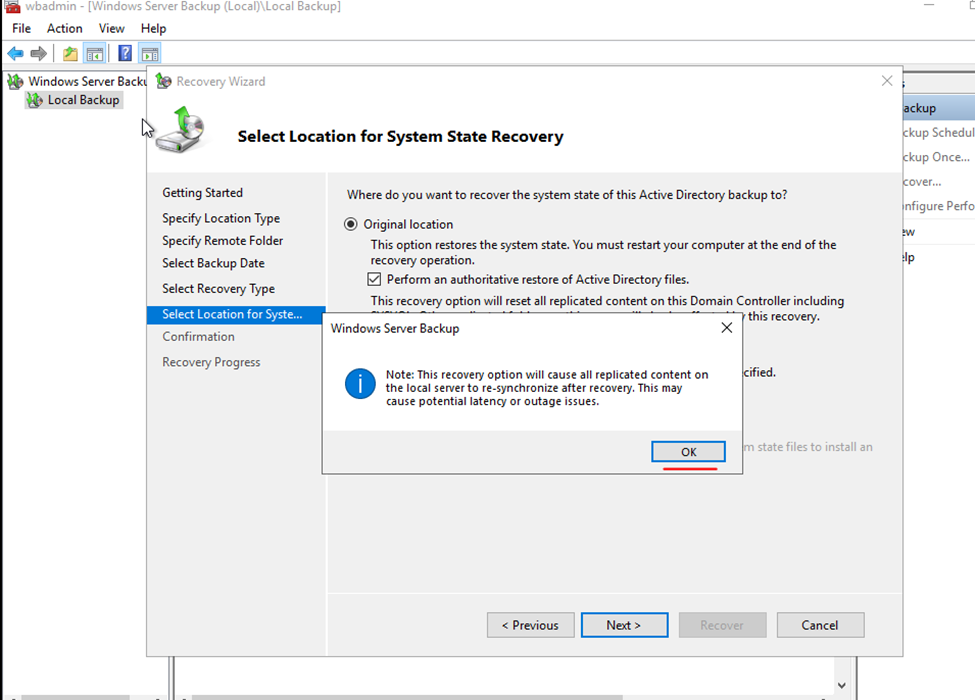
Select “System state” and click next.
Select Original Location You need to consider if an authoritative restore of Active Directory is needed. If you have other sites that contain healthy domain controllers then you may not need an authoritative restore. In this example, I have one site so I want to reset all replicated content.
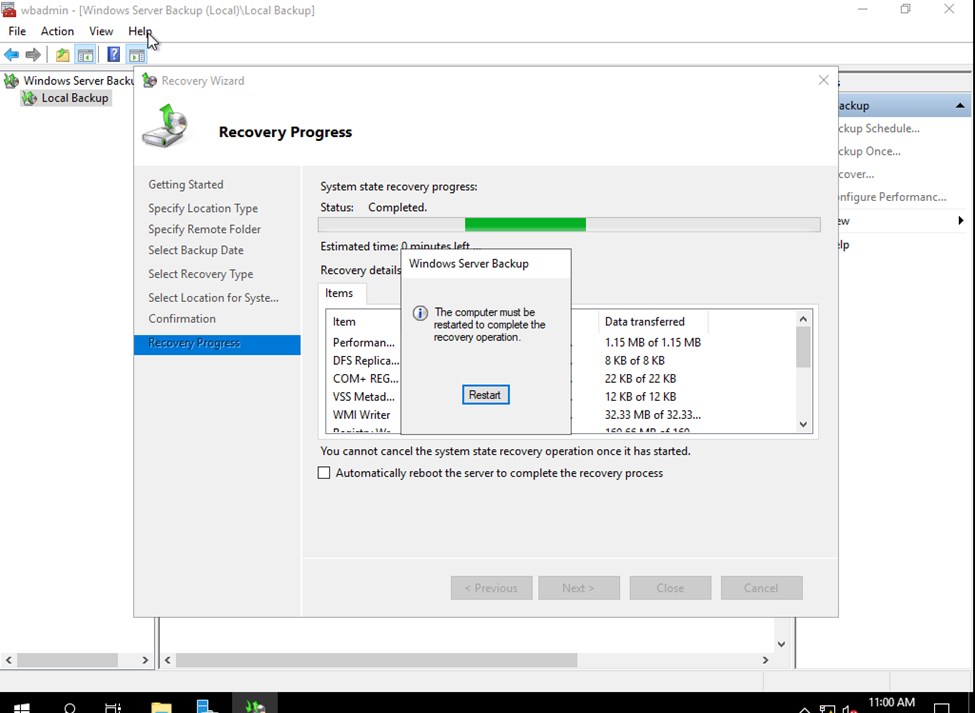
When the restore is complete, reboot and log into the server as normal. You should get a command line showing that the restore was completed. Mine says it was completed with errors but everything seems to be working fine now
Add Windows server 2019 to the existing domain as member
Log in to the Server 2019 as a member of local administrators group and join your server to domain. After restart, log in to the server as Enterprise Administrator.
Here I am Having 2016 DC Server.
FSMO COUNTROLS Authority
netdom query fsmo
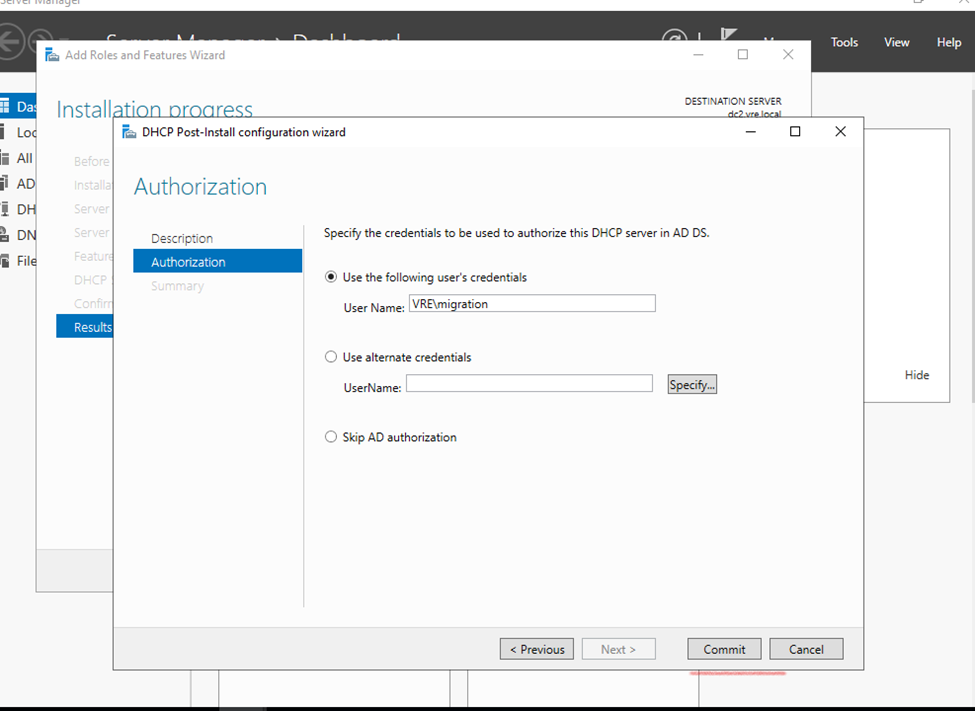
Migration user domain authorization — no need to create another user– use administrator
so, here i have created a user migration with enough authority
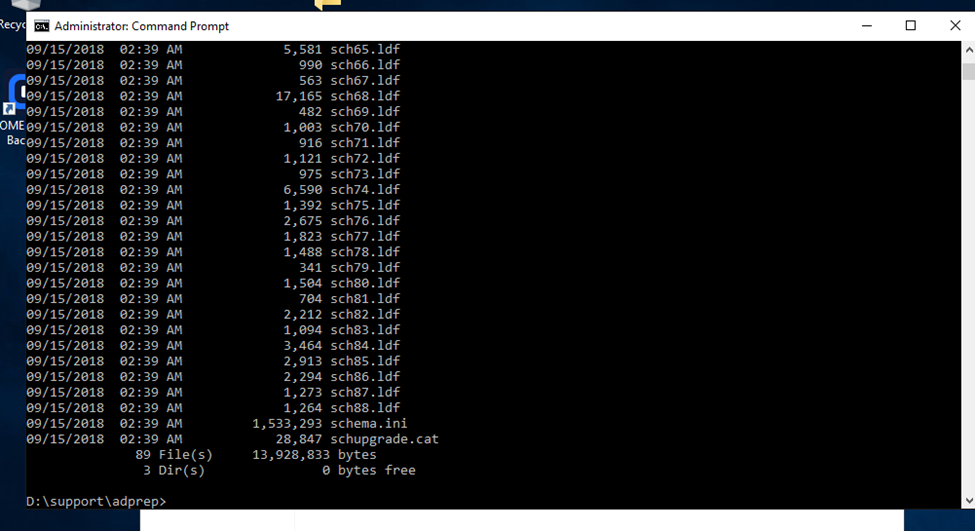
D:
Cd support
Cd adprep
dir
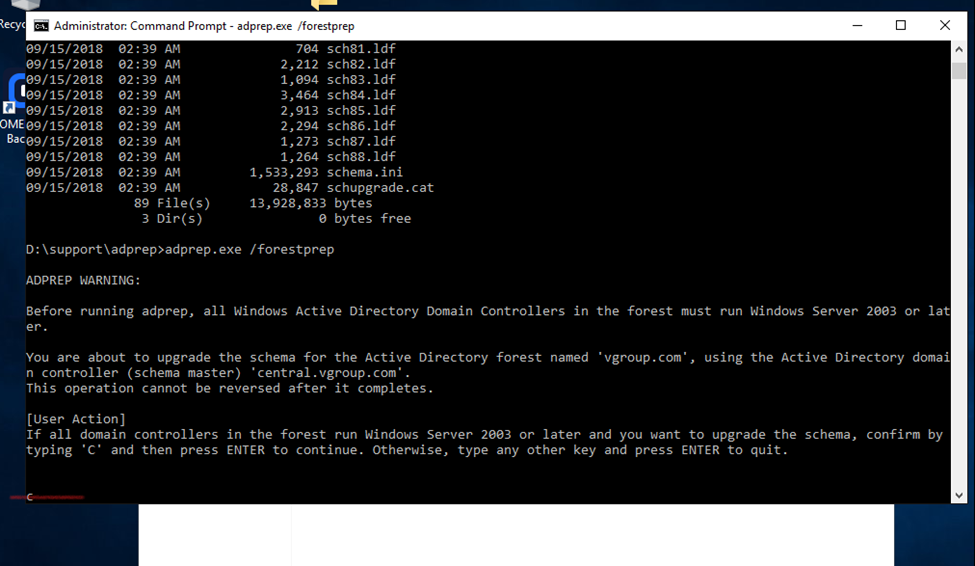
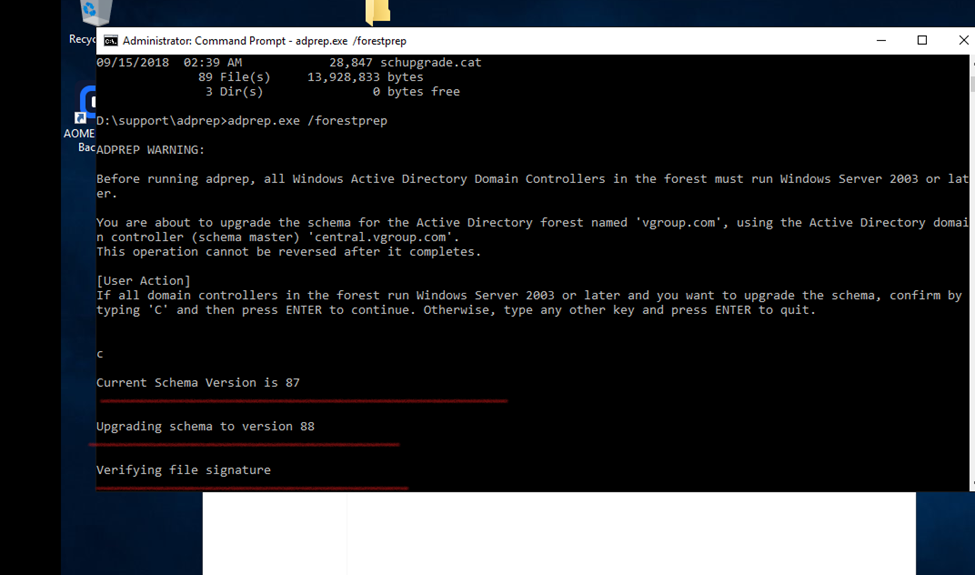
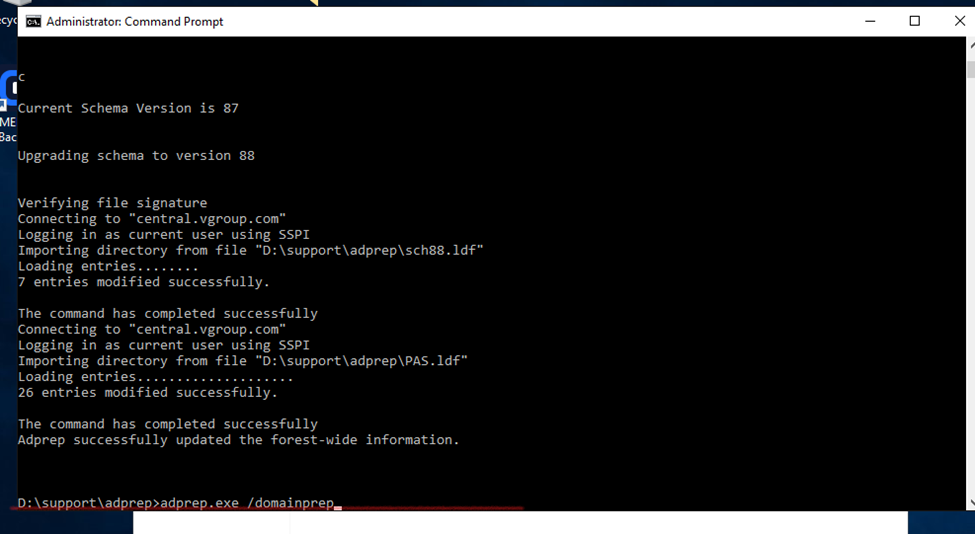
Adprep.exe /forestprep
And type c
(c for continue)
adprep.exe /domainprep
Set up a new server using Windows Server 2019
The first step is to install Windows Server 2019 on a new physical device or virtual machine. If you are more technically experienced with Windows Server, you could choose to install Server Core and then perform the necessary steps using PowerShell or by remotely connecting to the new server using Server Manager or Windows Admin Center. Otherwise, install Windows Server with the Desktop Experience role enabled.
Install the Active Directory Domain Services role
Wait for the server to reboot and then sign in with a domain admin account. You can then install the Active Directory Domain Services (AD DS) server role using Server Manager and the Add Roles and Features wizard in the Manage menu. You can also use the following PowerShell command:
When the AD DS server role has been installed, you’ll get a notification in Server Manager prompting you to promote the server to a domain controller. Clicking the yellow exclamation mark icon will launch the AD DS configuration wizard. You should choose to ‘Add a domain controller to an existing domain’ and follow through the on-screen instructions. And providing that you are signed in with a domain admin account, adprep will automatically prepare your existing domain.
So, after installation of 2019 server need to install Active directory click to join existing domain.
Windows Upgradation (Windows server Migration 2016 to 2019)
How to Upgrade Windows Server 2016 to 2019 Step by Step
If you are still running Windows Server, you should upgrade to Windows Server 2019 since Windows Server 2016 will end the support.
Instructions
To upgrade Windows Server 2016 to Windows Server 2019, do the following:
Log in as an administrator on the server you want to upgrade.
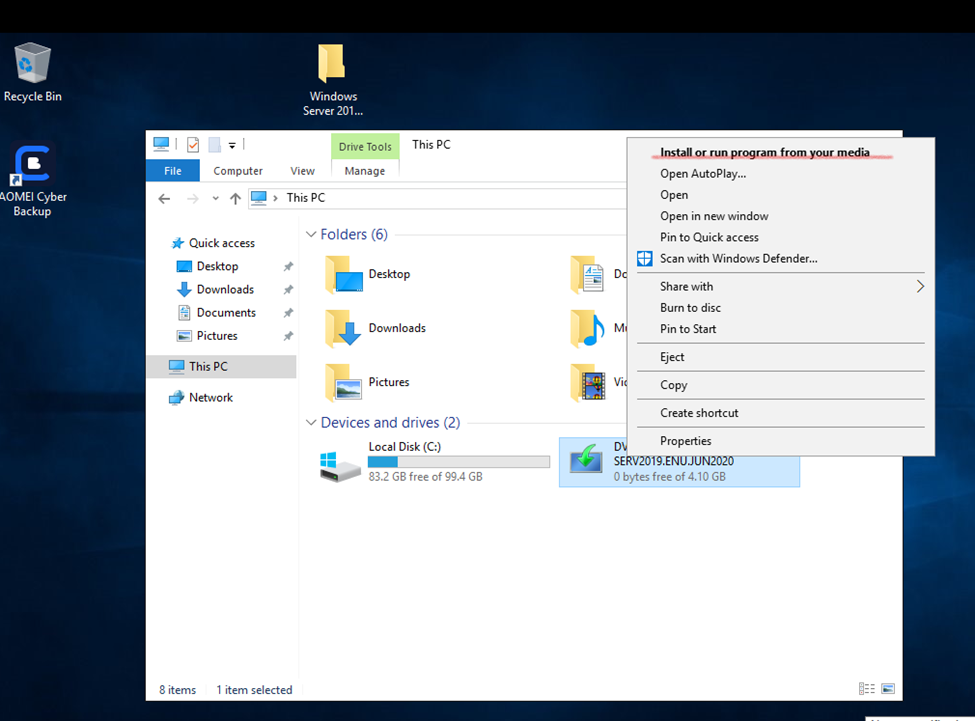
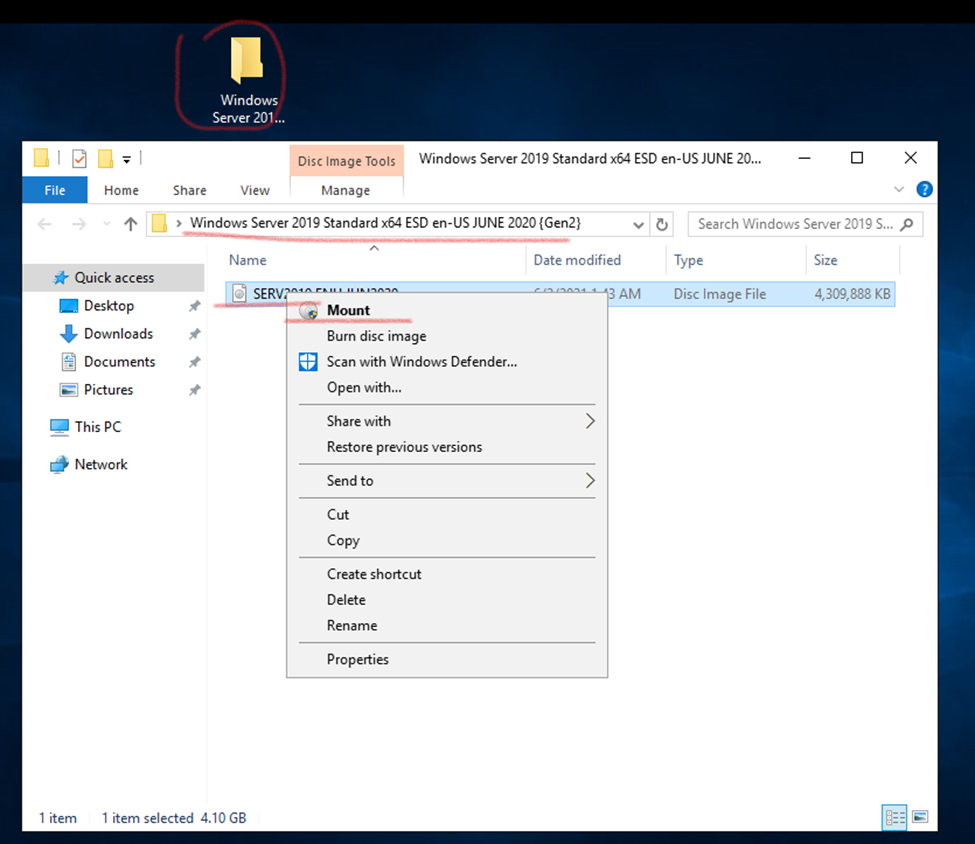
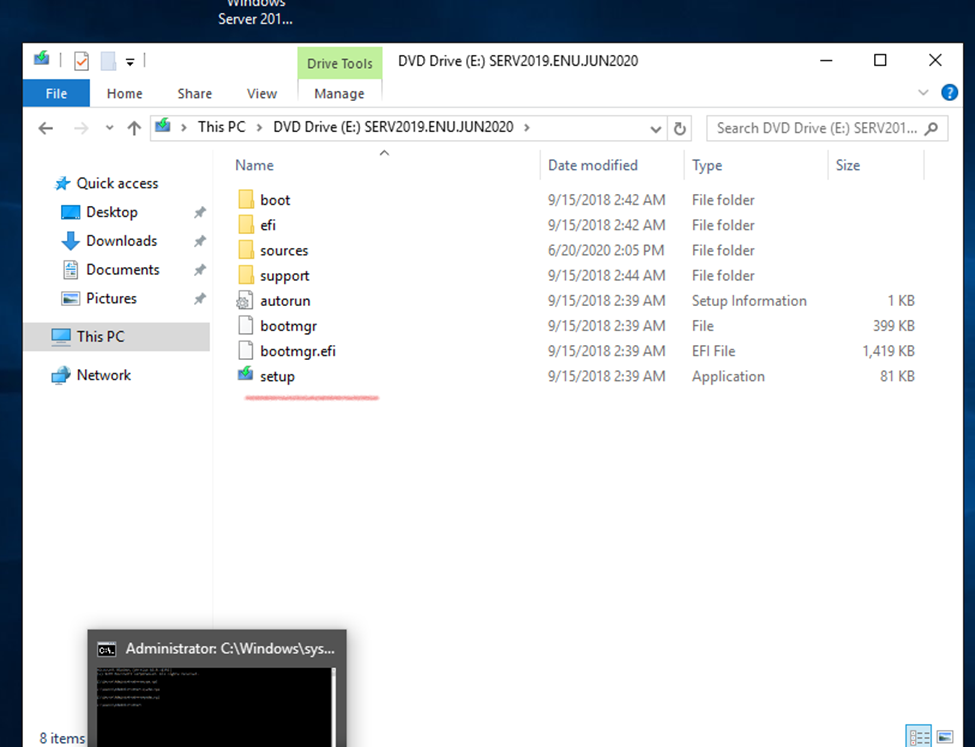
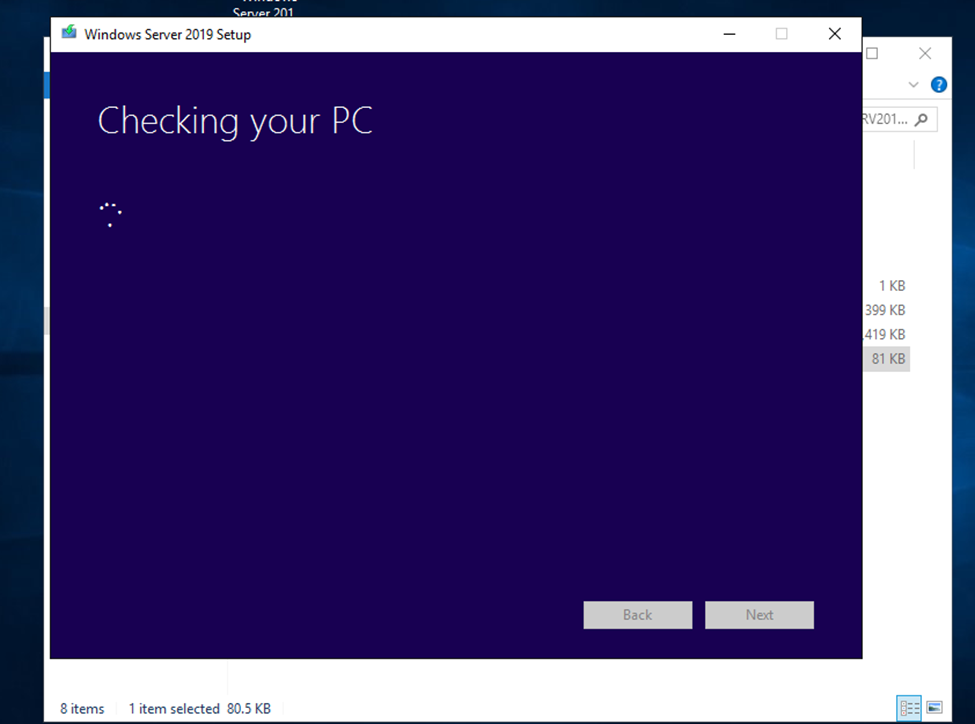
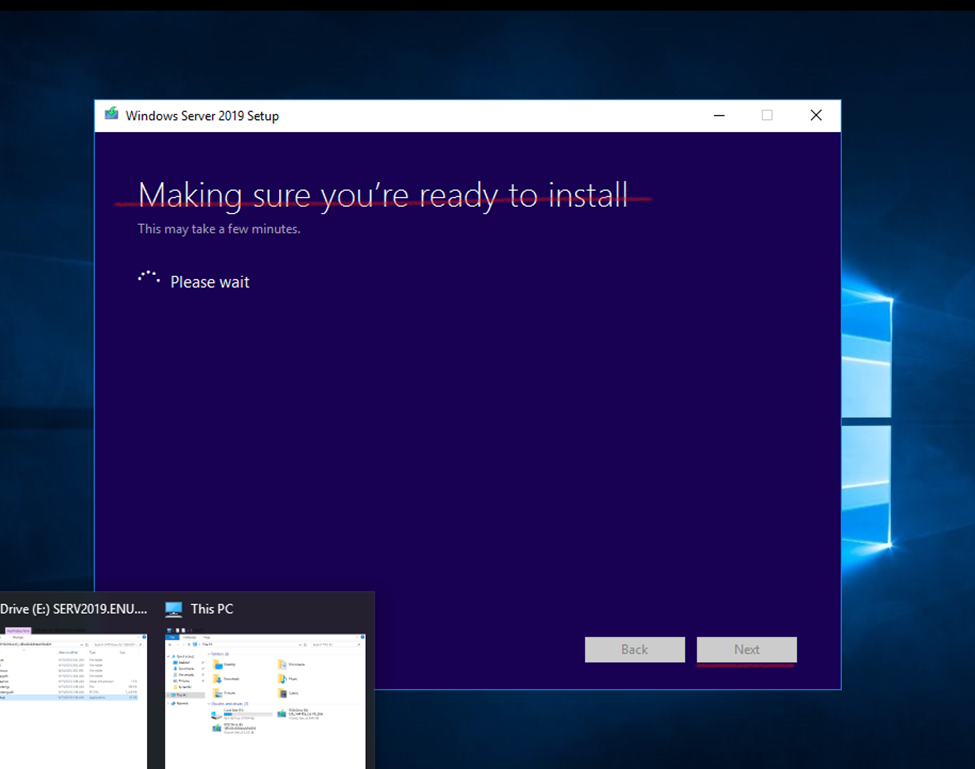
Insert the Windows Server 2019 DVD or mount the installation ISO.
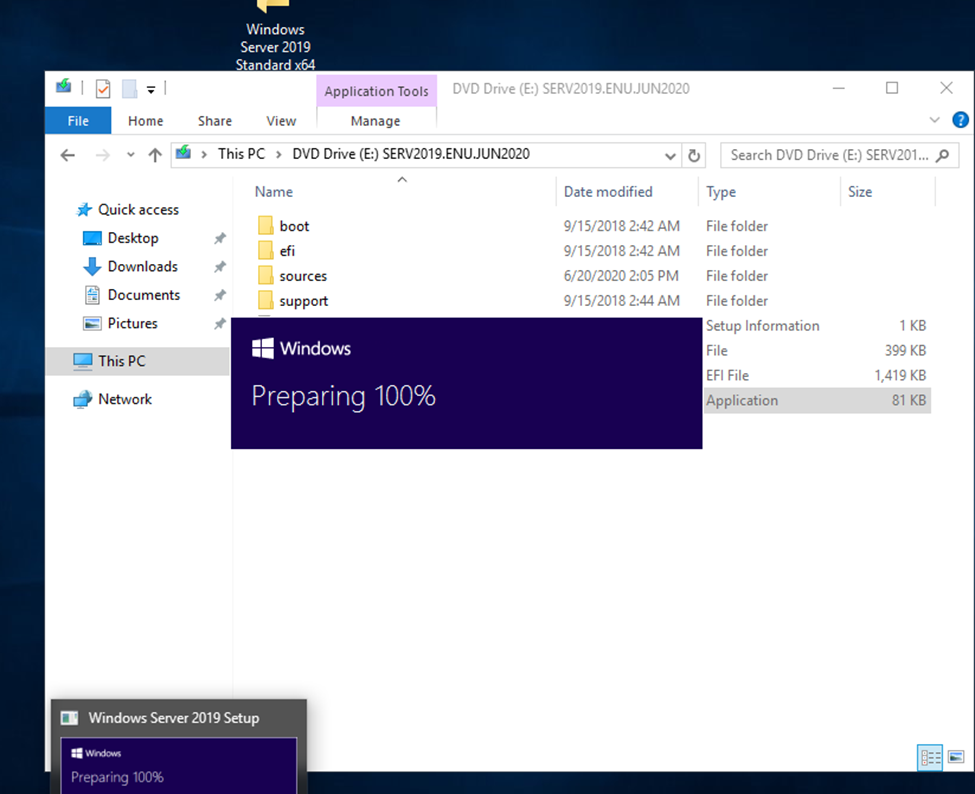
Browse to the root of the installation media and double-click setup.exe. The Windows Server 2019 Setup window appears.
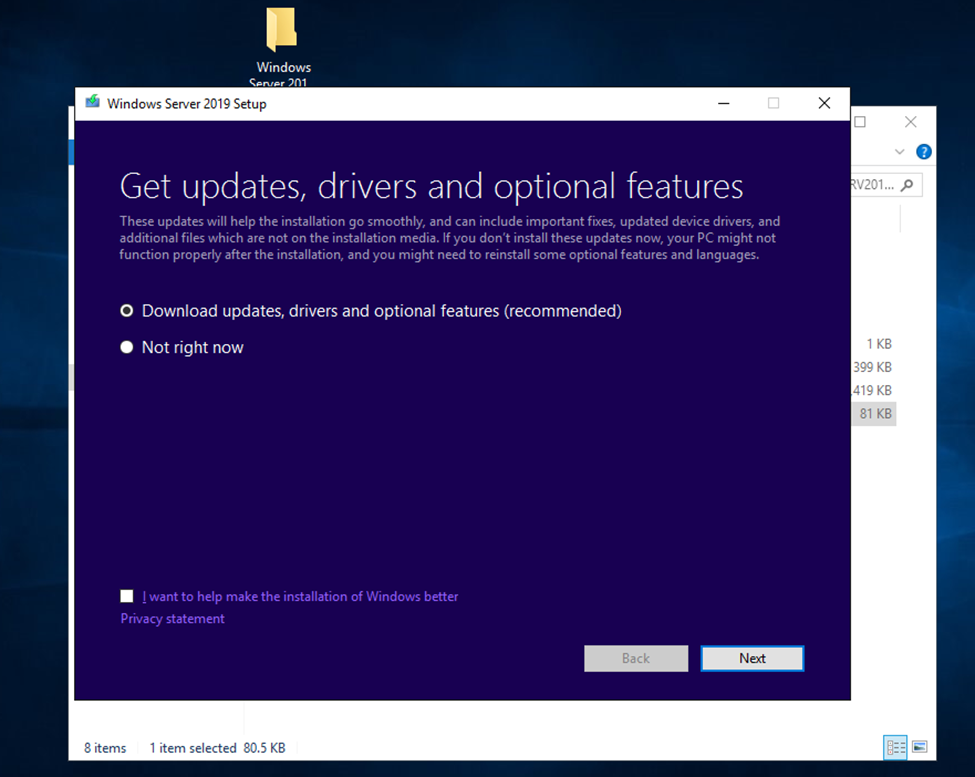
Follow the steps in the wizard according to the guidance in the Before You Begin section above. Note the following:
If you are upgrading from a DVD, you may be prompted to boot from DVD. You can let the request time out and the upgrade will continue.
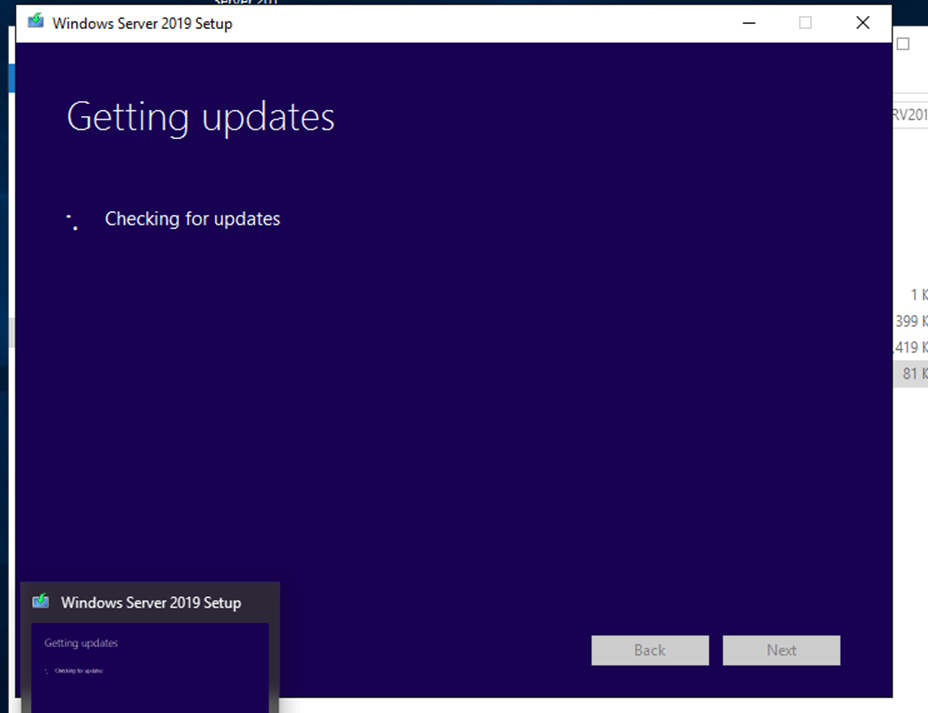
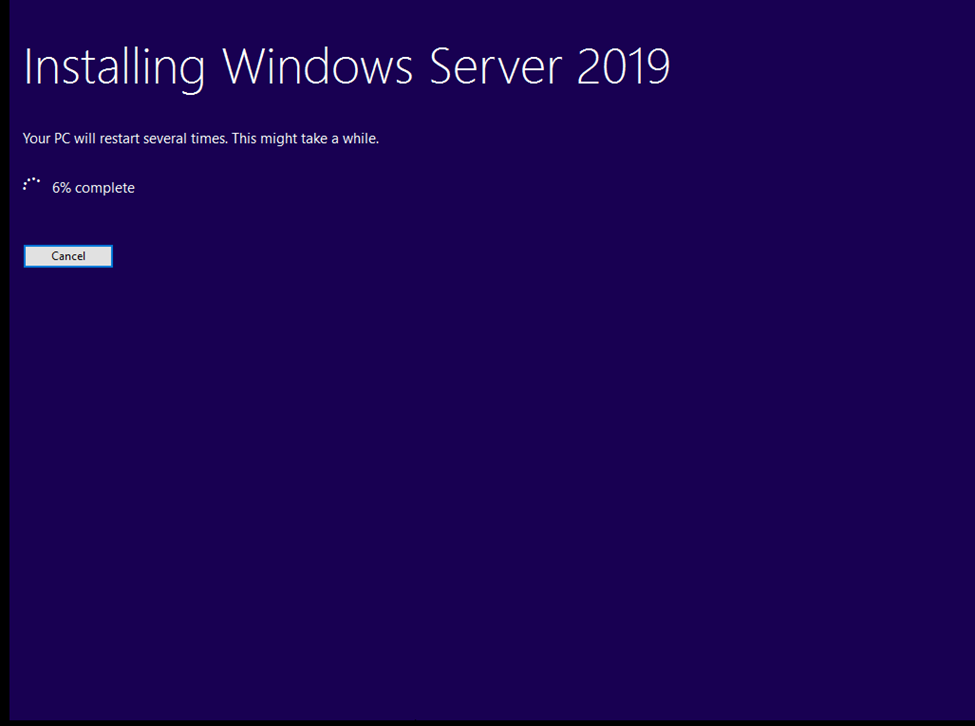
When the upgrade is almost finished, a screen will indicate that settings are being finalized. When the upgrade is finished, you will be presented with the Windows Server 2019 login screen.
According to Microsoft, Windows Server 2016 will continue to update until Jan 12, 2027. And the end of life for Windows server 2019 is Jan 9, 2029. Windows Server 2022 has released in Sep 2021.
Even though Windows Server 2016 still acts as the main workhorse on many companies, we recommend upgrading to the latest version due to the new security function and better performance.
Before starting upgradation server first take complete server backup
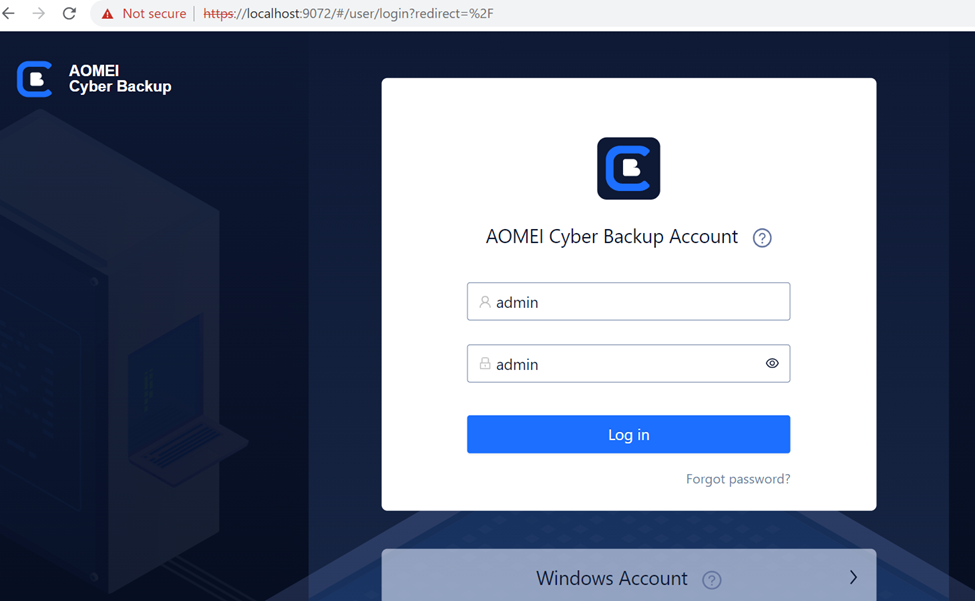
So, here I am using AOMEI Software t take the complete backup
Default password:
Currently my DC is running on WINS 2016 SERVER
Adds
DOMAIN
GO TO Attached windows server 2019 Directory
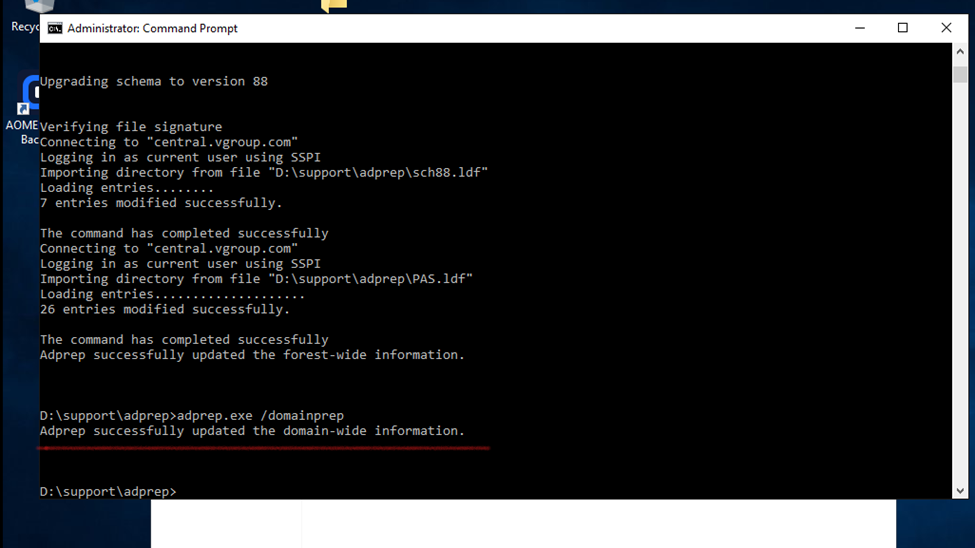
2016 server having 87 schema level and 2019 having 89 so need to upgrade my schema before upgrading
Cd support
Cd adprep
dir
Adprep.exe /forestprep
And type c
(c for continue)
adprep.exe /domainprep
Don’t download and update while upgradation click on not right now.
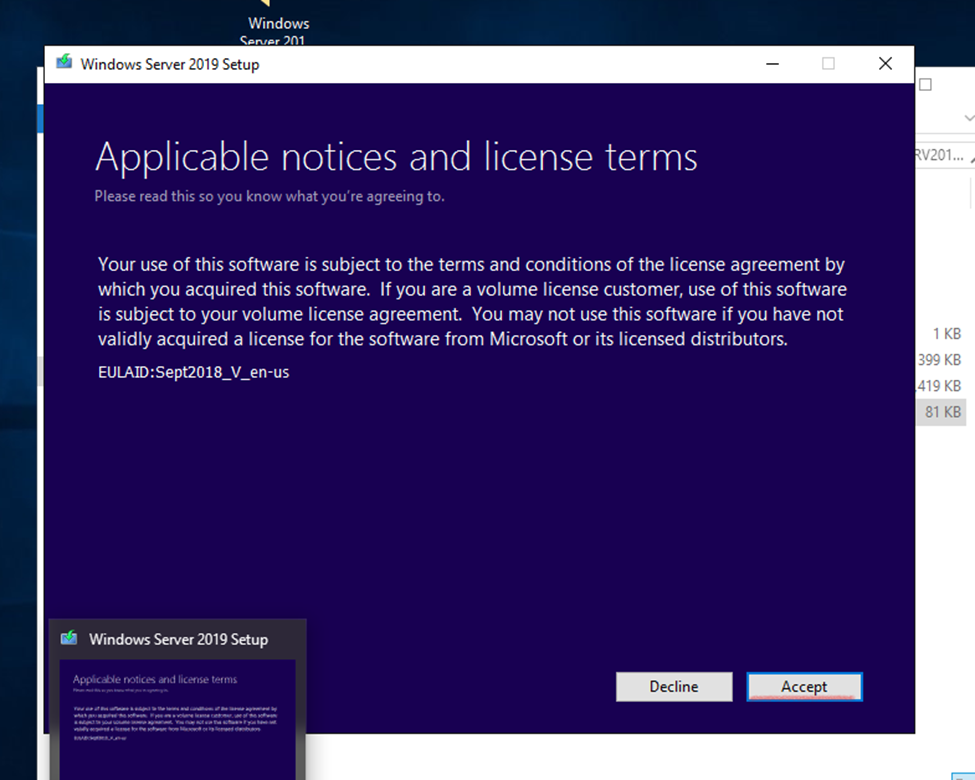
Click and accept.
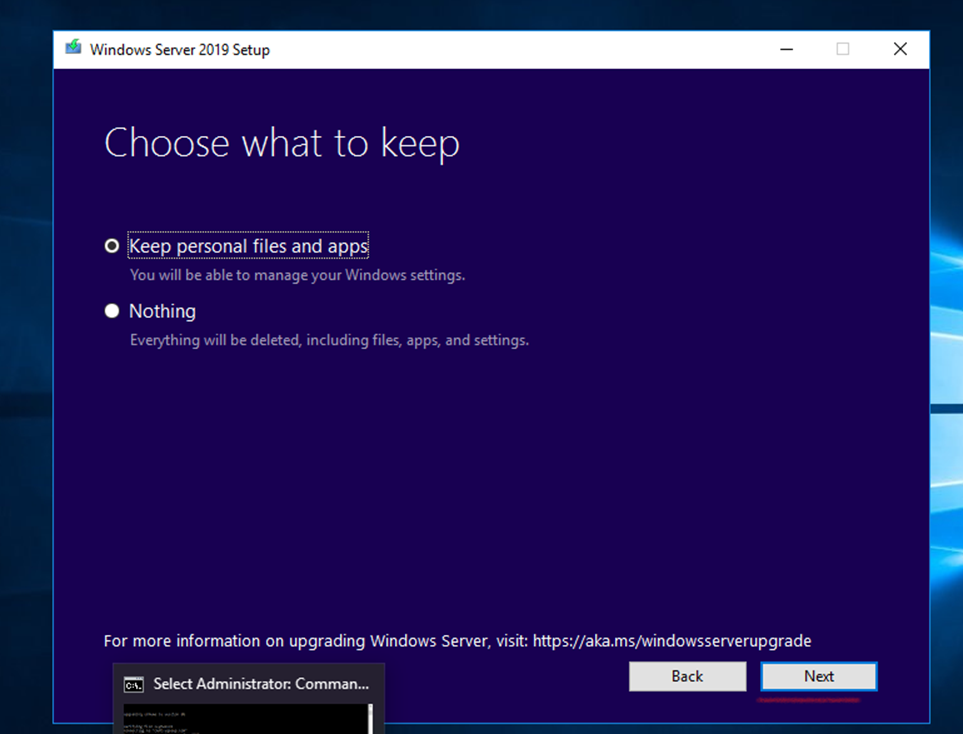
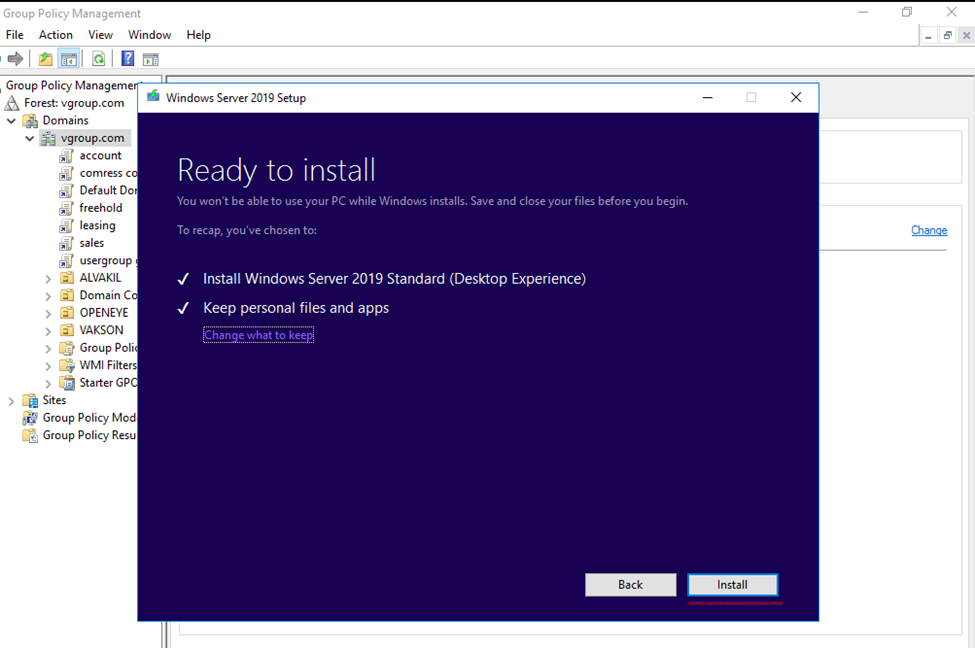
choose Keep personal files and apps – to keep data.
Nothing -will cause all data to be deleted, including files, apps, and settings.
Next
Select the wanted Windows Server 2019 image and then choose Next
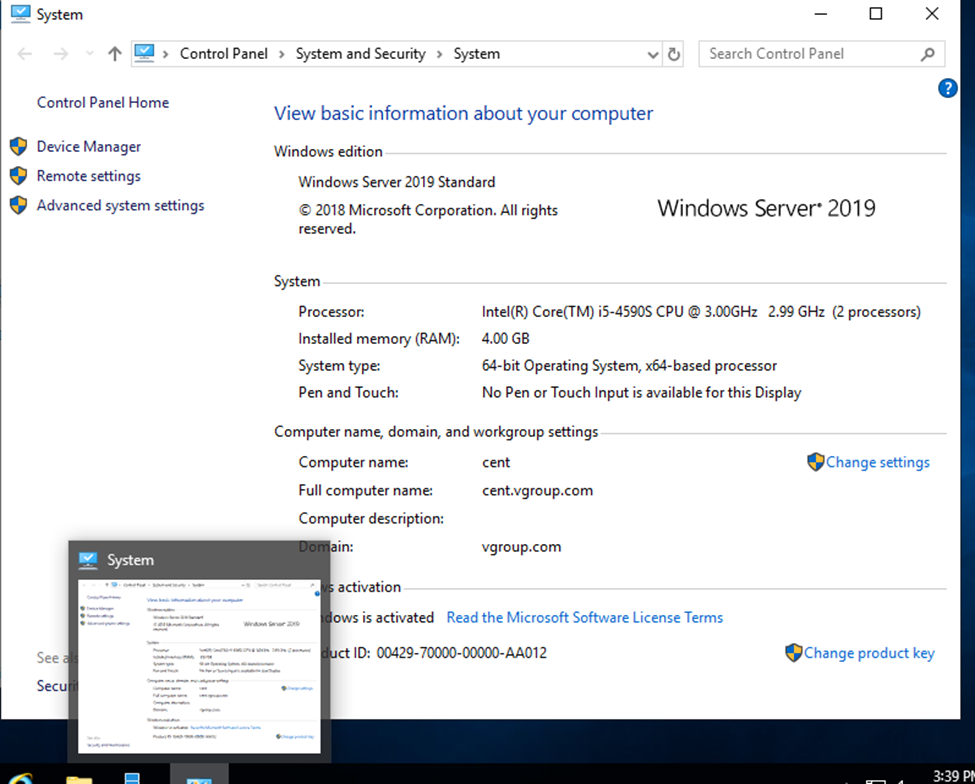
After the upgrade is completed, verify that the upgrade to Windows Server 2019 was successful by going the the System Properties.
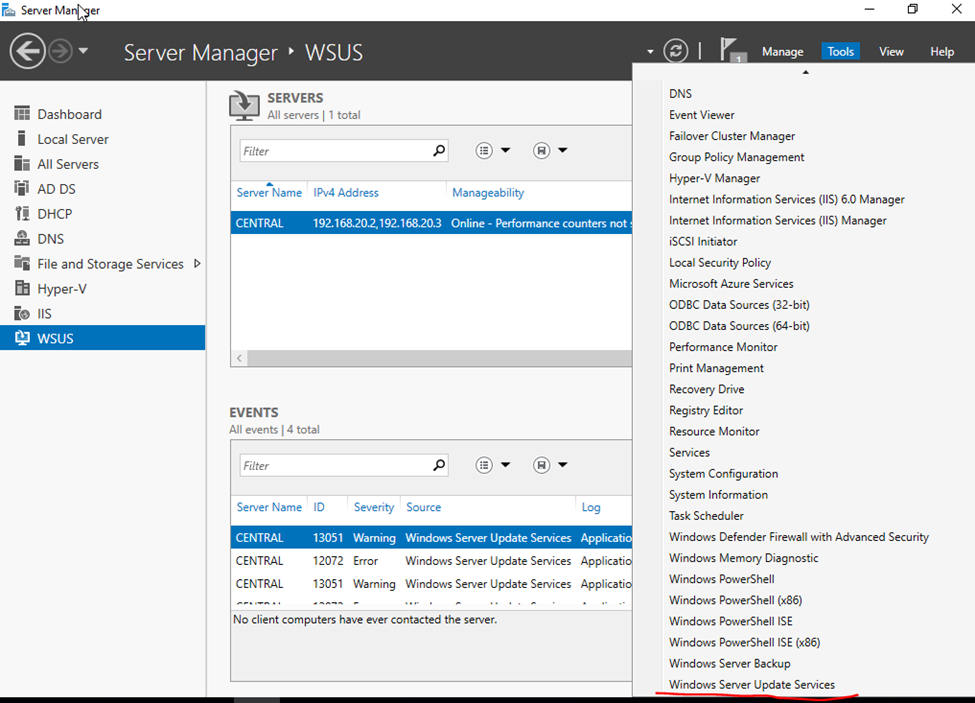
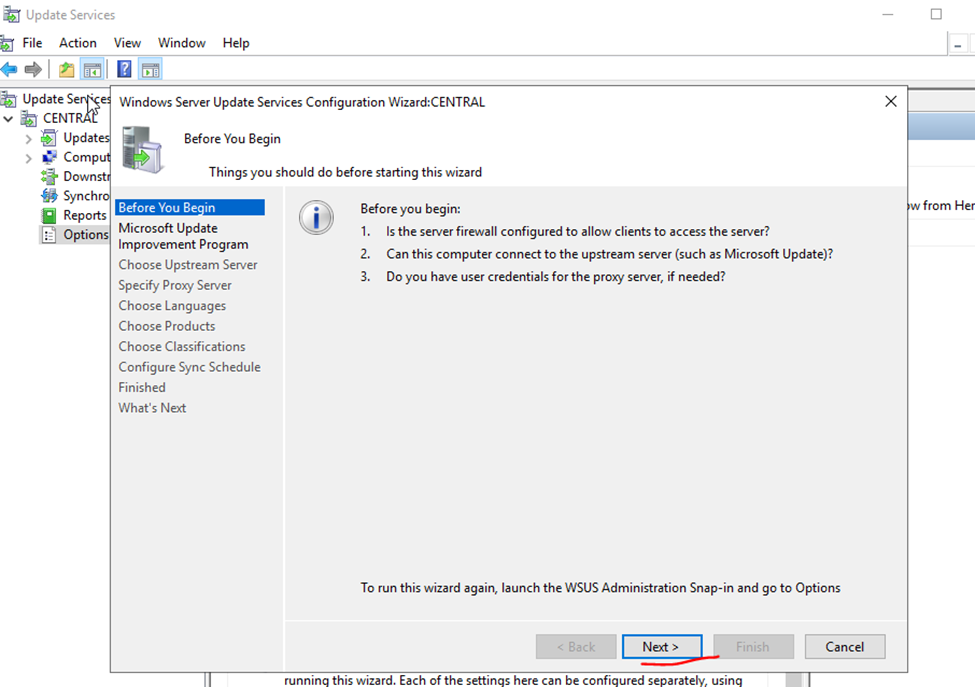
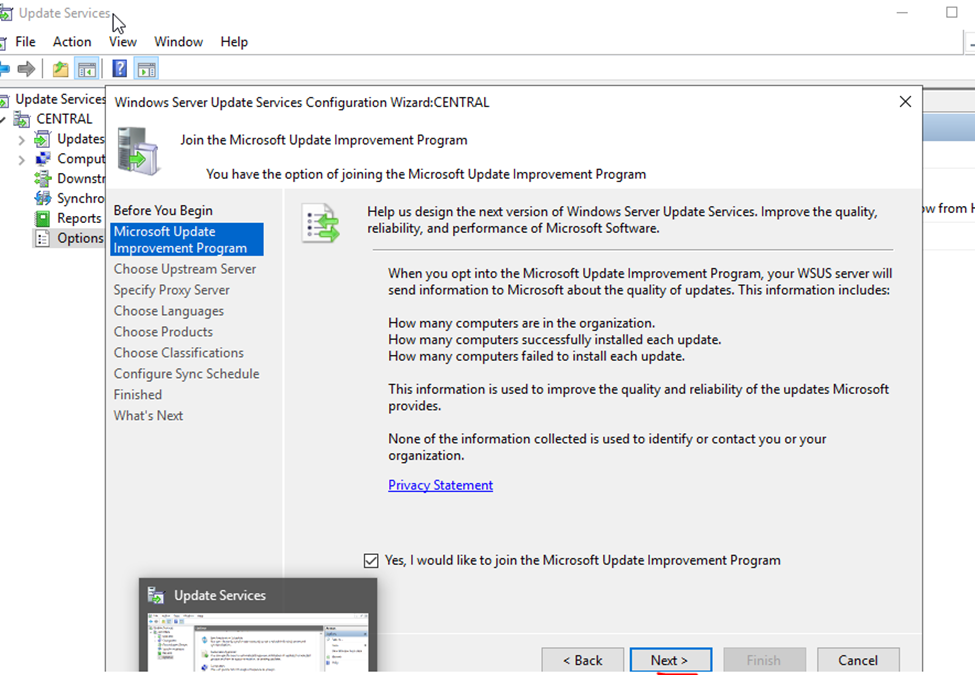
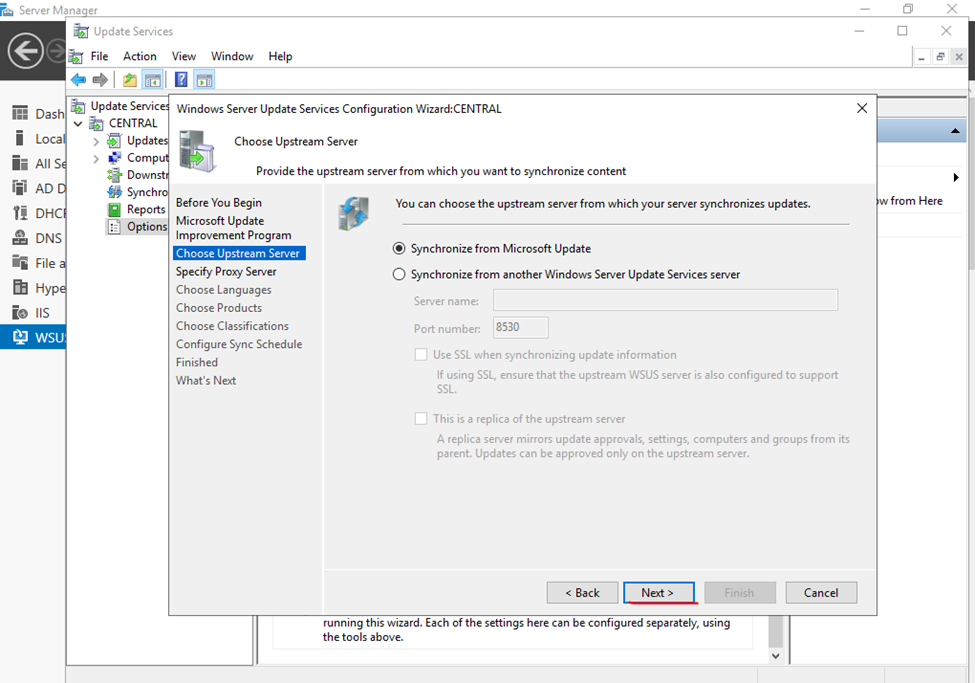
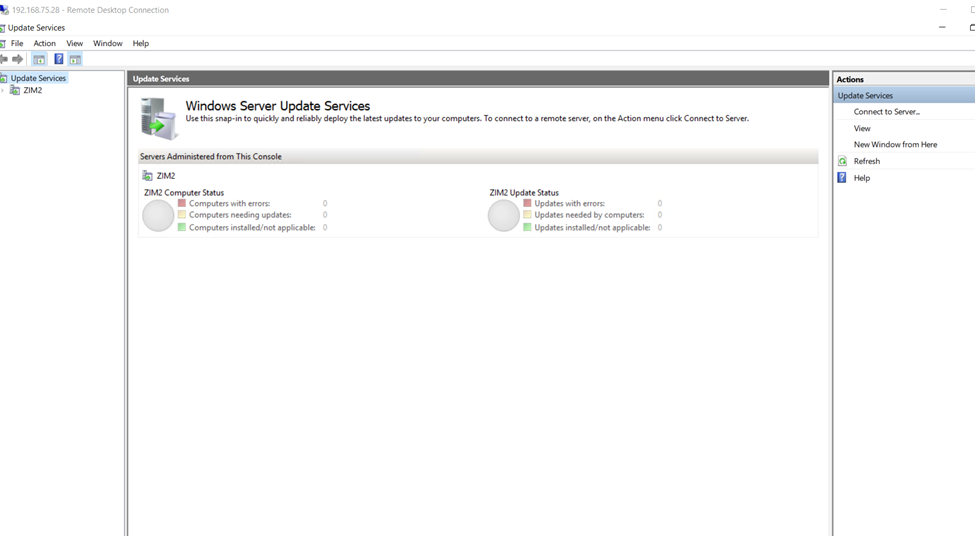
Install and configure Windows Server Update Services (WSUS)
WSUS- Windows Server Update Services
Windows updates are released to fix bugs, fix security issues in OS and to add new features to operating system. The Windows Updates rely on Windows Update service which is set to start automatically by default.
install and configure WSUS (Windows Server Update Services) on Windows Server 2019.
Benefits of WSUS – Windows Update service downloads and installs recommended and important updates automatically.
Categories of updates:
Critical Updates
Security Updates
Drivers
Update Rollups
Service Packs
Tools
Feature Packs
Updates
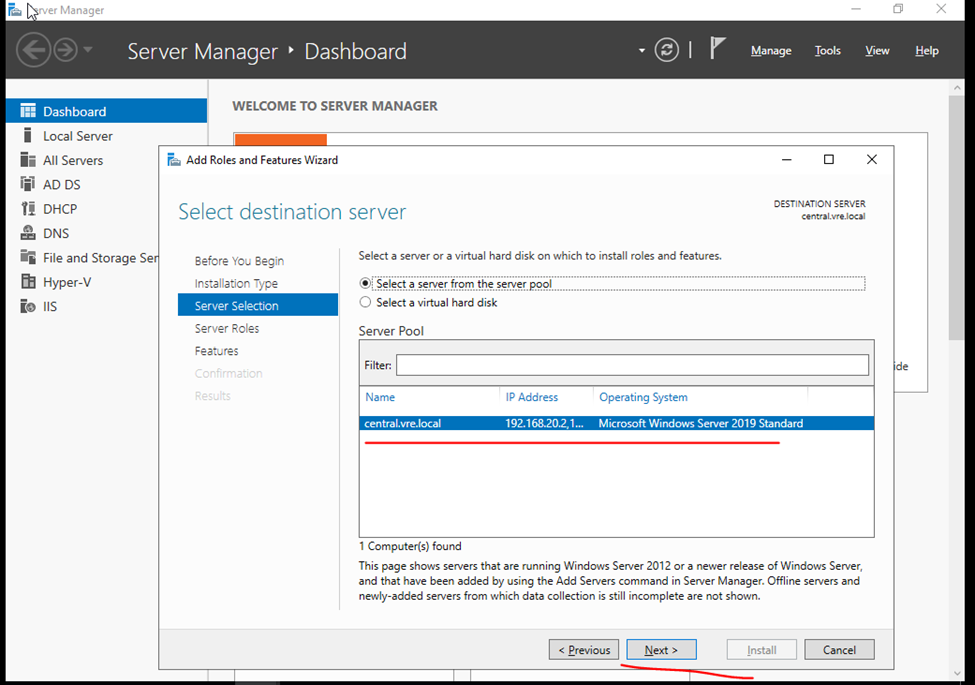
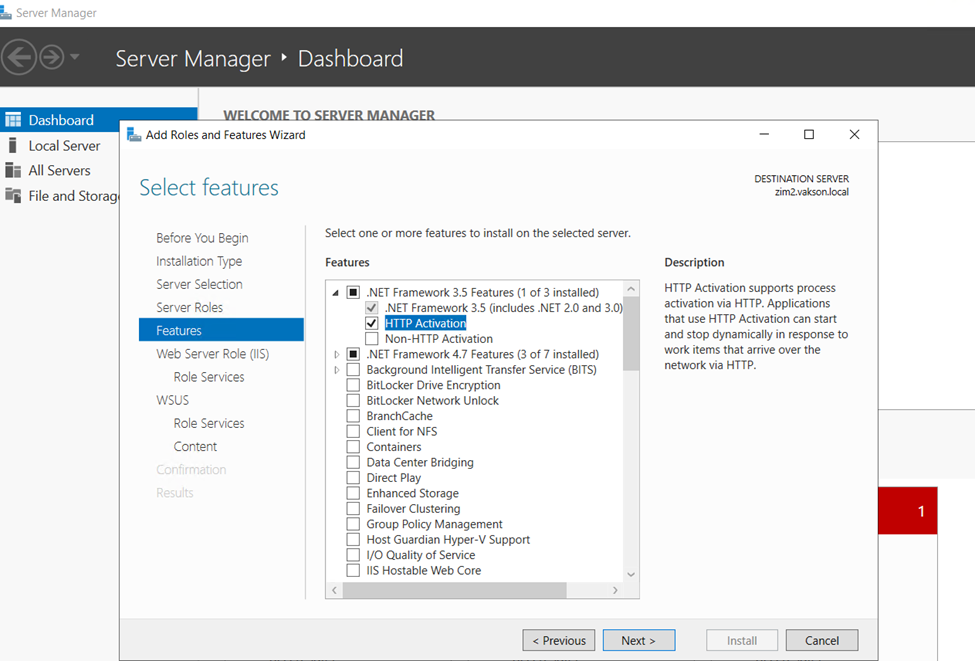
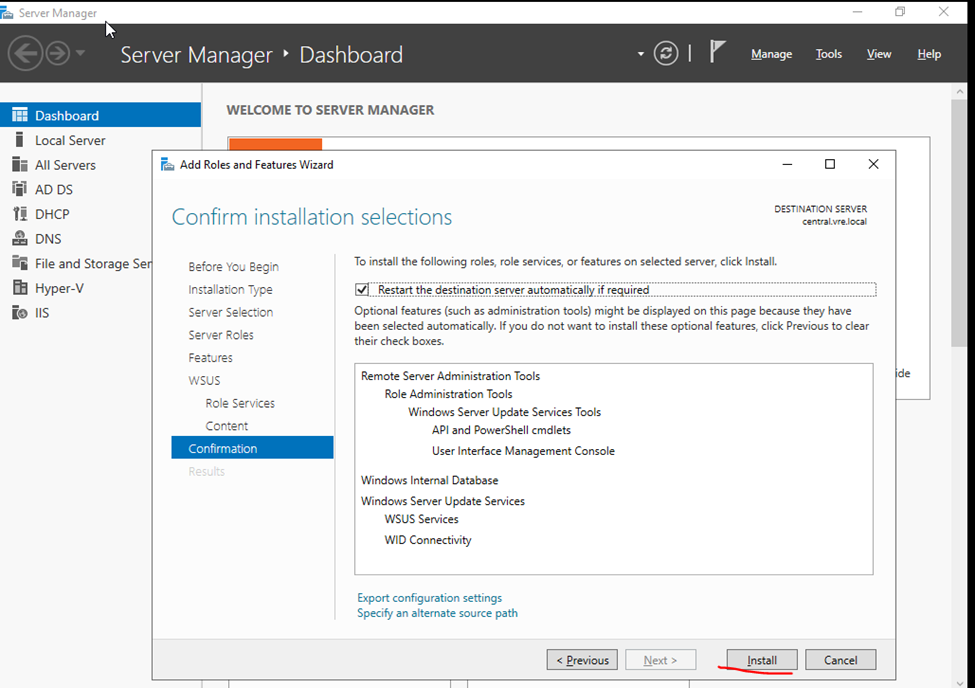
Server Manager- Add Roles and Features
Select Role Based and features based installation
On the Server Selection page, verify the server name and click Next.
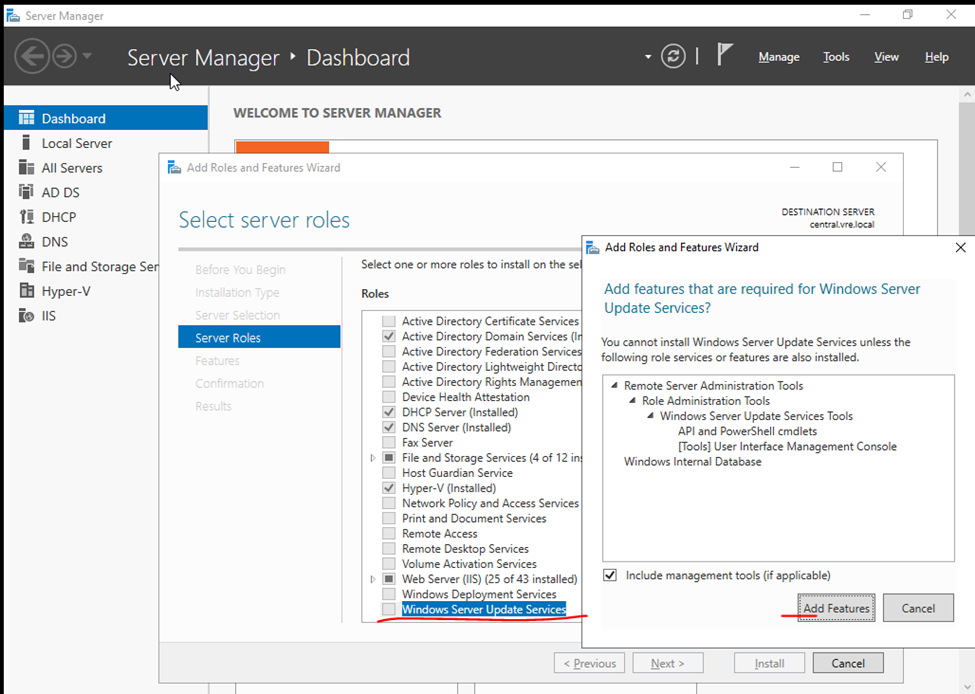
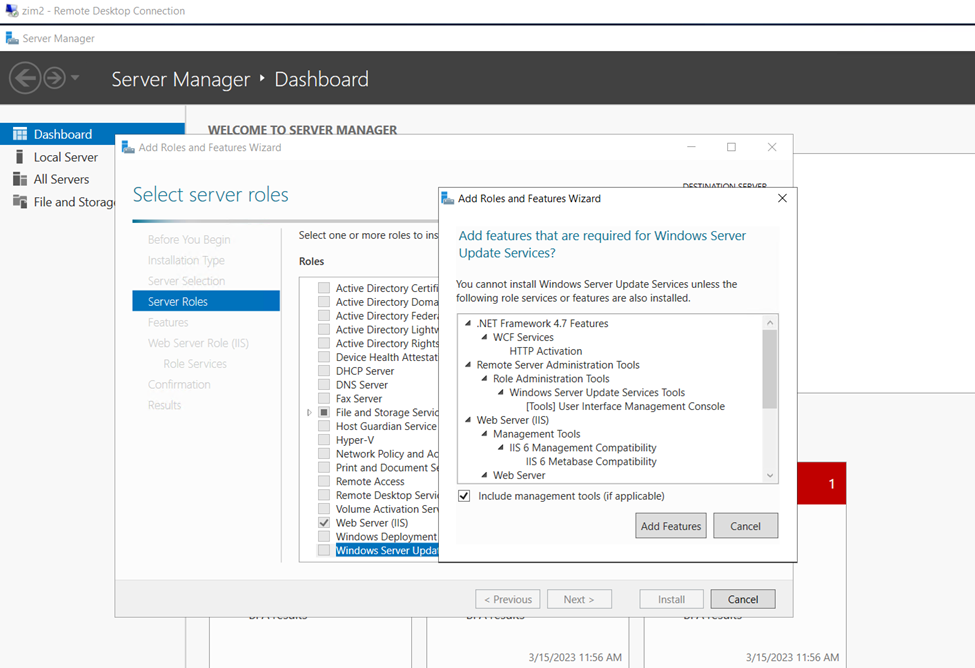
Server Roles – Windows Server Update Services
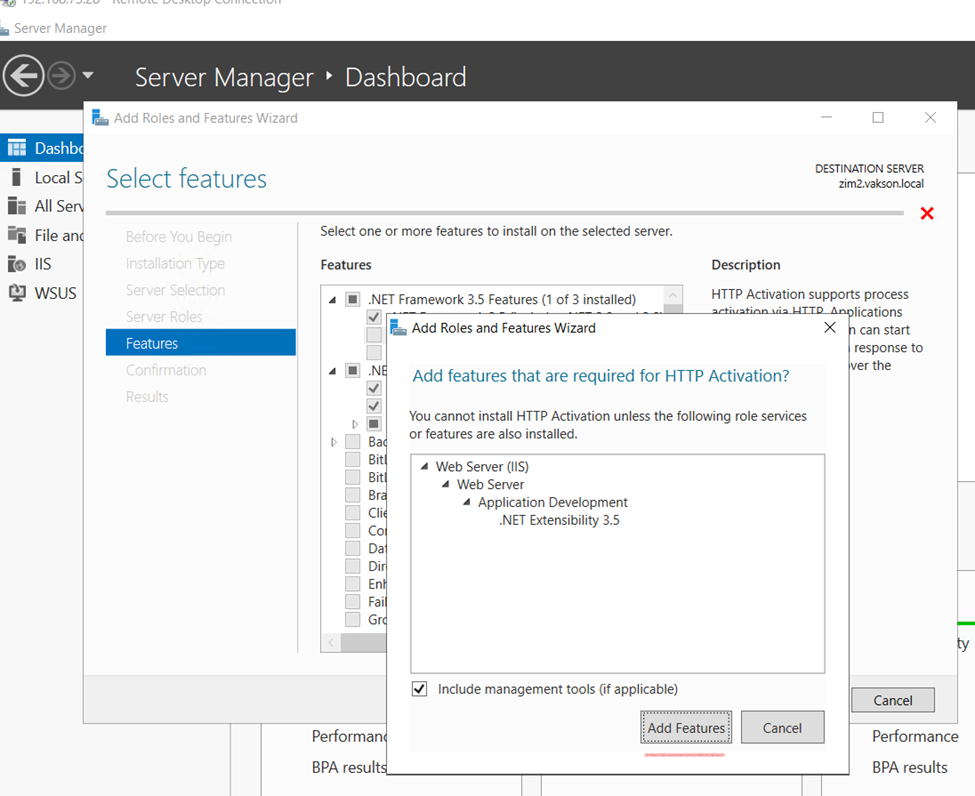
On the Server roles page, select the role Windows Server Update Services. You should see Add features that are required for Windows Server Update Services box. Click Add Features, and then click Next.
Next
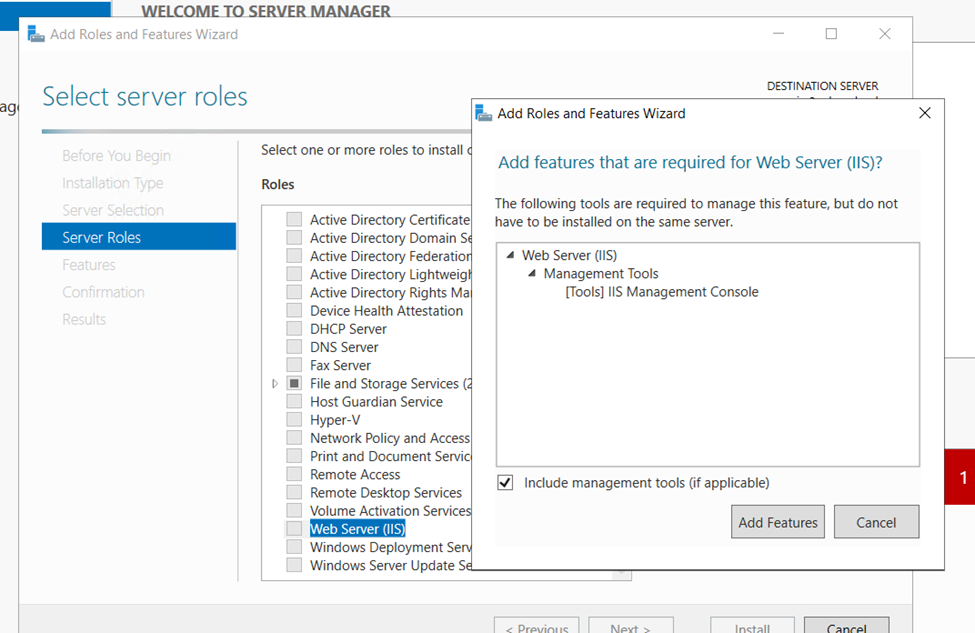
Or Including with IIS Server
Add features
Also select HTTP Activation
Click and next
Next
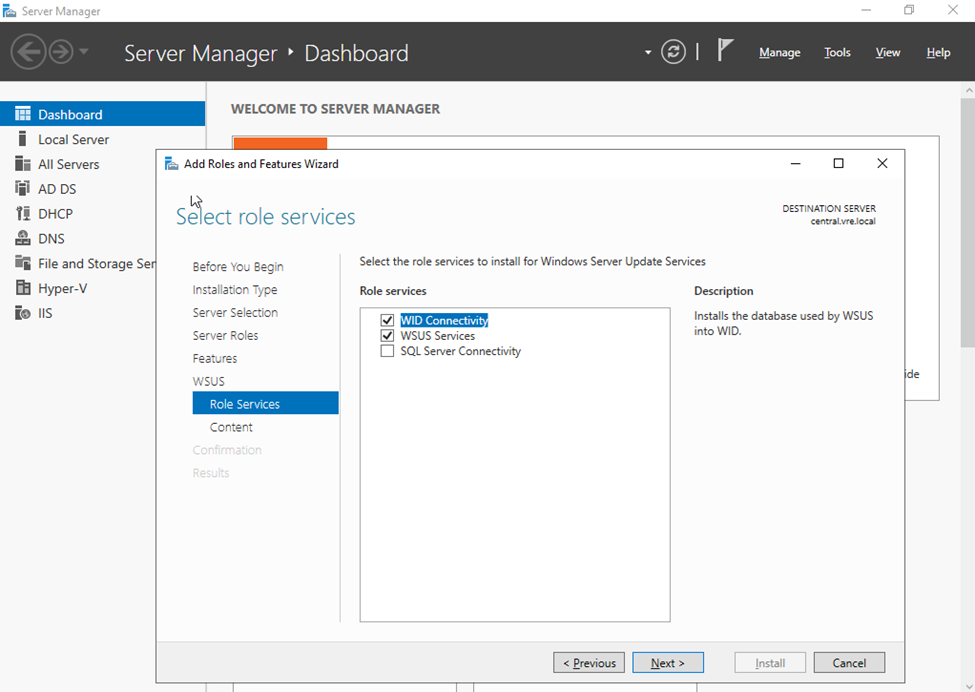
Select WID Connectivity and WSUS Services. Click Next.
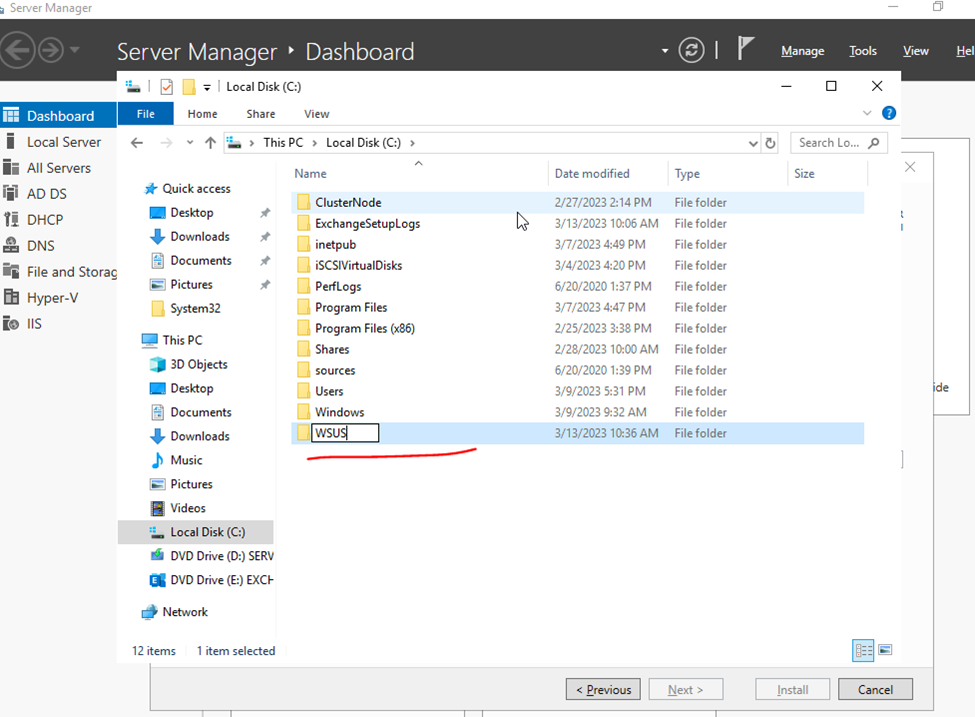
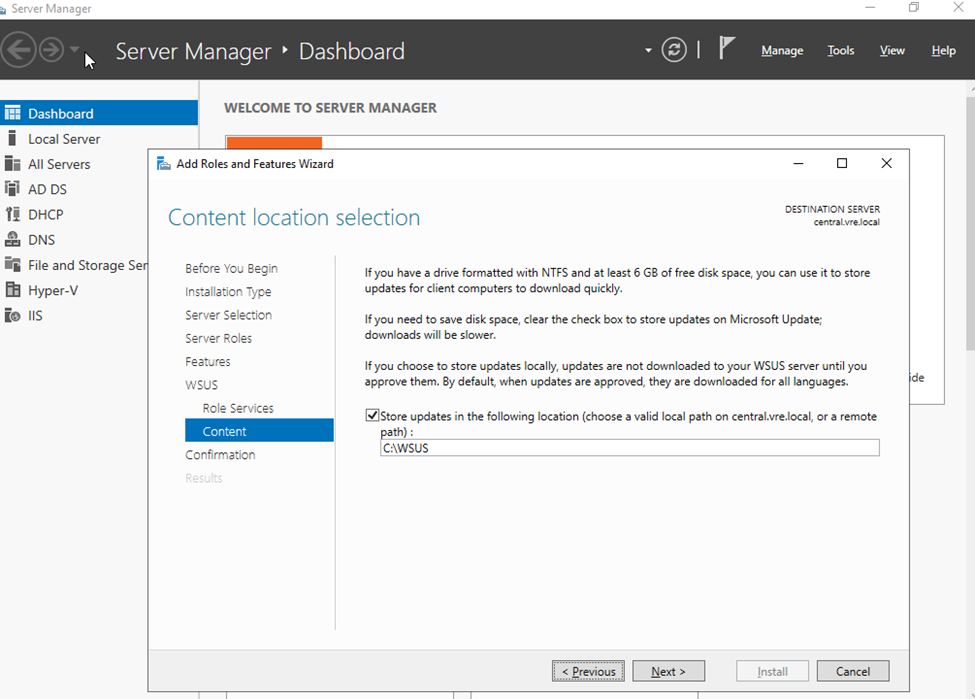
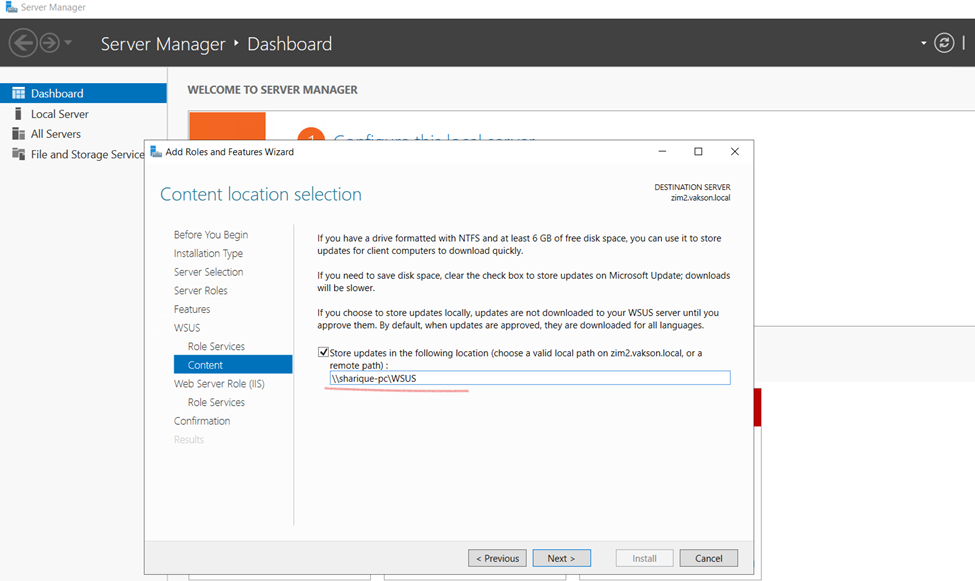
Create a patch folder
The size of this folder can grow eventually and you don’t want this folder to reside on C: drive. Hence choose either a separate drive or store the updates on remote server.
OR Network folder
Next
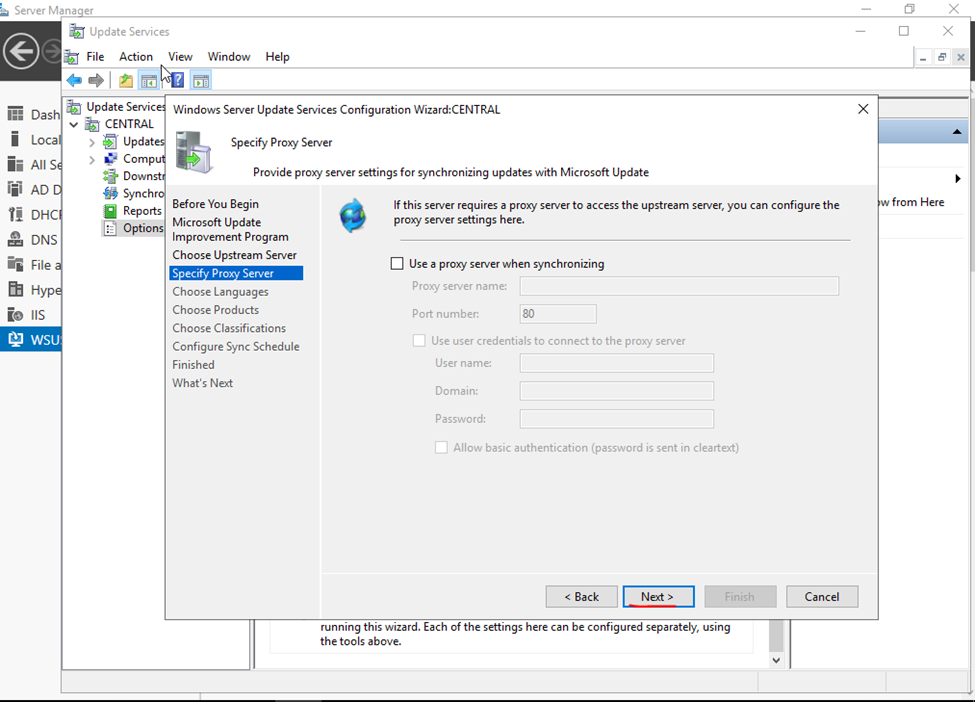
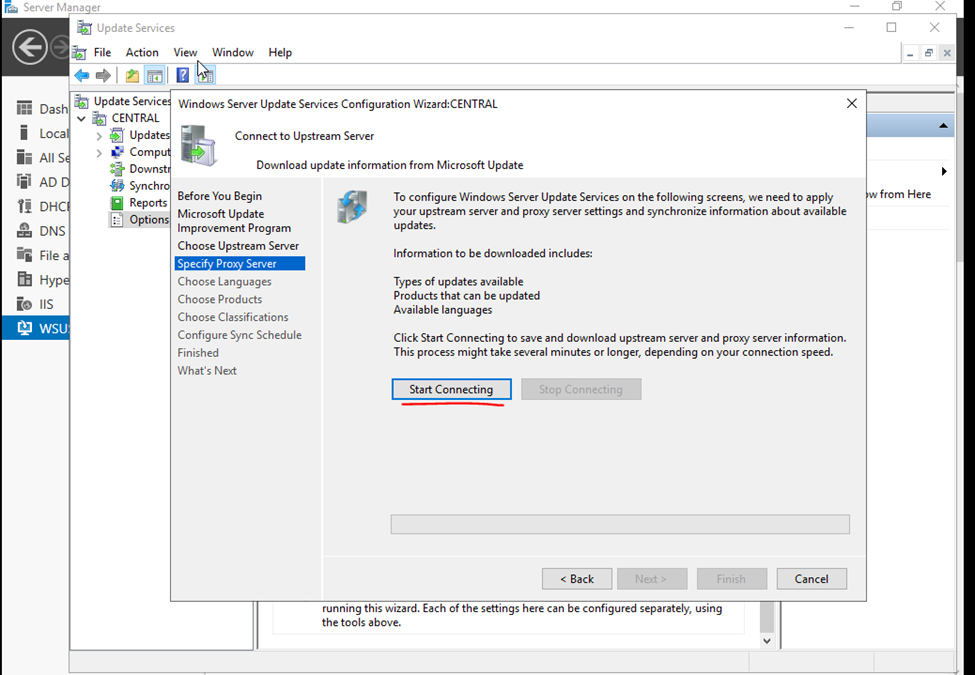
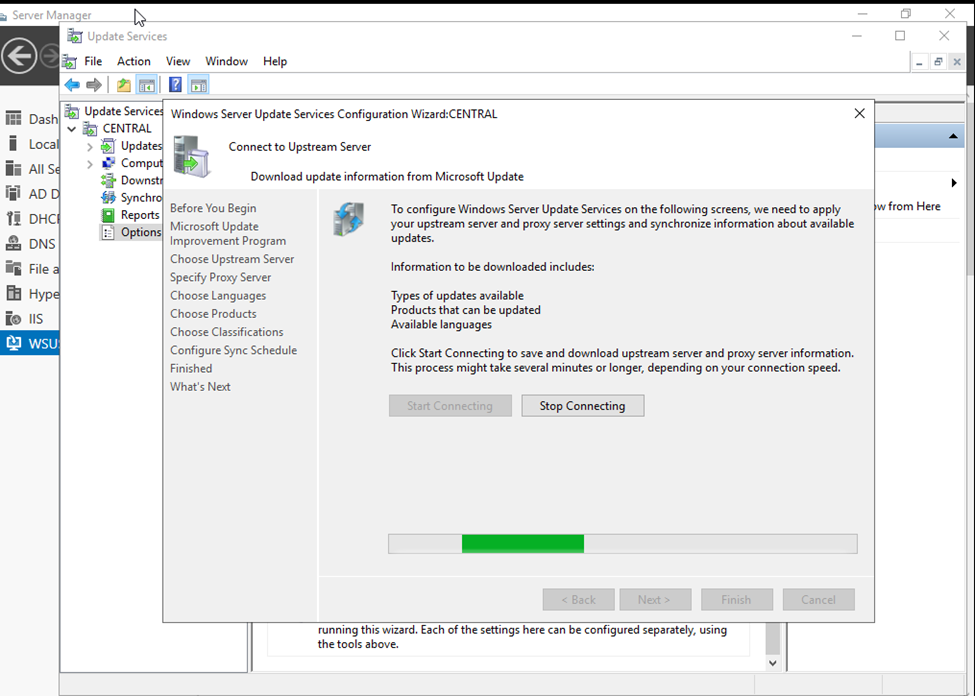
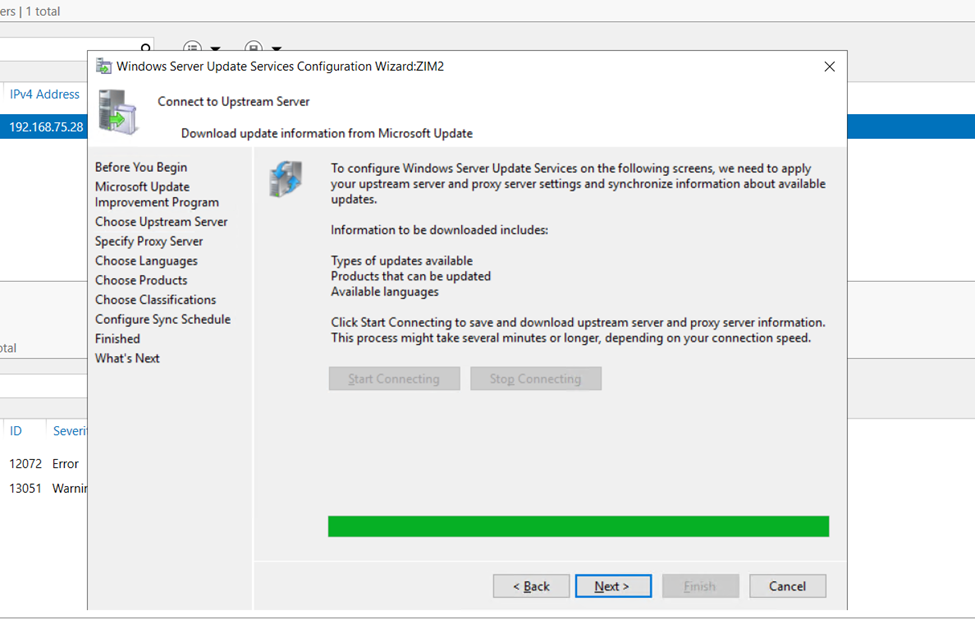
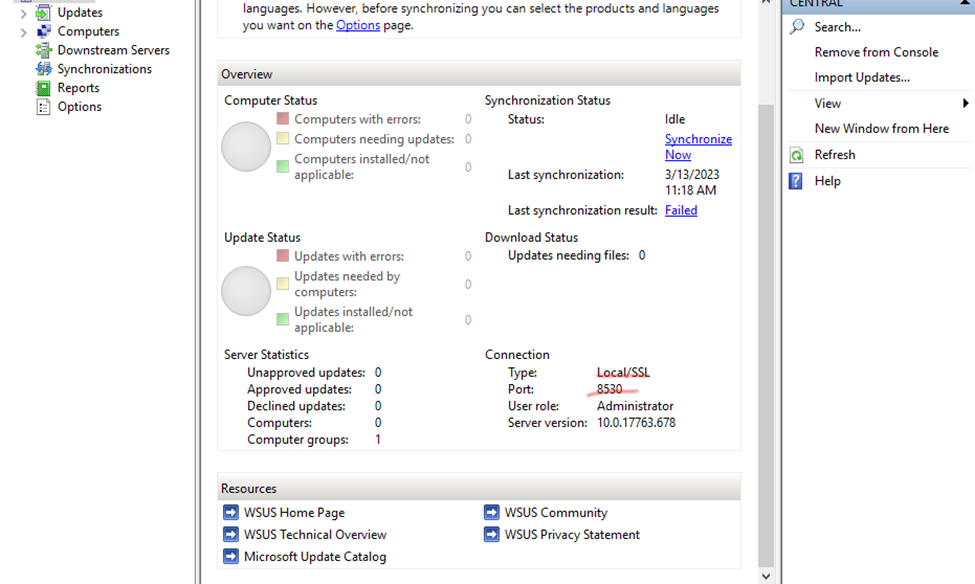
On the Connect to Upstream Server page, click Start Connecting button.
synchronization task is completed click Next
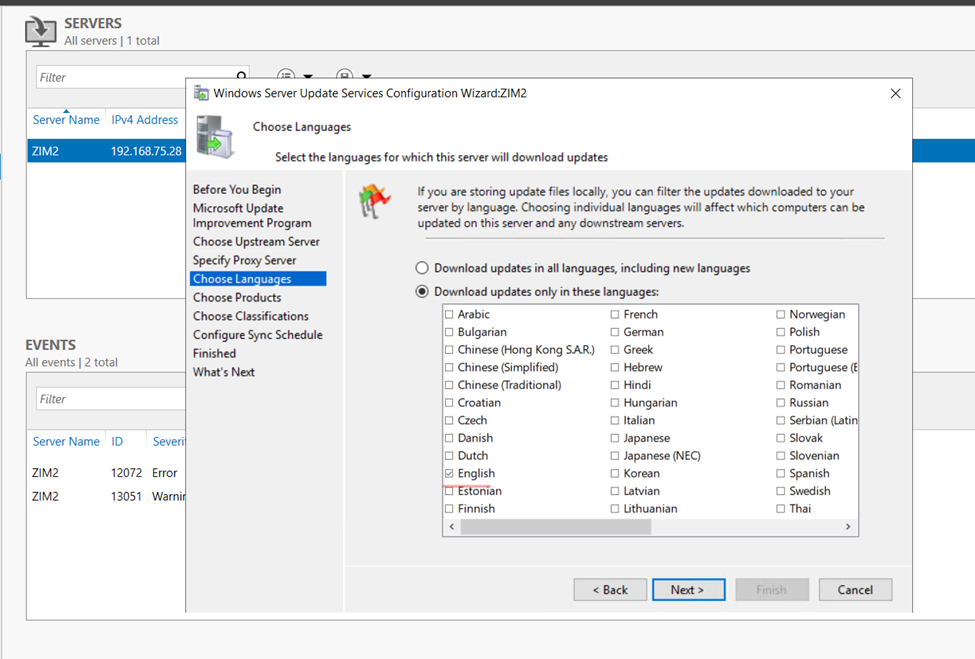
Choose Languages screen, click Download updates only in these languages. Check English and any other additional language you wish to download updates
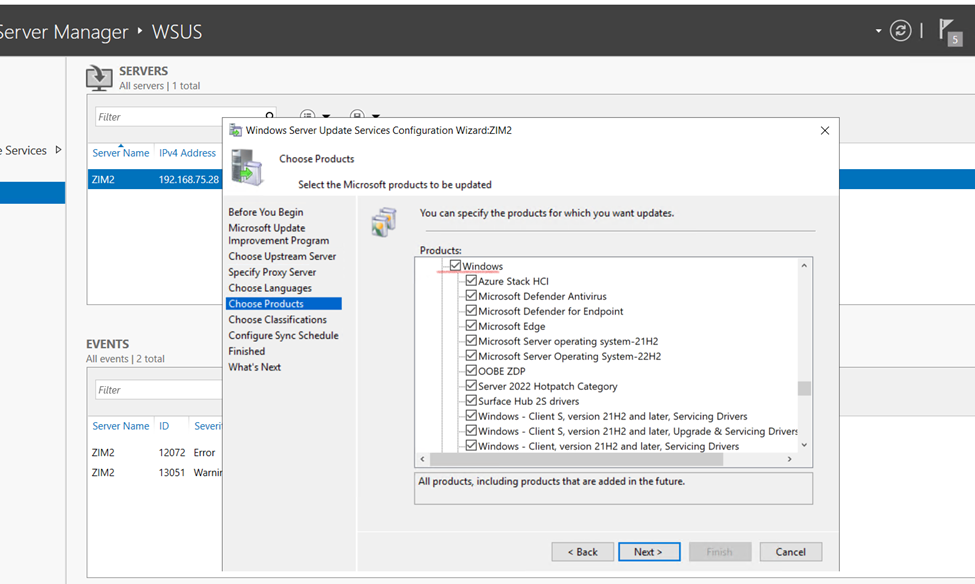
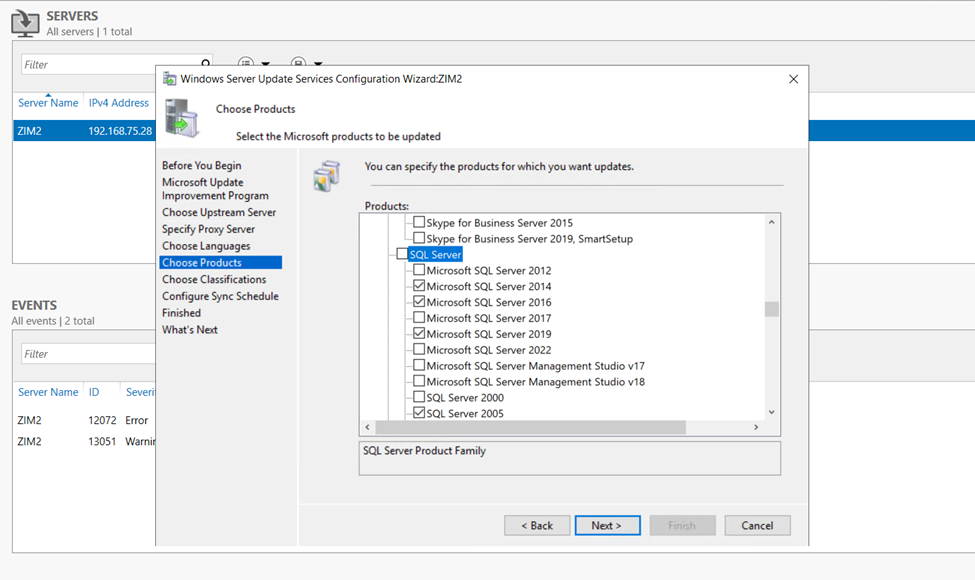
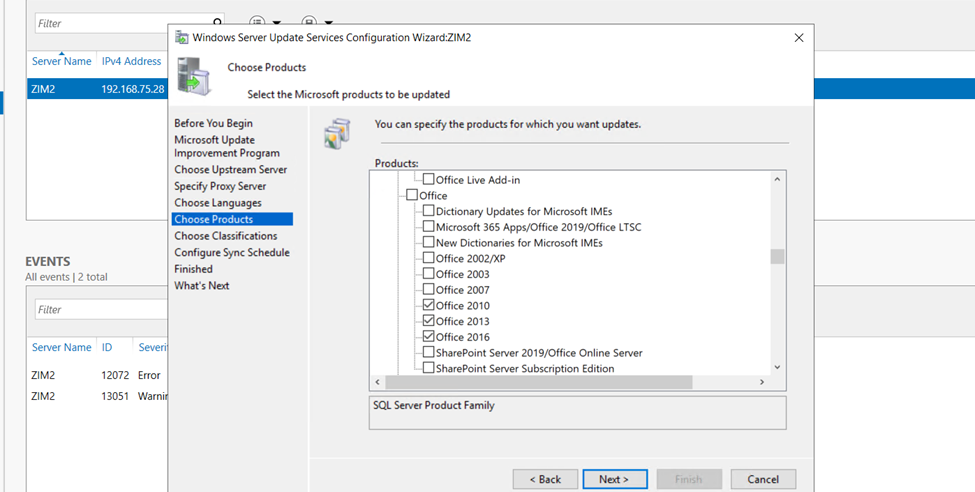
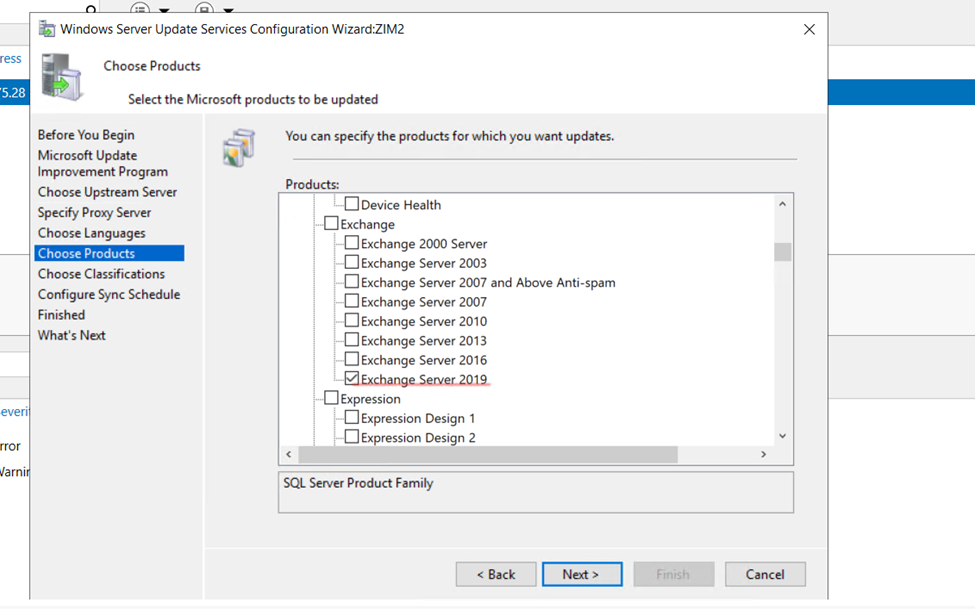
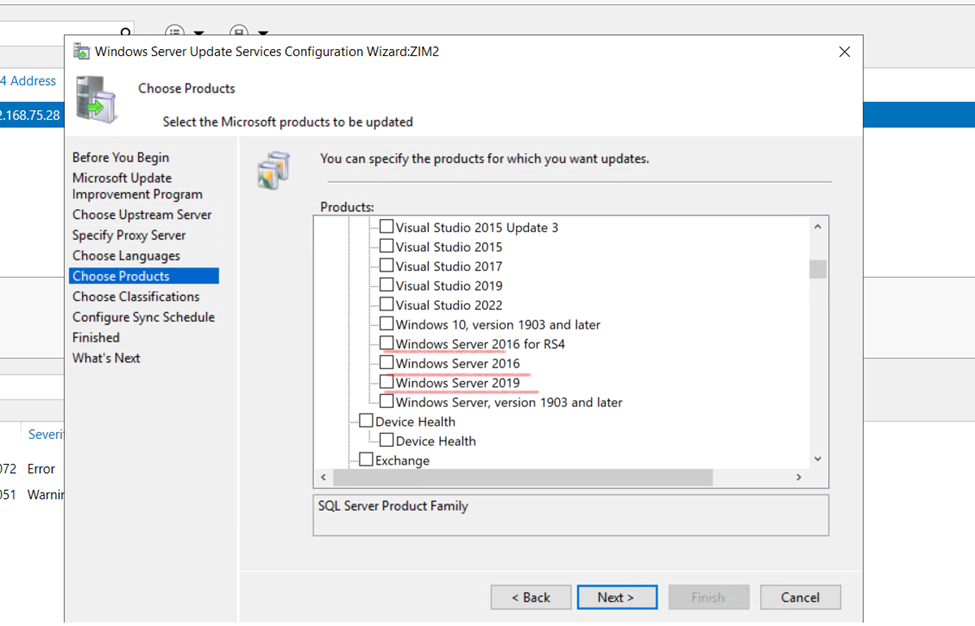
On the Choose products screen, check all products you wish to update. Scroll down to the Windows section and uncheck it. Then check only the Windows versions you have in your environment.
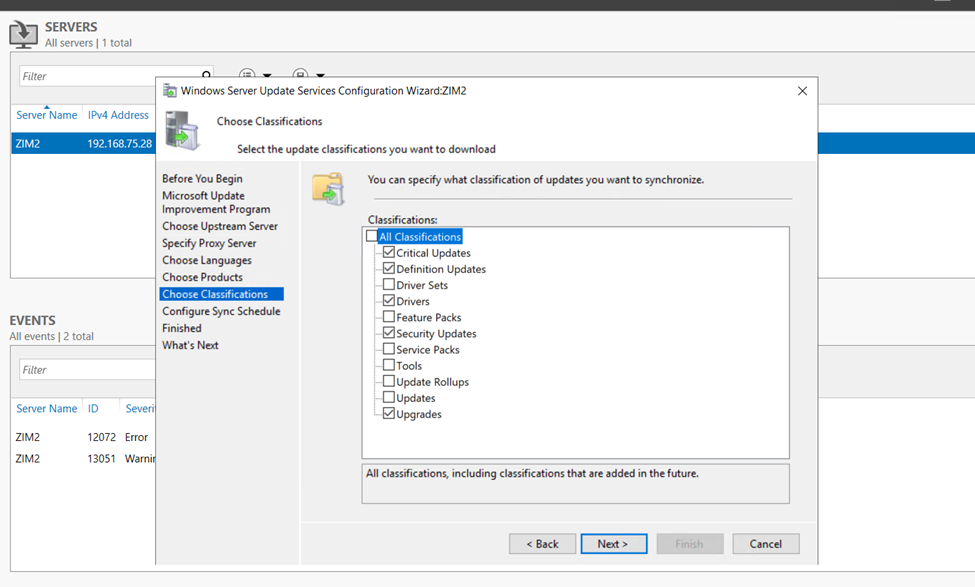
Choose Clarifications screen offers option to determine Windows update classifications you wish to download.
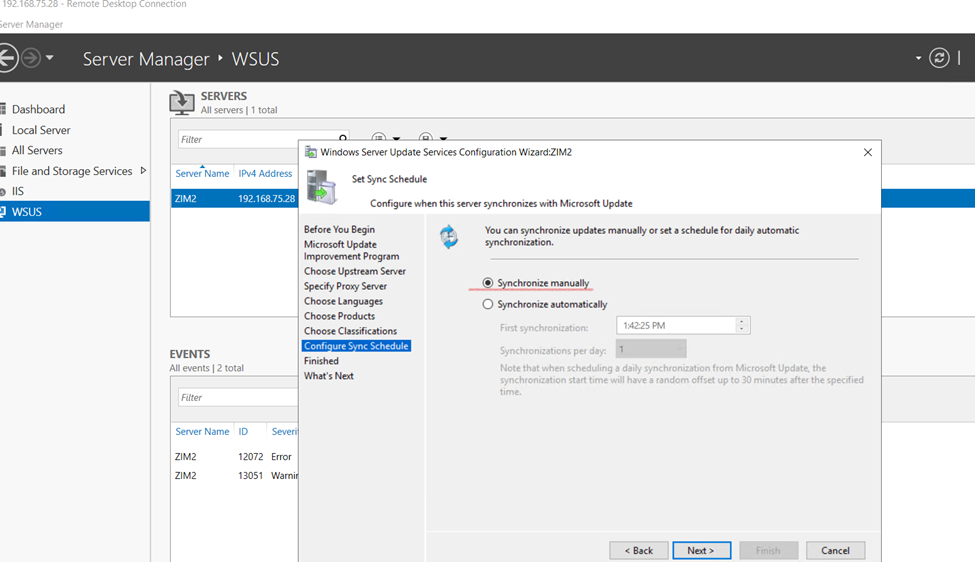
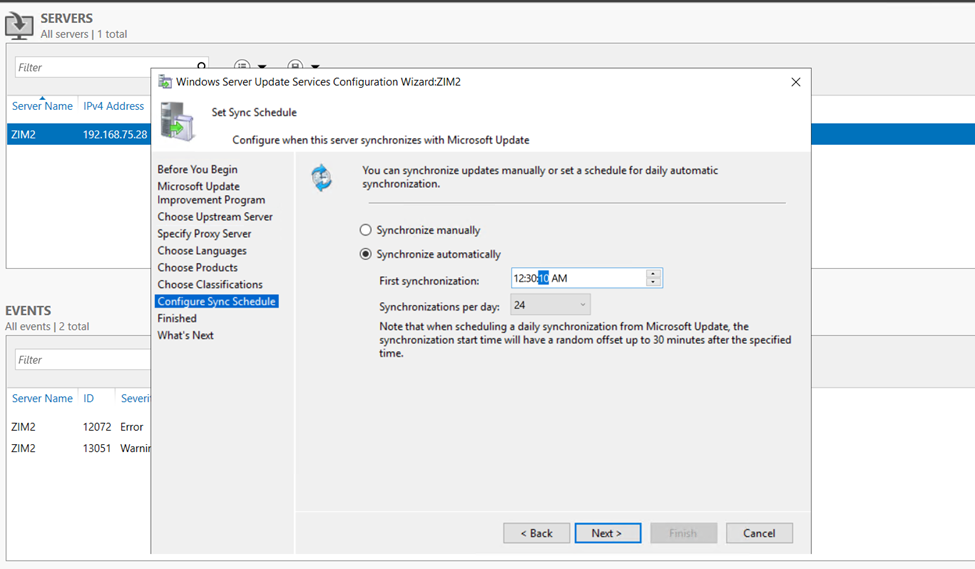
Set Sync Schedule screen configure to sync manually or automatically and Next.
If you choose Synchronize manually, you must manually start the synchronization process from the WSUS Administration Console. With this option selected, you have to manually perform the sync every time. Therefore do not select this option if you are setting up the WSUS in production.
It is recommended to set the automatic sync between the primary WSUS and WSUS Replica as frequently as possible (24 syncs a day), because in scenarios where a remediation plan was activated on endpoints that communicate with WSUS Replica (Downstream WSUS) the “execute patch installation for single computer” task will only work after the Primary and Replica WSUS sync successfully.
If the sync has yet to occur, you will see either an exit code 341 or 342 for the “execute patch installation for single computer” task.
In order to change the sync schedule to be as frequently as possible, do the following on the WSUS replica.
Go to Options
Open Synchronization Schedule
Make sure Synchronize automatically is enabled and set to 24 synchronizations per day.
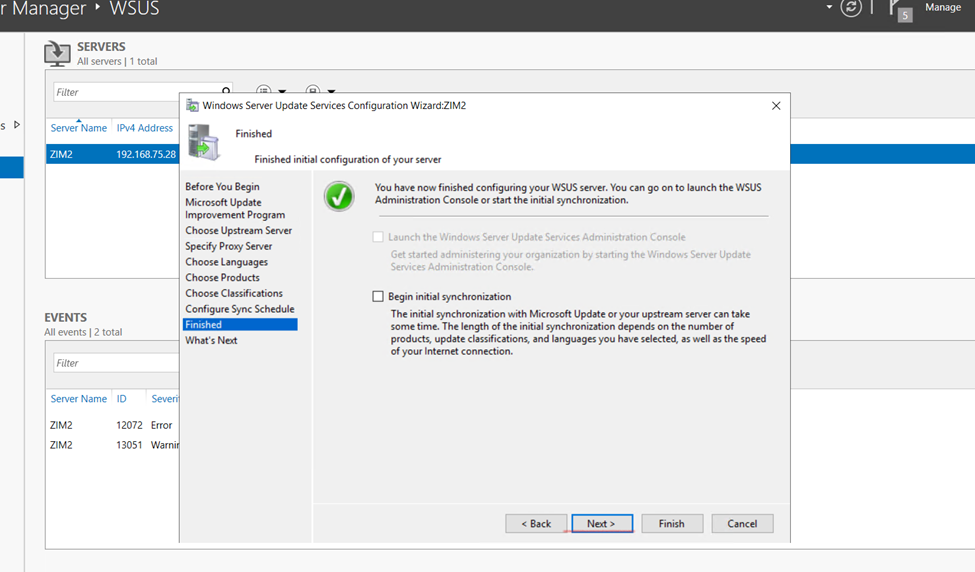
Next Begin WSUS Initial synchronization
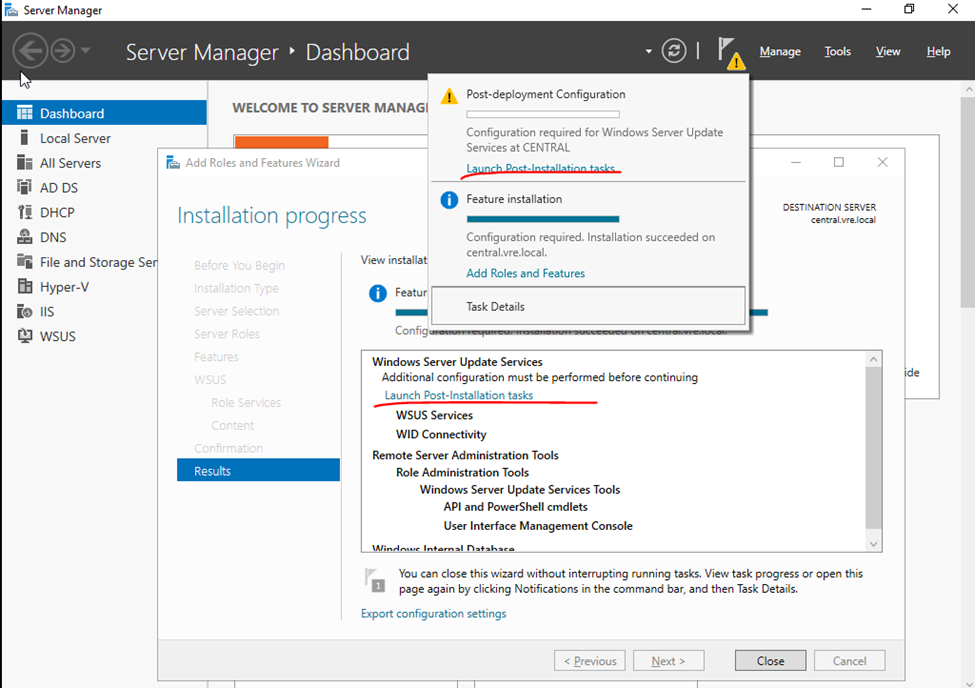
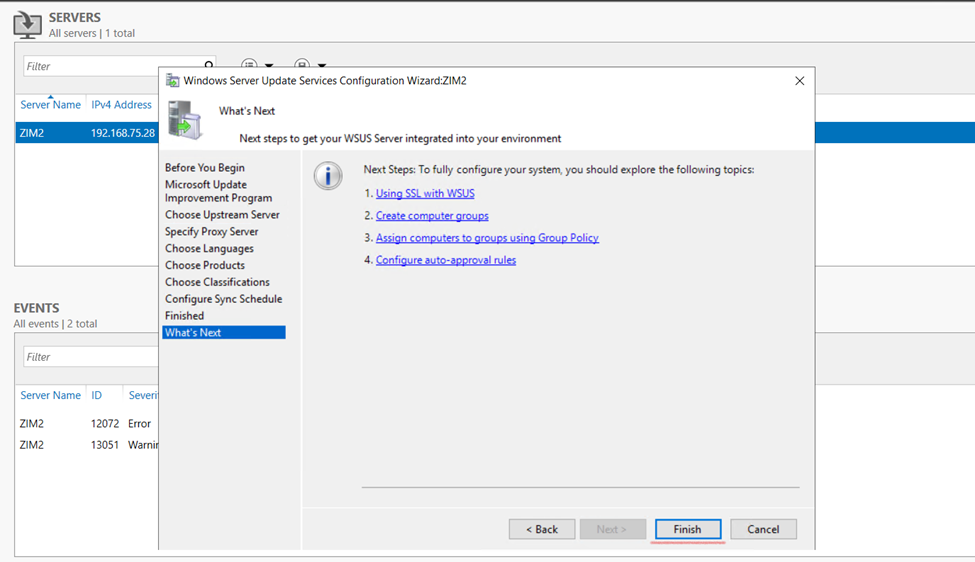
Finally on the last page, click Finish. This completes the steps to configure WSUS
So now,
Need to configure GPO
If you wanted to connect to specific need to install IIS (Internet Information Services).
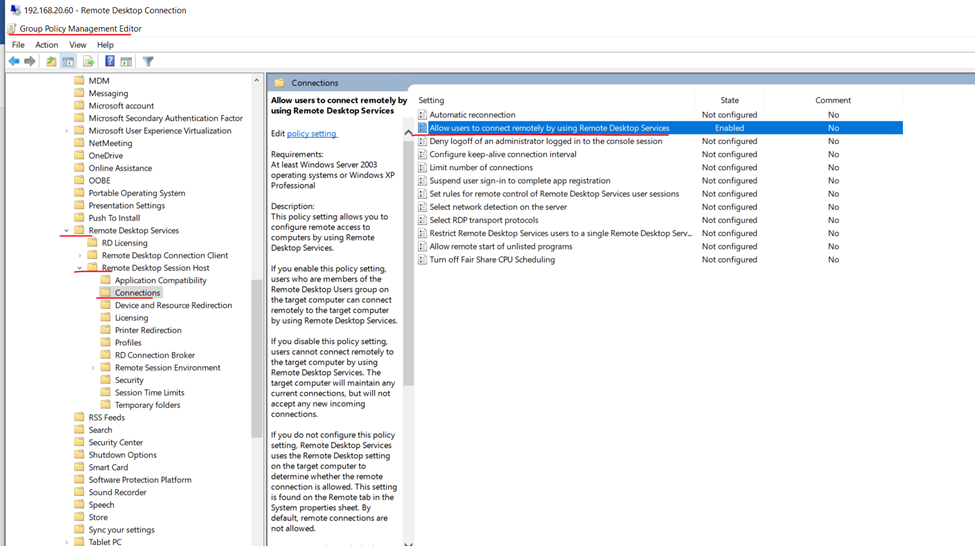
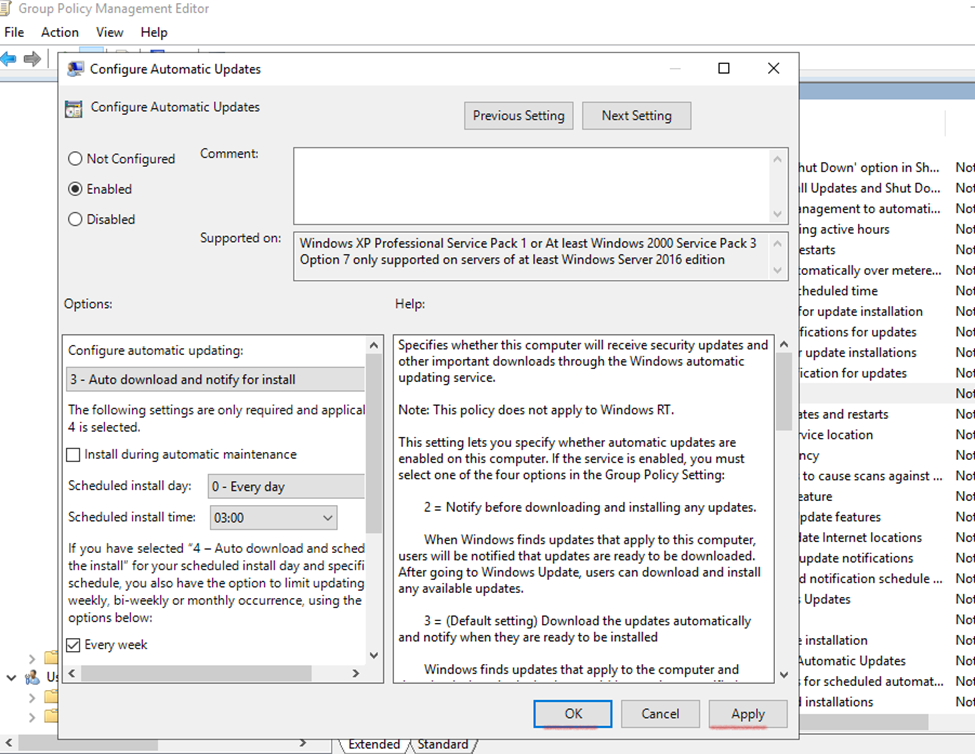
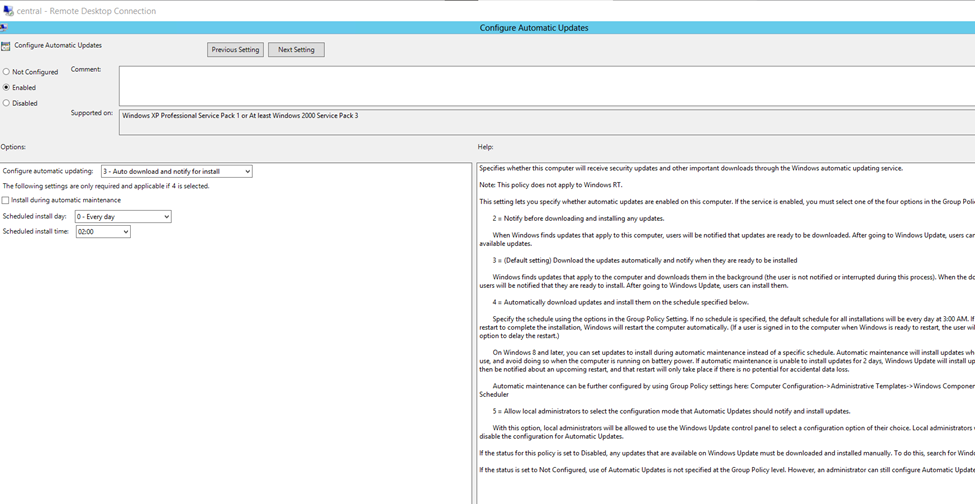
Configure Group Policy Settings for WSUS
After you install and configure WSUS, the next important task is to configure group policy settings for automatic updates.
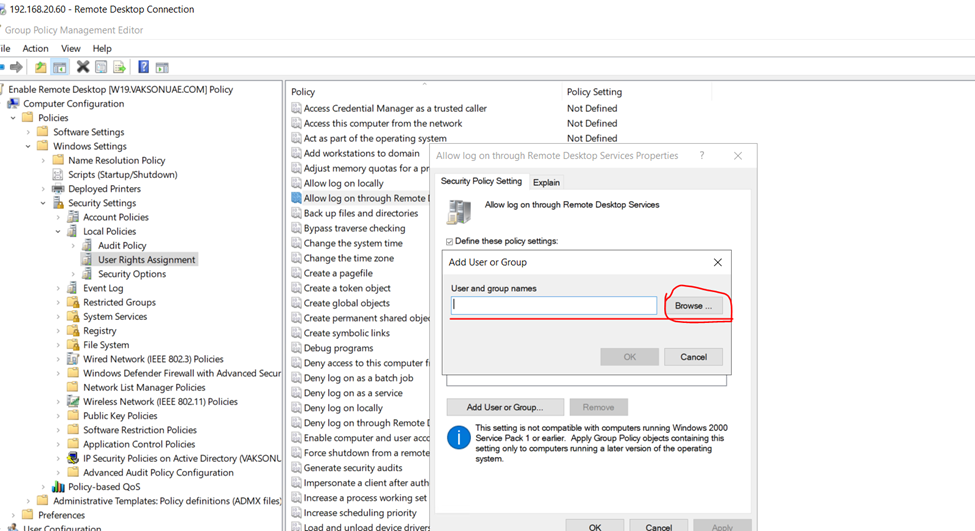
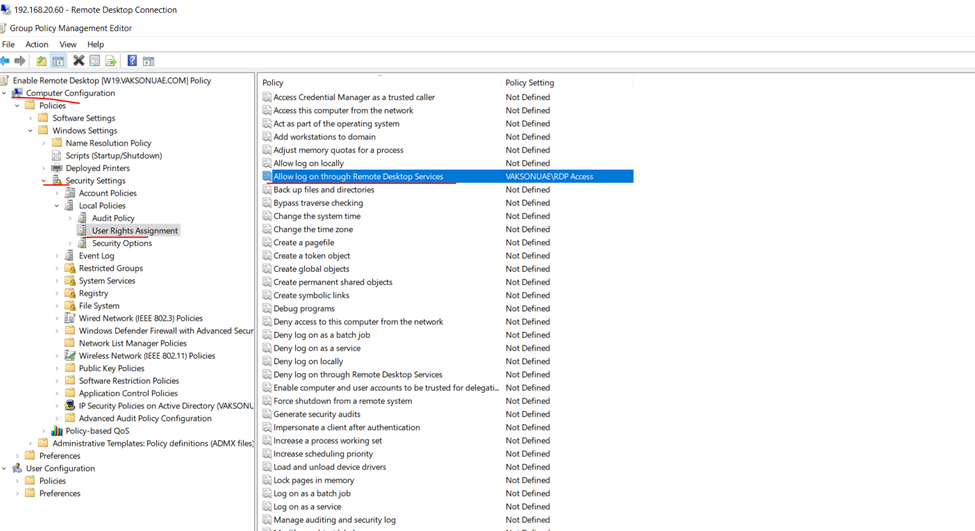
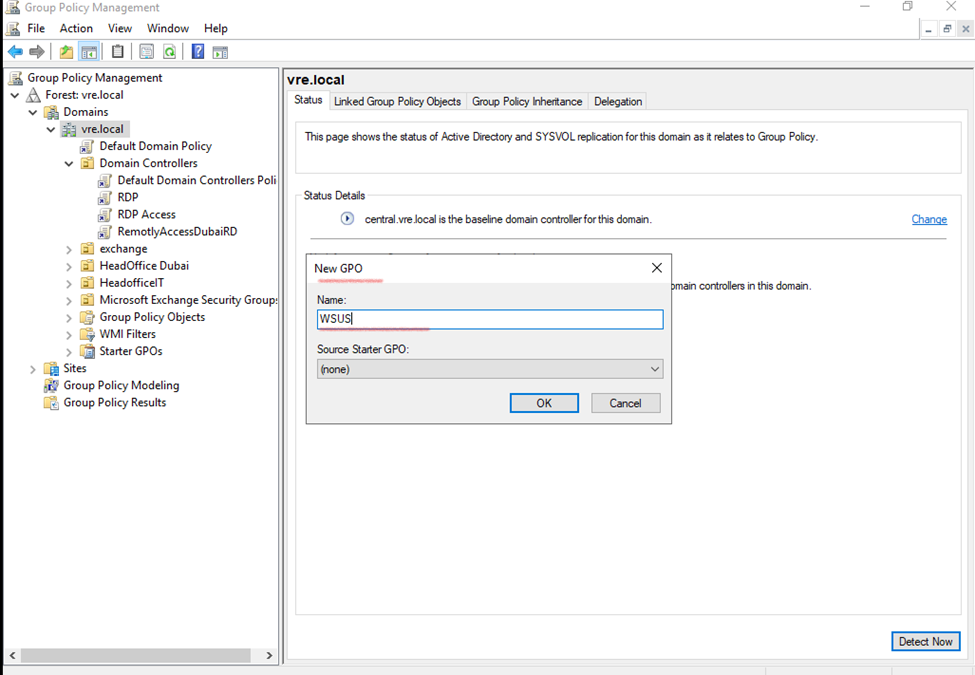
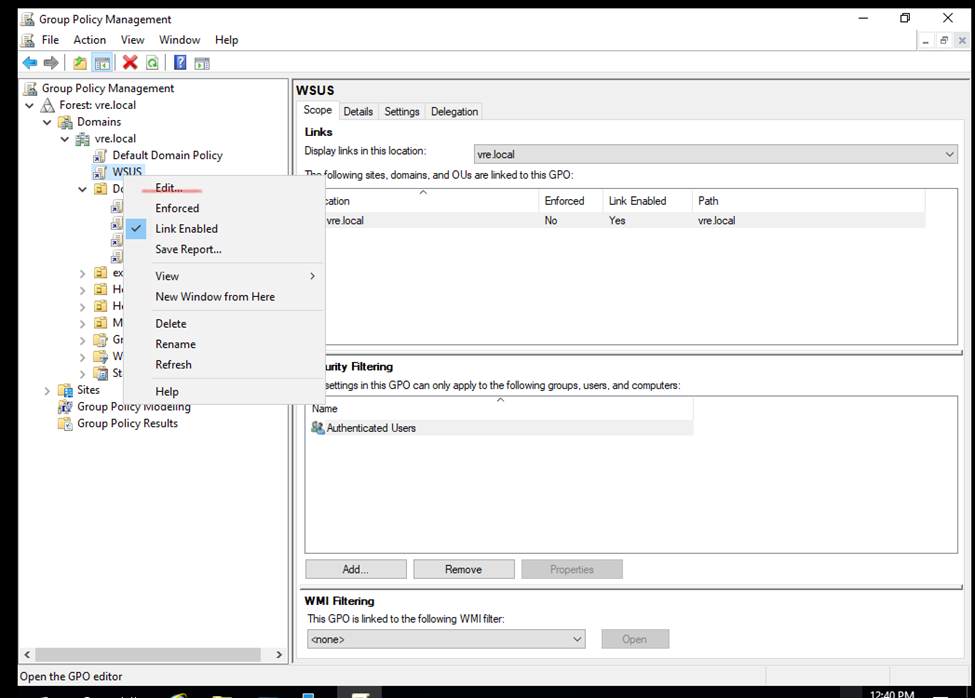
Open the Group Policy Management console, and open an existing GPO or create a new one.
WSUS – Create as per you, Group Policy
Once created Group policy click to edit once edited – you will redirect to GPO EDIT Windows
Edit GPO
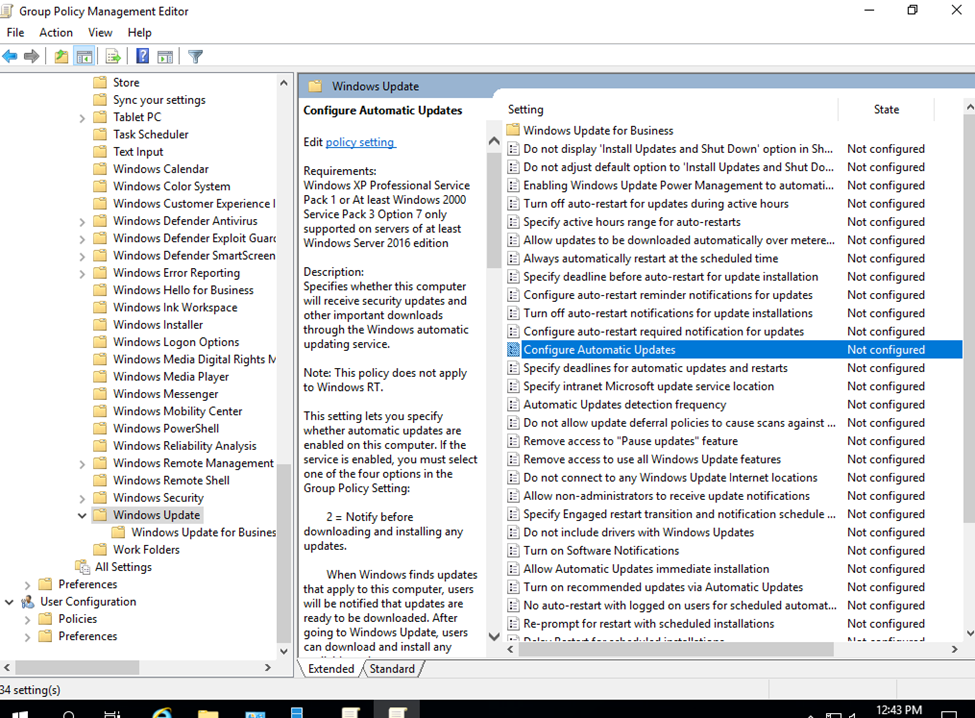
Configure WSUS Automatic Updates
Go to
Computer Configuration > Policies > Administrative Templates > Windows Components > Windows Update.
Double-click Configure Automatic Updates and set it to Enabled
Enable auto update
Intranet (Private Network).
You can design your private organization according to your need.
Locally connect to office devices environment, Like Computer, Server, Printer and etc. – office server which is only associated to only your office environment known as Intranet.
Mostly Intranet use for officially keep the data secure which is not connected to internet.
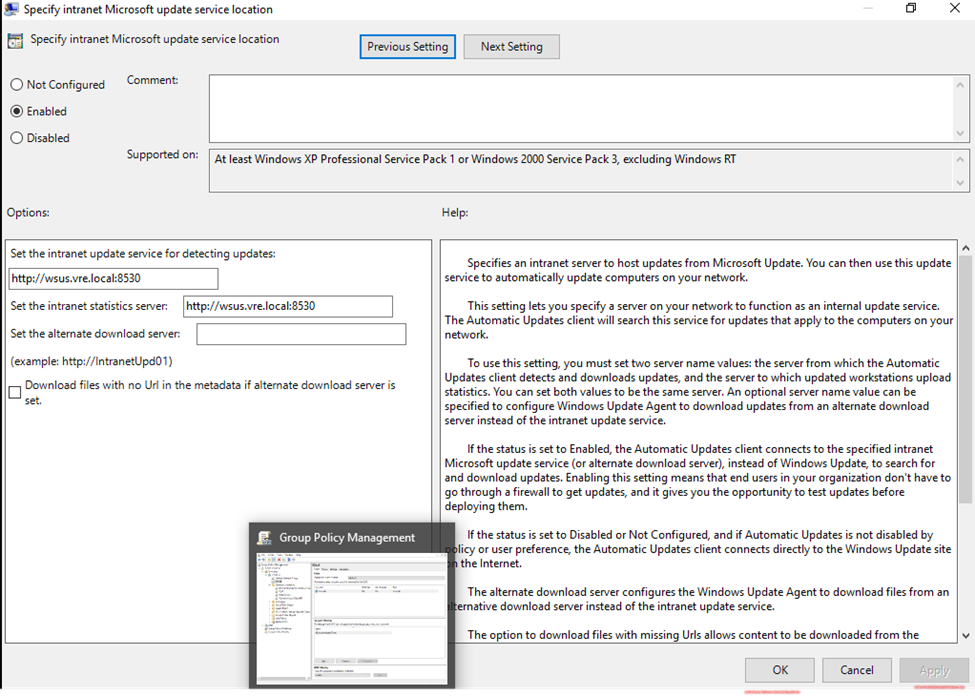
Specify Intranet Microsoft Update Service Location
The idea behind this is to ensure the client computers contact the specified intranet server instead of downloading updates from internet. Unless you configure this policy setting, the client computers
Computer Configuration > Policies > Administrative Templates > Windows Components > Windows Update.
Double-click Specify Intranet Microsoft update service location and set it to Enabled
Specify intranet Microsoft Update service location
(in your Domain Controller your attached PC – Address will be appear here)
So my wsus pc url is : wsus.vre.local
Default port for wsus: 8530
Specify intranet Microsoft Update service location
On the client computer, check the resultant set of policy to confirm if the WSUS GPO is applied
To enable the policy, click Enabled. Specify the intranet update service and intranet statistics server. Click Apply and OK
How to Start, Stop and Restart Windows Server Update WSUS Services via PowerShell and CMD Start the WSUS service Start-Service wsusservice Stop the WSUS service Stop-Service wsusservice view the status of the WSUS service Get-Service wsusservice
The below commands are Command line syntax used to start, stop and restart WSUS service. net stop wsusservice net start wsusservice
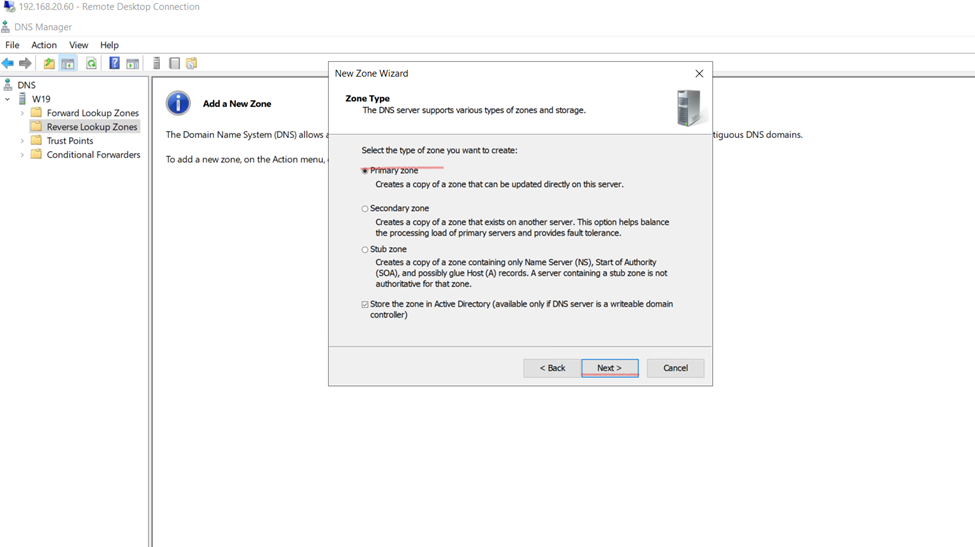
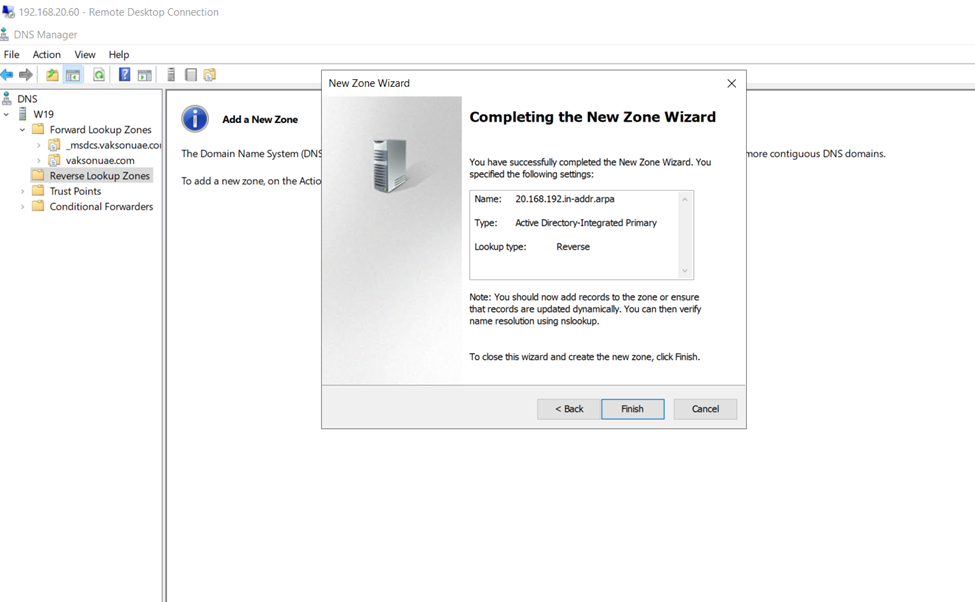
How to configure a DNS Reverse Lookup Zone in Windows Server 2019
How To add DNS Reverse Lookup Zone in Windows Server 2019
Reverse lookup zones are used to resolve IP addresses to a hostname. For reverse lookup zones to work they use a PTR record that provides the mapping of the IP address in the zone to the hostname.
Configuring DNS Reverse Lookup zone
Go to tools and open DNS
DNS Manager, under your server, right-click on Reverse Lookup zones, and click on New Zone
Click on Reverse zone and create
next
How to Create PTR Records
Let’s walk through manually creating a PTR record. This is only needed if a system is not configured to dynamically update. This may be the case for systems with static IP addresses like servers
Back in the DNS console PTR record listed.
You can see in the picture above the IP returned the hostname
You can see in the picture above the IP returned the hostname
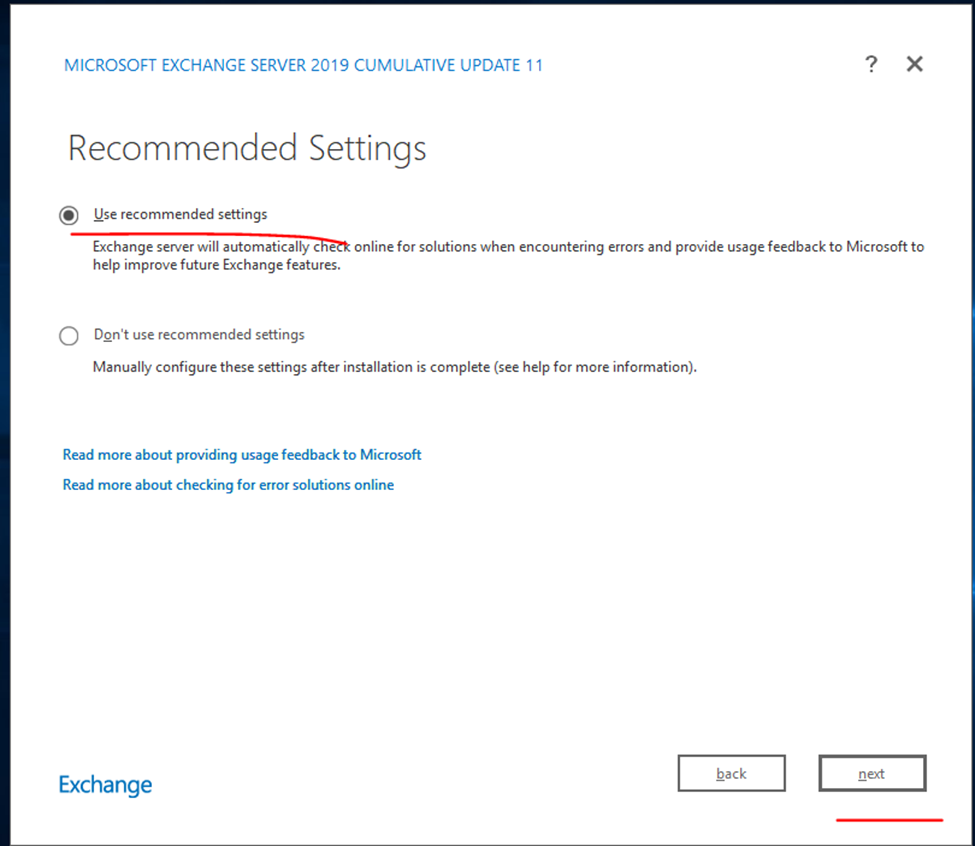
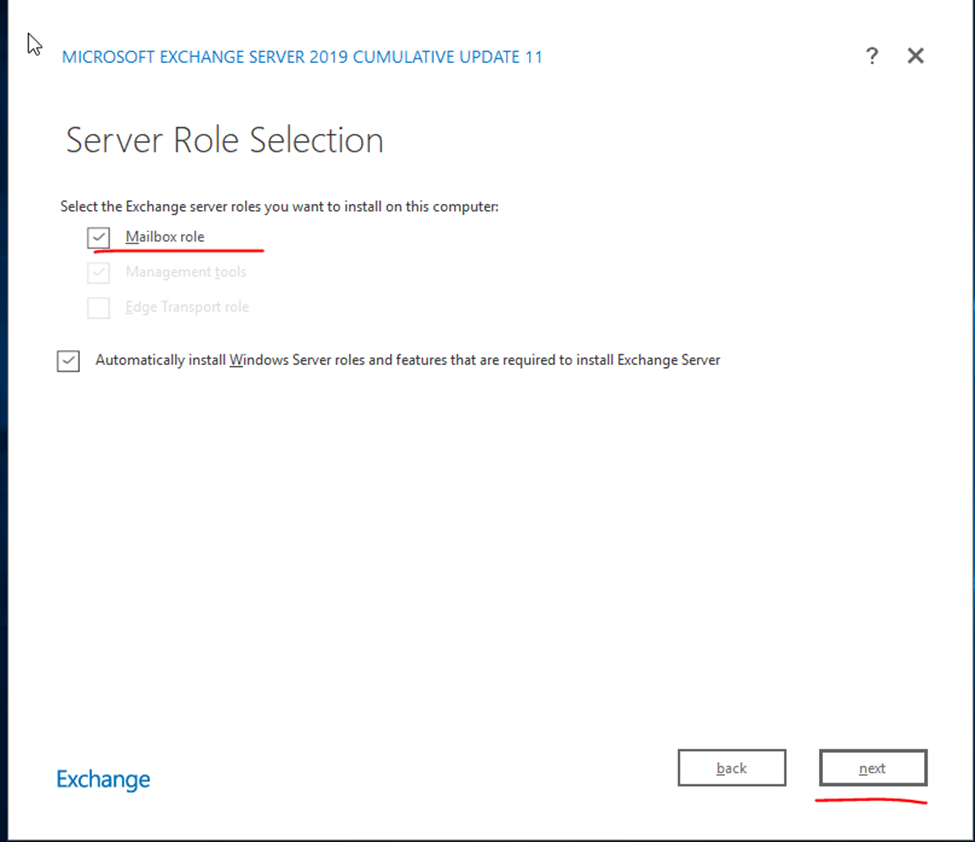
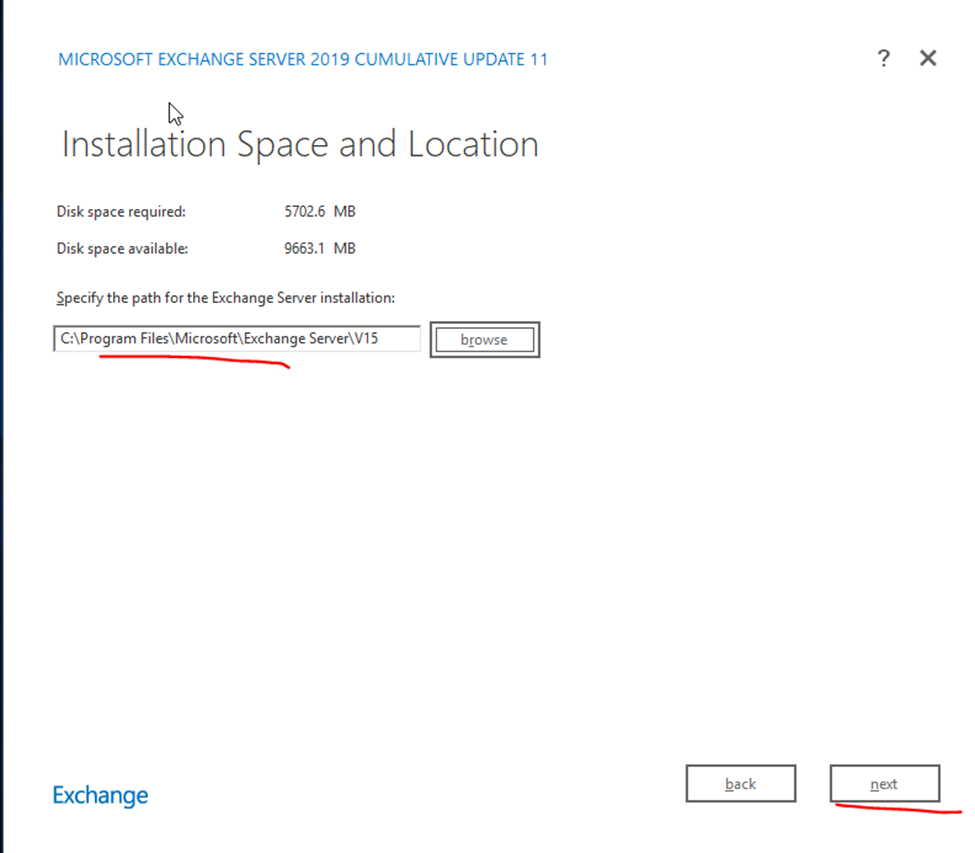
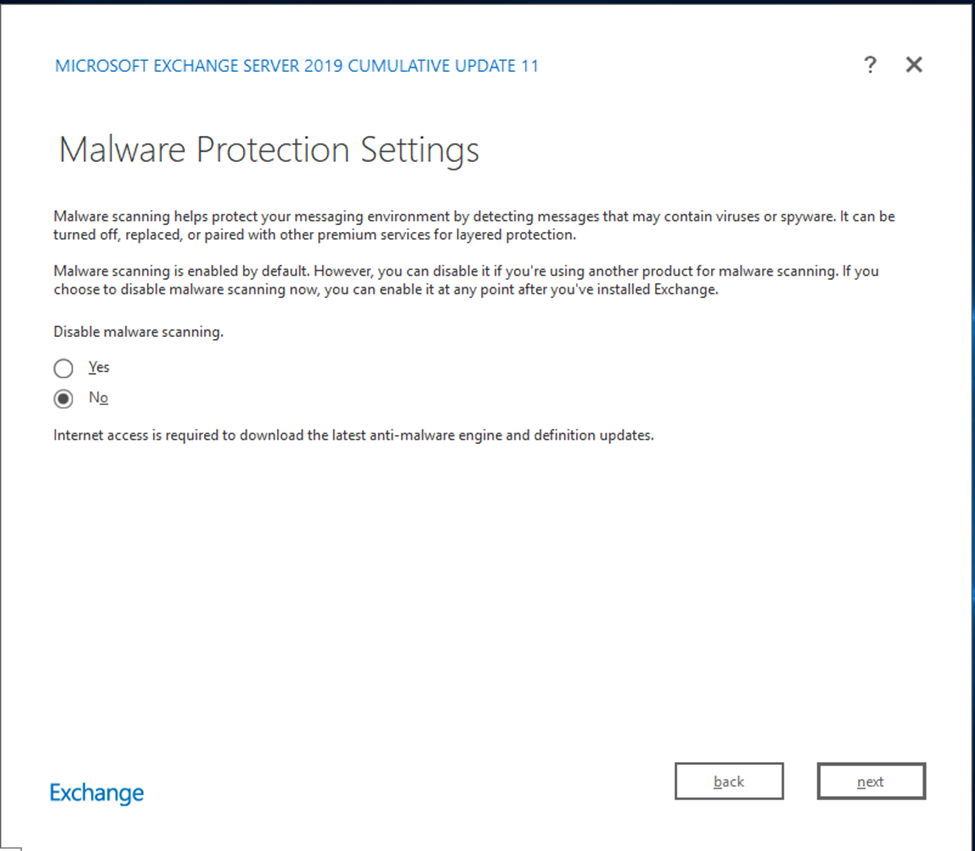
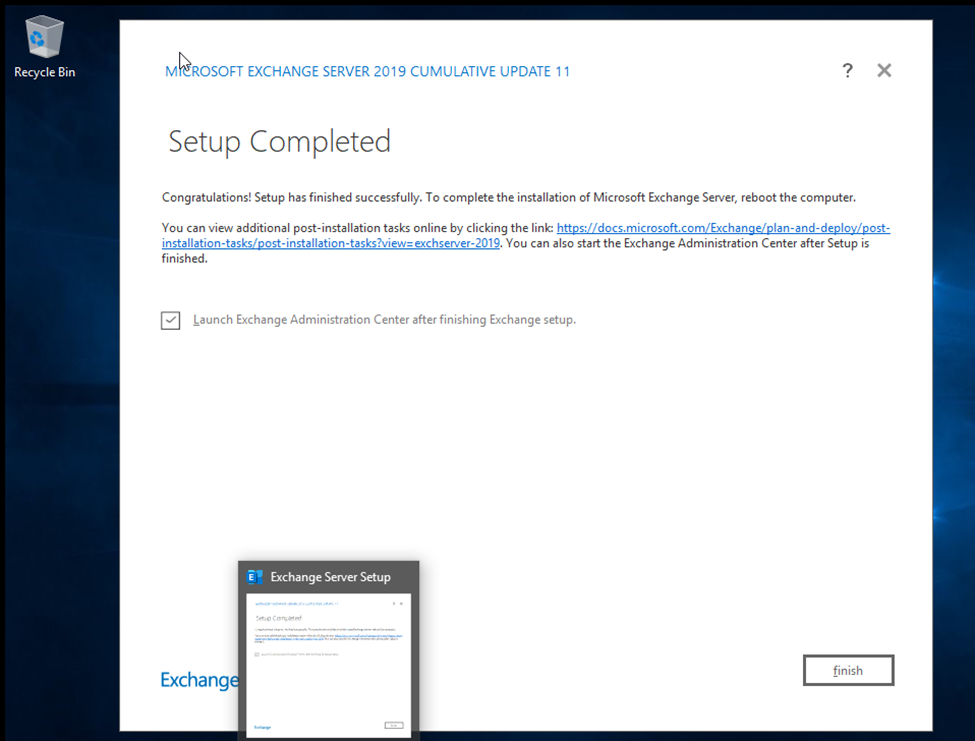
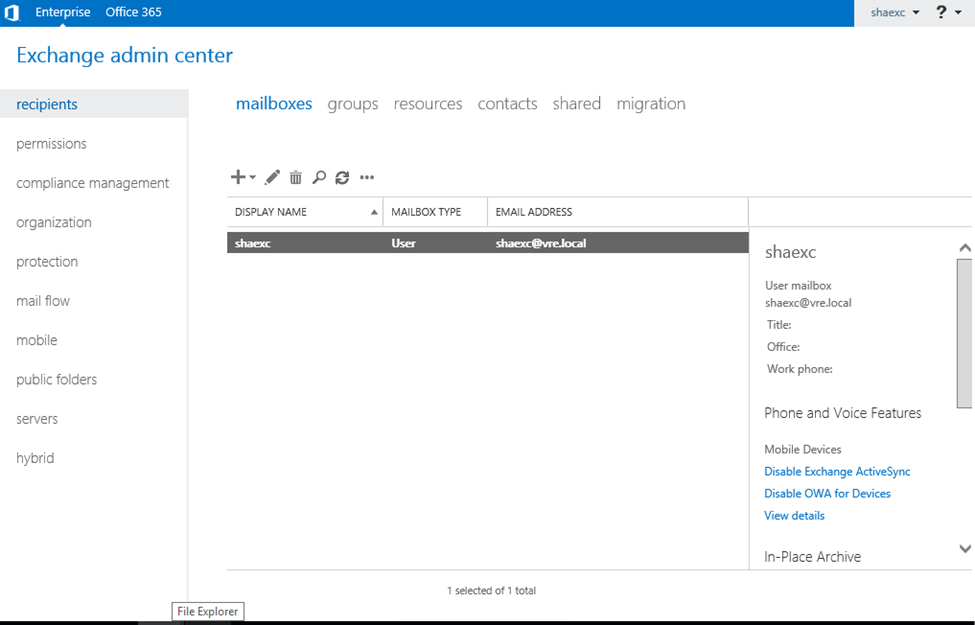
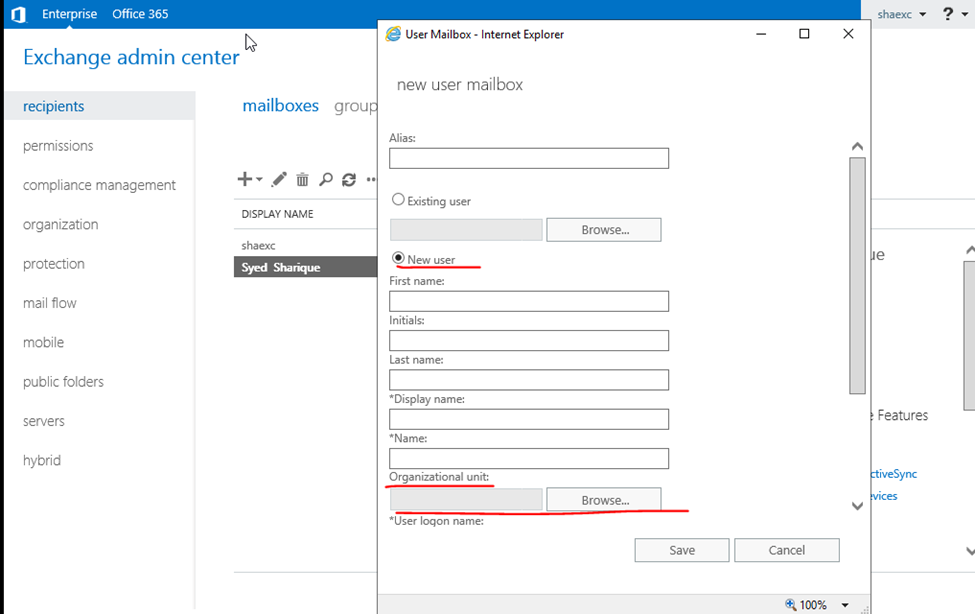
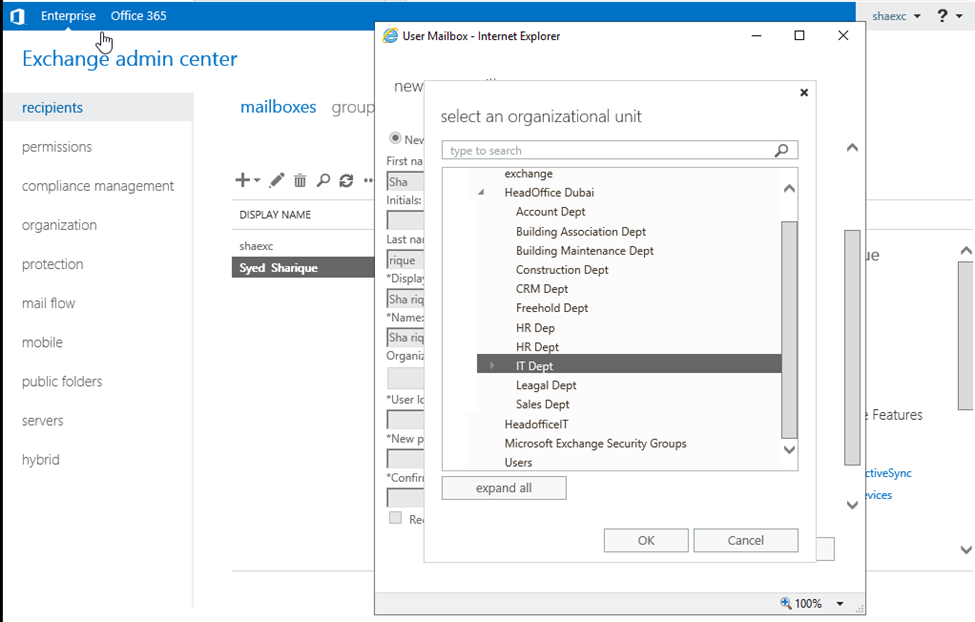
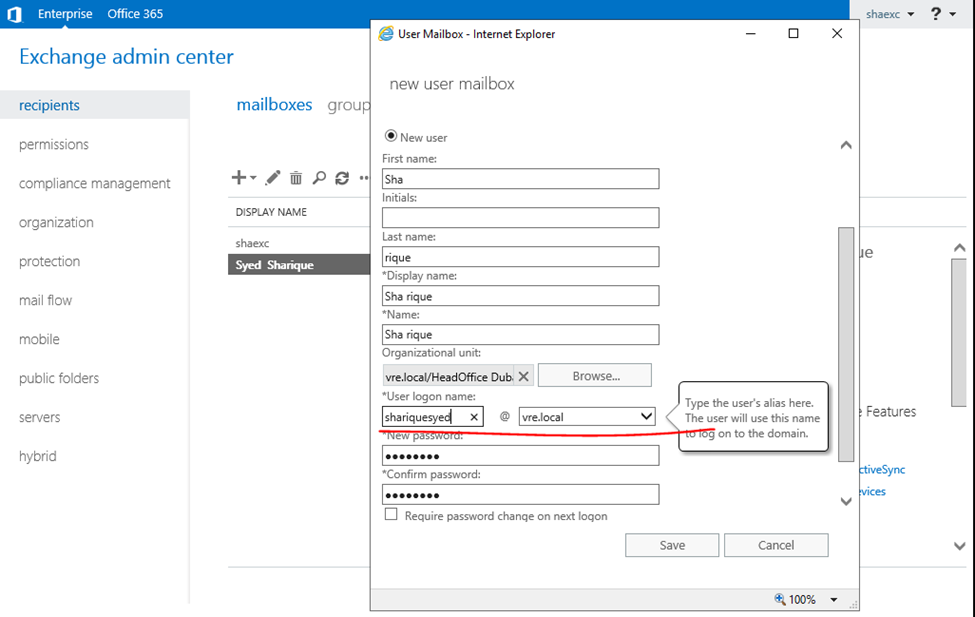
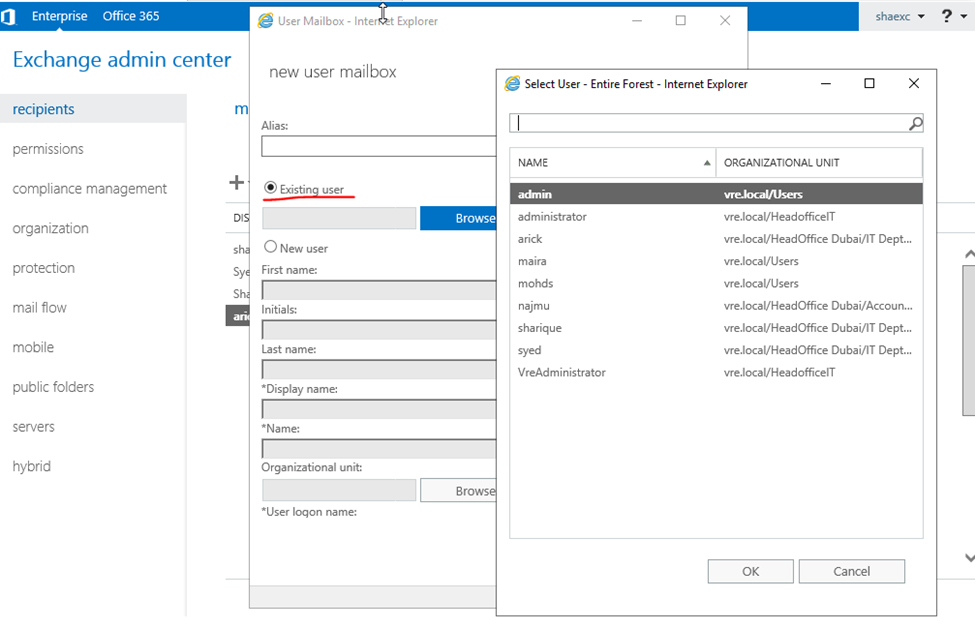
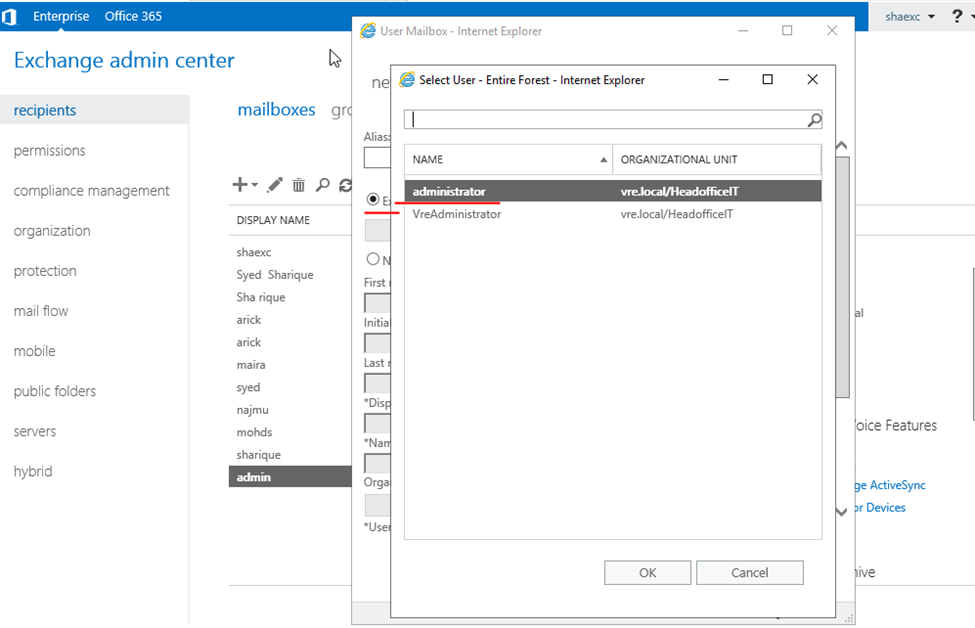
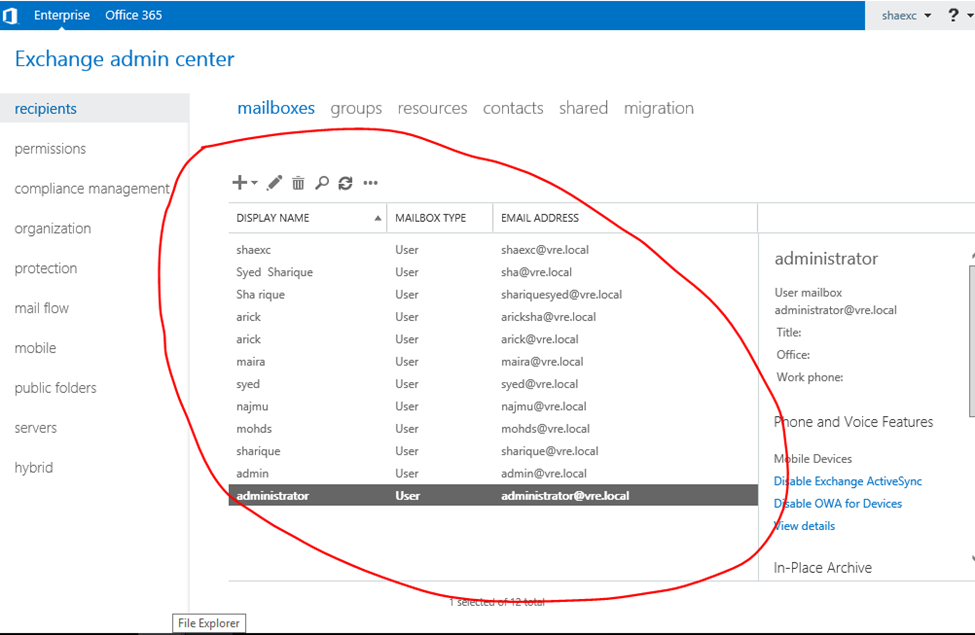
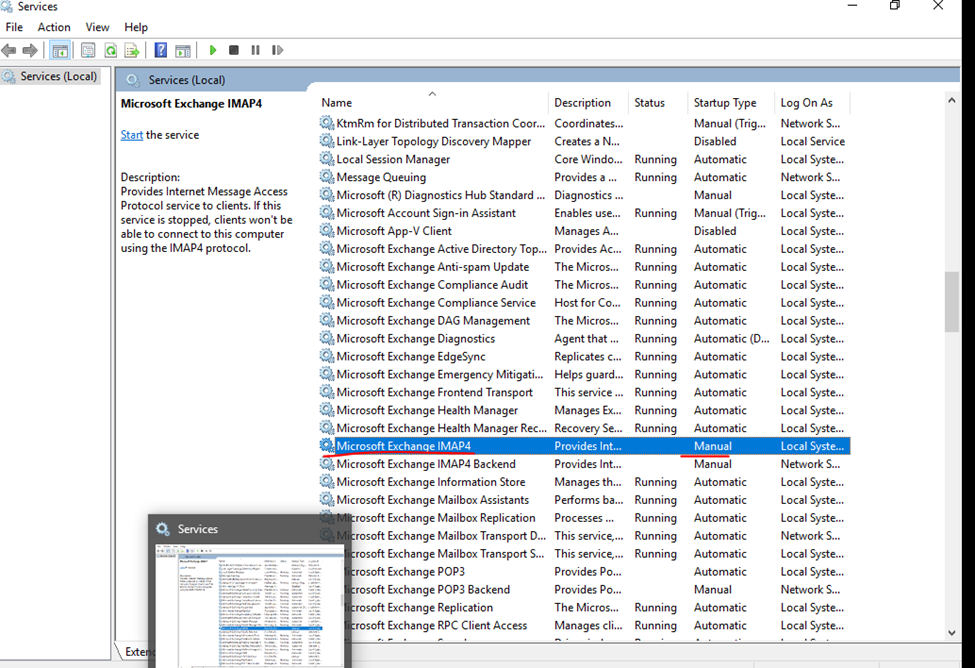
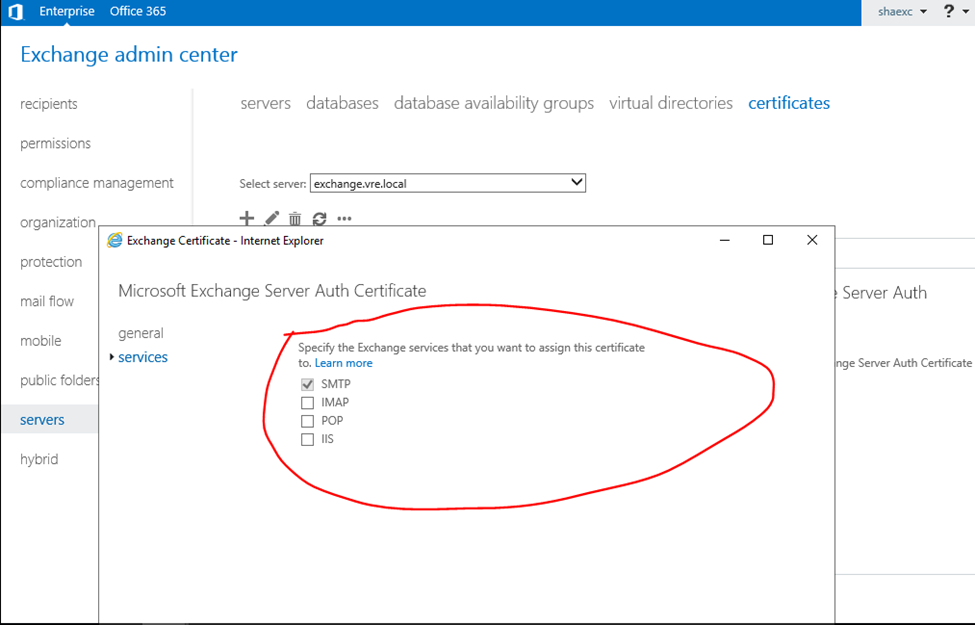
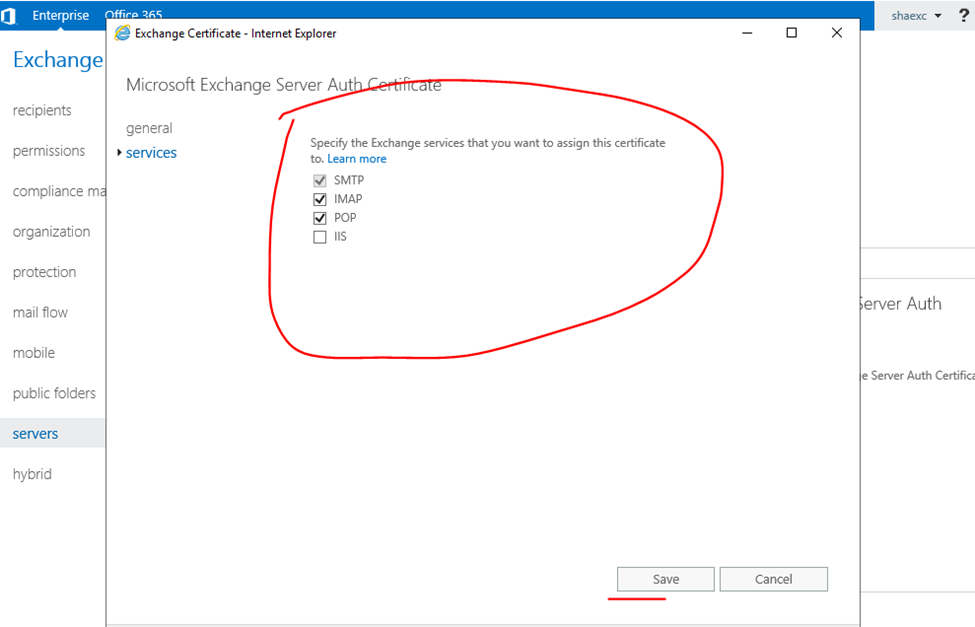
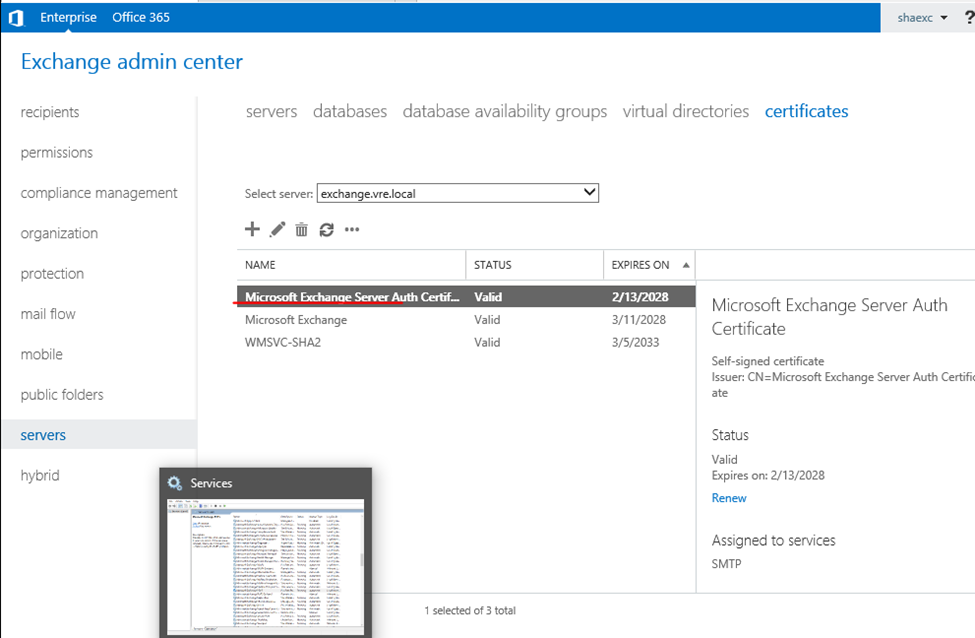
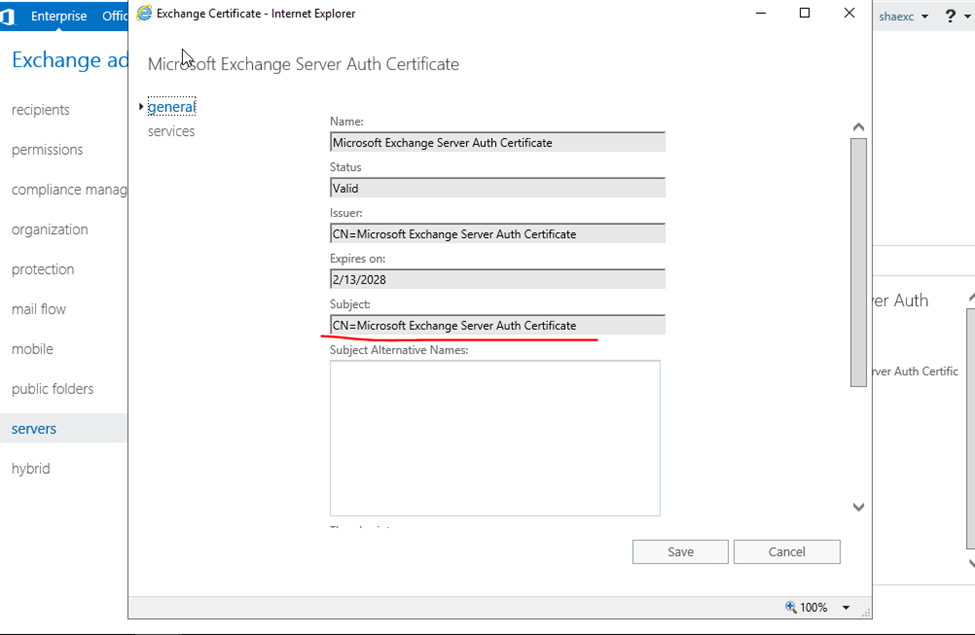
The first task in the installation of any version of Exchange is to prepare the Active Directory environment where the Exchange Server will be placed. However, prior to the preparation, it should be checked against the above Domain Controller support prerequisites mentioned earlier. Once the above requirements are verified for consistency, proceed with the following preparation tasks on the server/computer which will be used to prepare the Active Directory.
We will be using the Exchange Server itself to prepare the Active Directory.
Office 365 Exchange Server
Exchange Server 2019
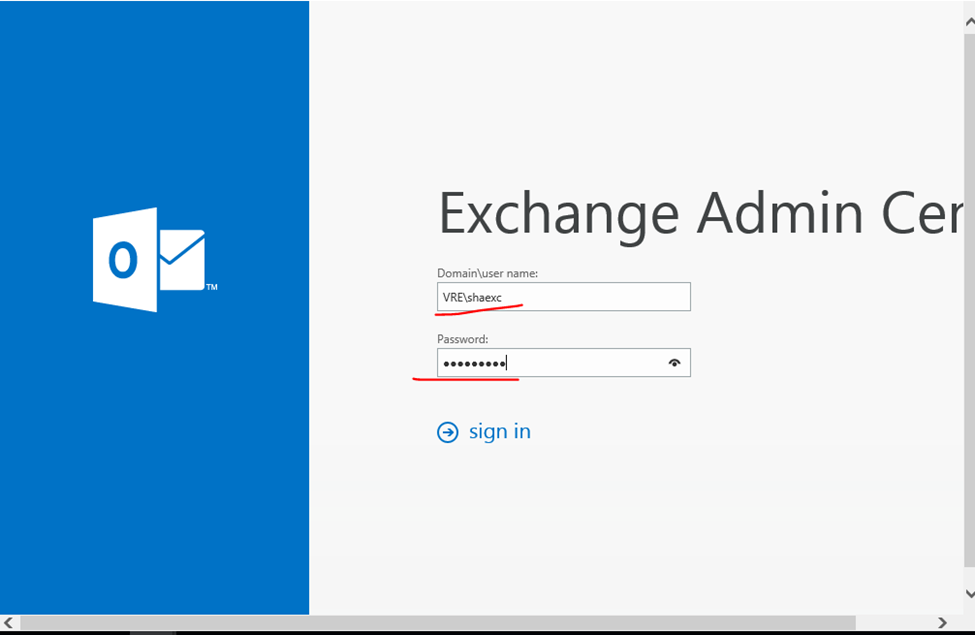
Exchange server pc should be connected to Domain Controller with Domain Controller user with required permission.
Before starting installation exchange server, we need to aware about the pre requisites.
.NET Framework 4.7 or later
Unified Communications Managed API 4.0
Visual C++ 2013 or 2012
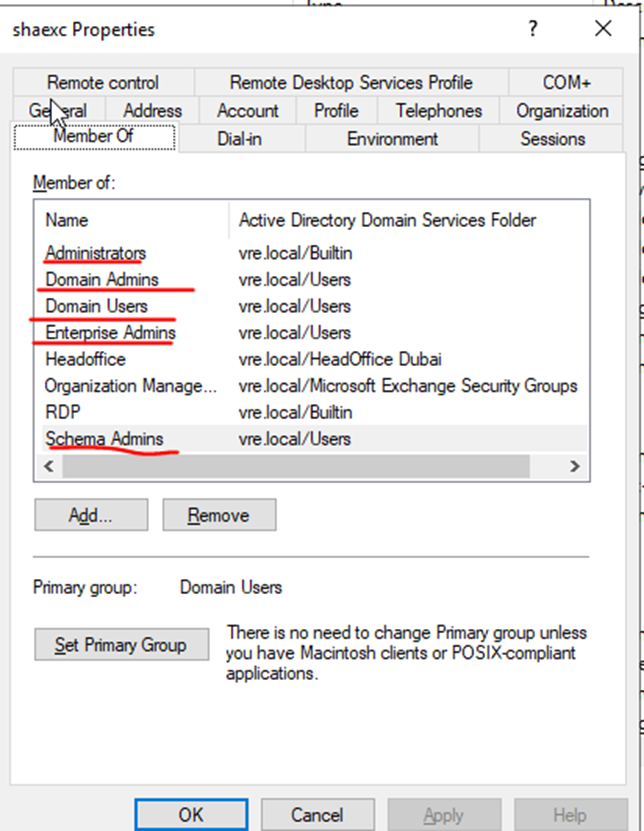
Required Permission right to Exchange Admin User:
Administrators
Domain Admins
Domain Users
Enterprise Admins
Schema Admins
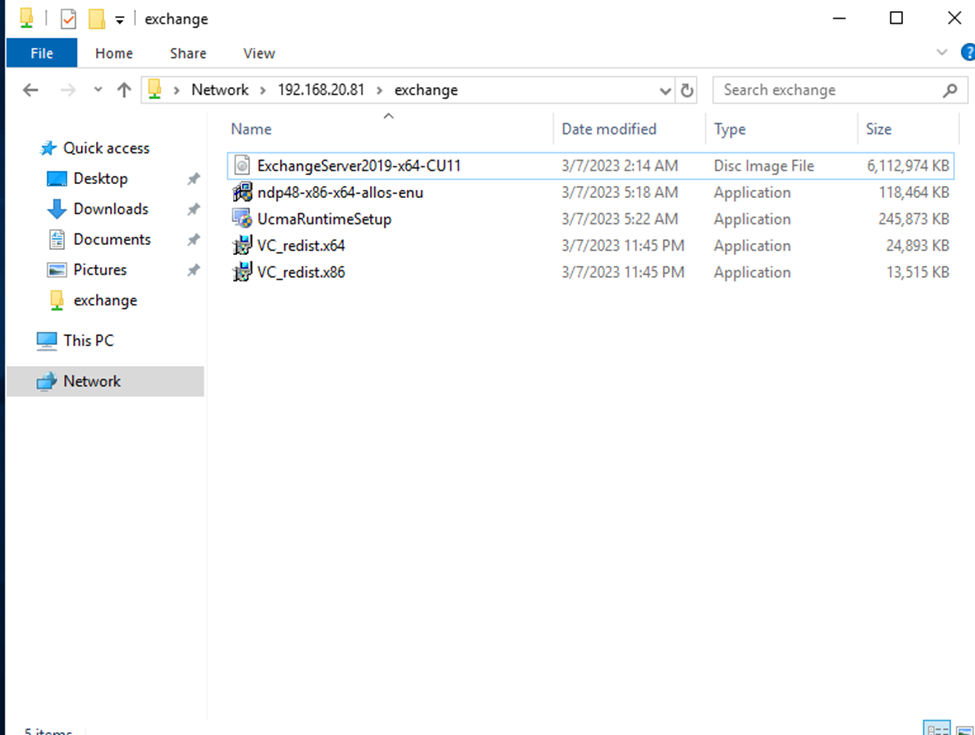
pre requisitesSoftware
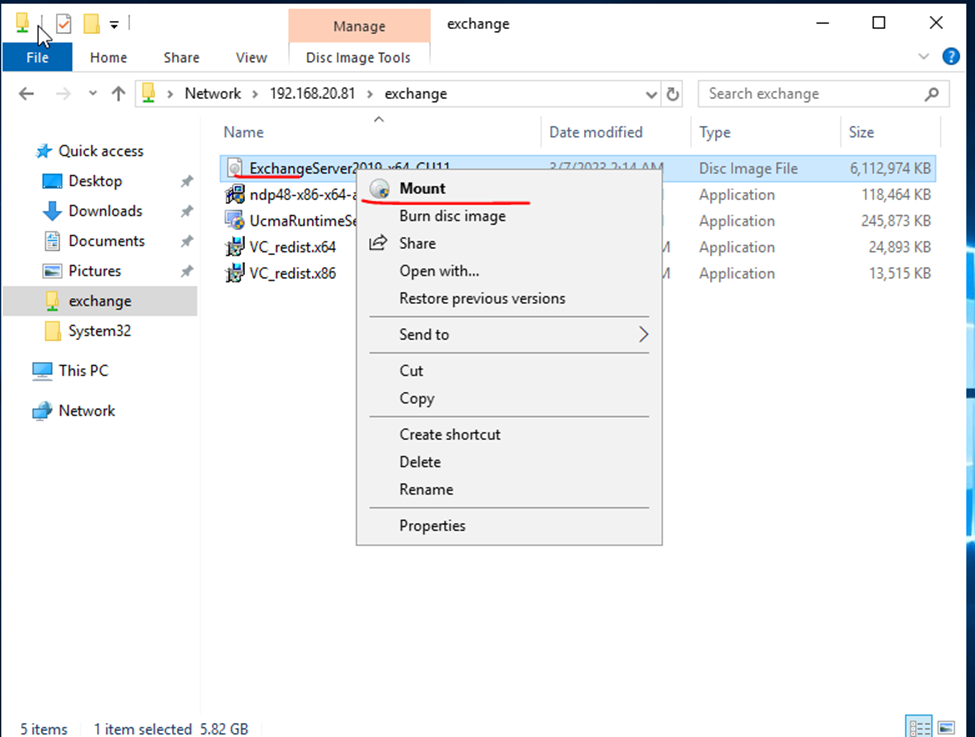
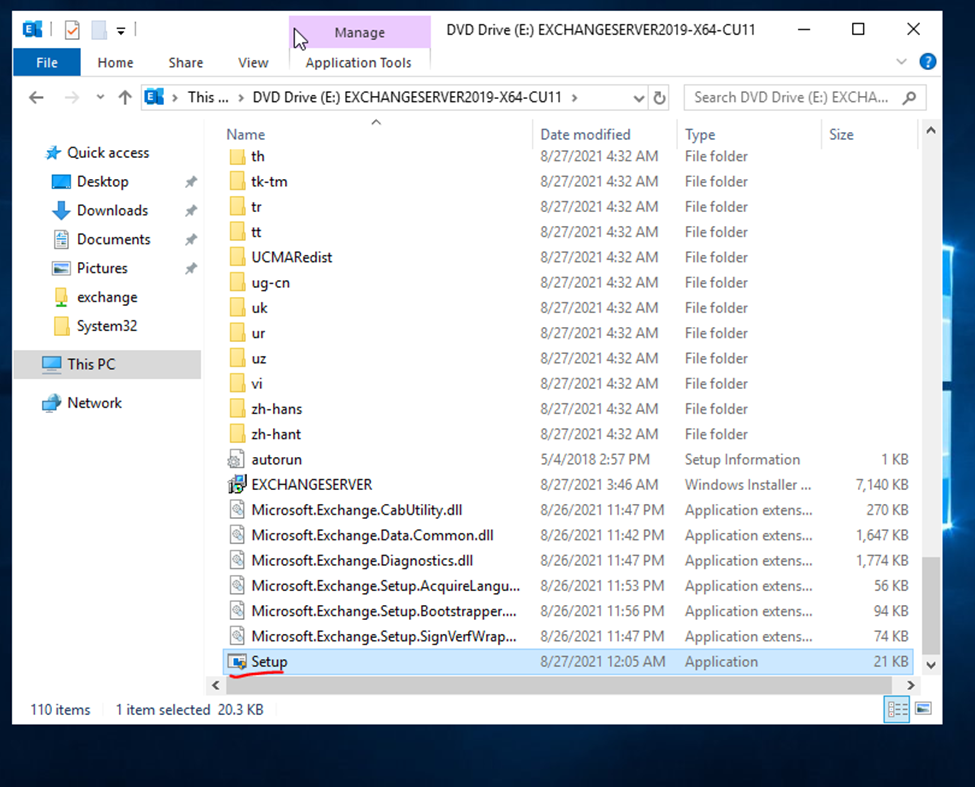
Mount the disk
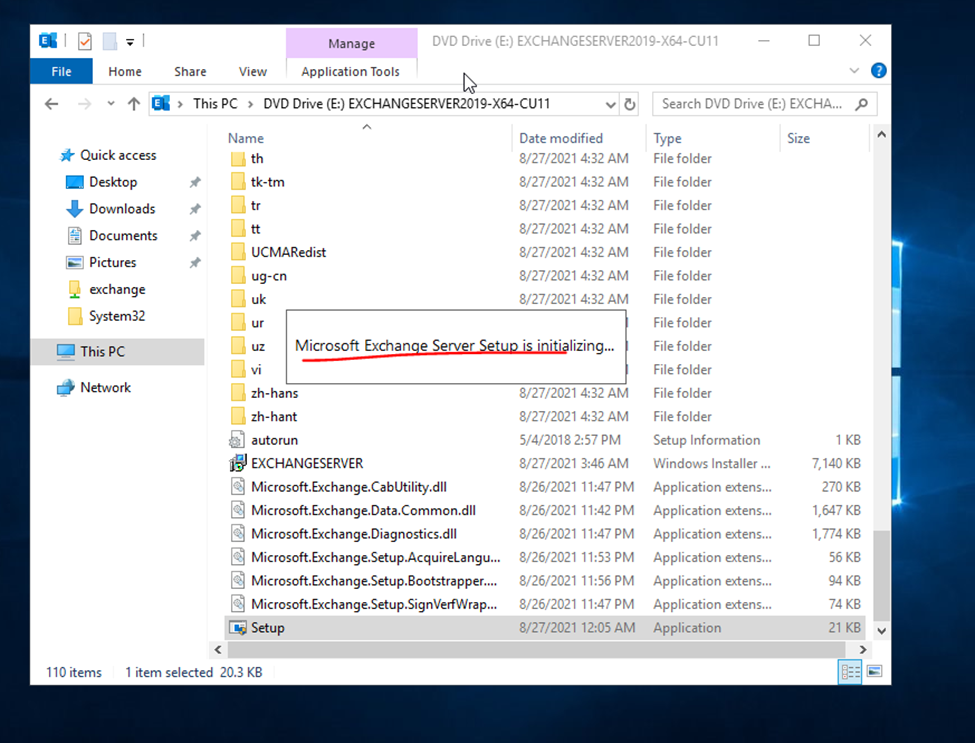
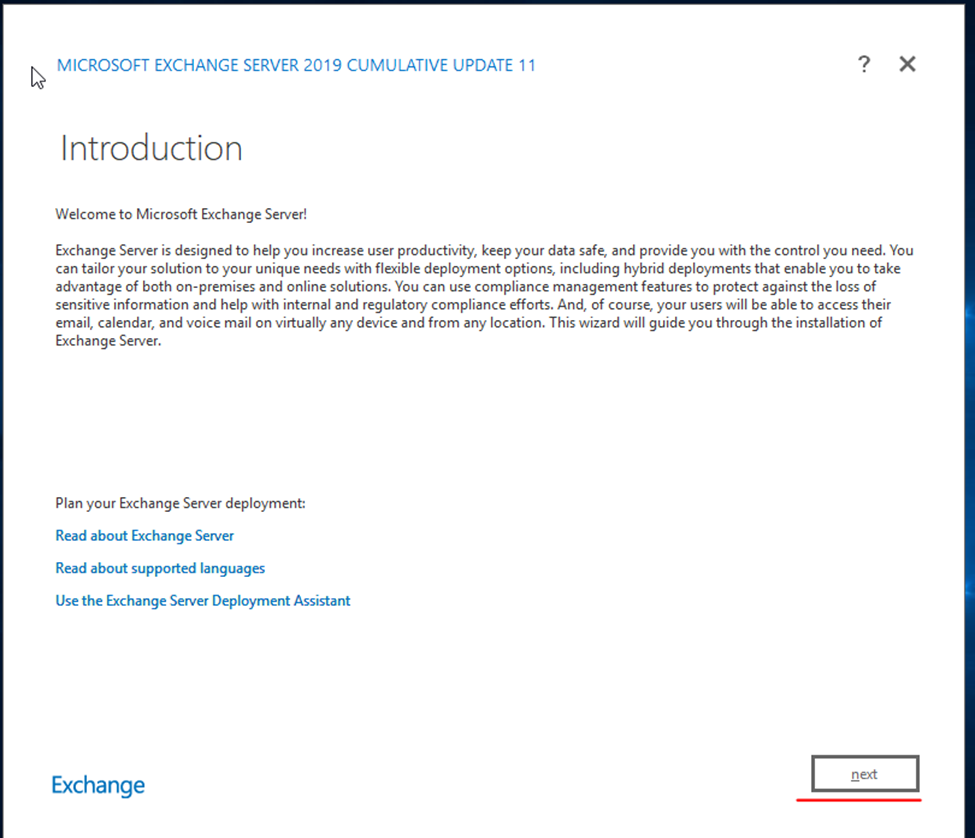
click to run setup file
launching exchange installation
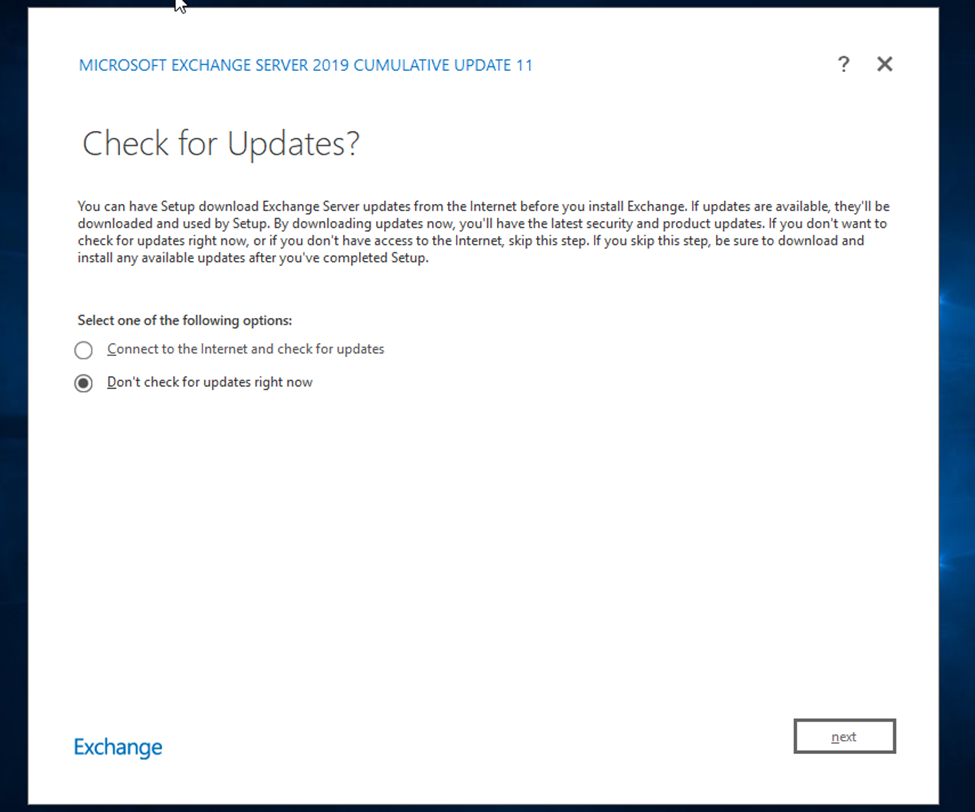
If you looking for latest update select update option otherwise next option
System state backup: Backs up operating system files, enabling you to recover when a machine starts but you’ve lost system files and registry. A system state backup includes: Domain member: Boot files, COM+ class registration database, registry
system state backup is, first of all, you need to know what a system state is. A system state contains some system settings and parameters files that are listed in the next part.
System state backup is a copy of system state data created by certain tools and stored in a safe location. Once the original system state files are damaged or missing, you can rely on the backup image to recover the previous working system.
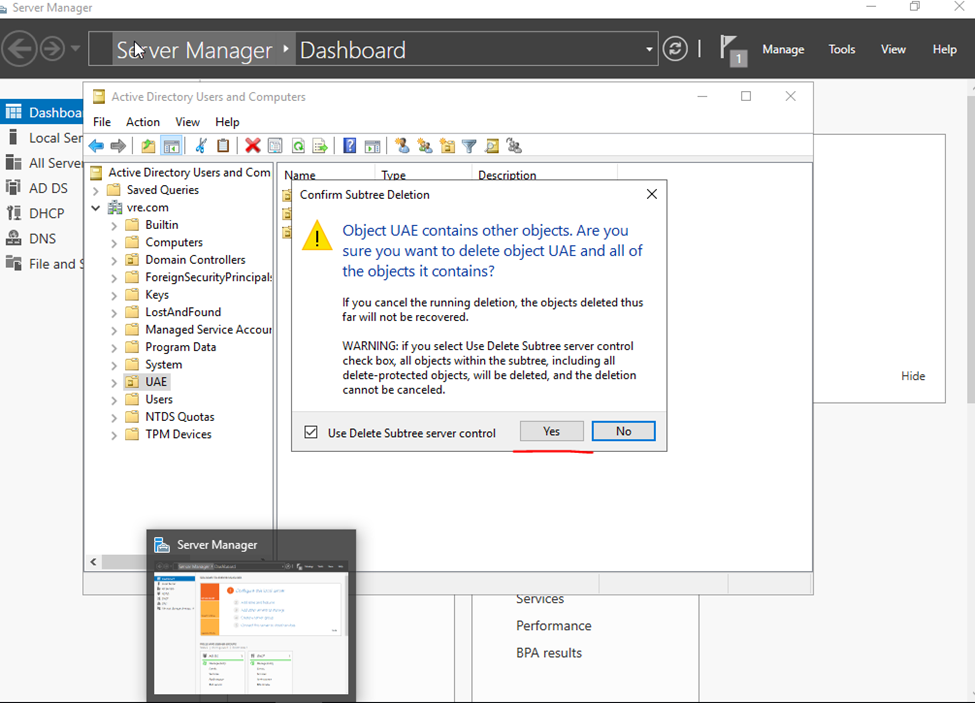
Active Directory domain controllers (DCs) you have, you will certainly want to set up some sort of automated backup of your Active Directory. Although having two or more DCs provides redundancy and fail-over protection in the event one of them fails, you can’t really anticipate what can happen in the event of a natural disaster, a fire, or flooding of a data center
for Restore we need to Start Server in Repair Mode(Click – F8)
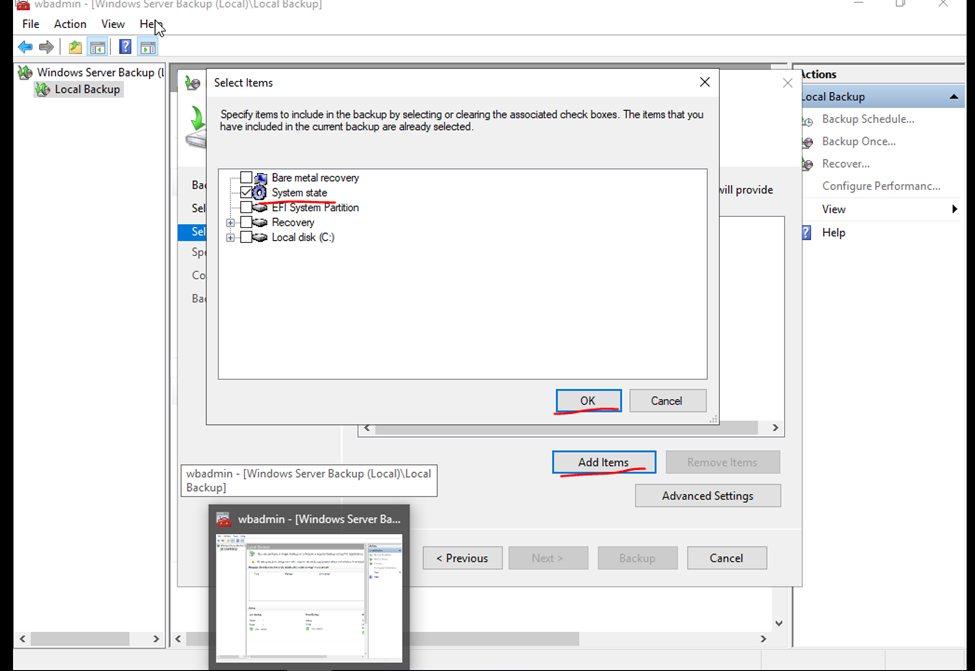
so, if we select bare metal recovery – we are taking complete server backup.
if we select System State taking backup only for Active directory.
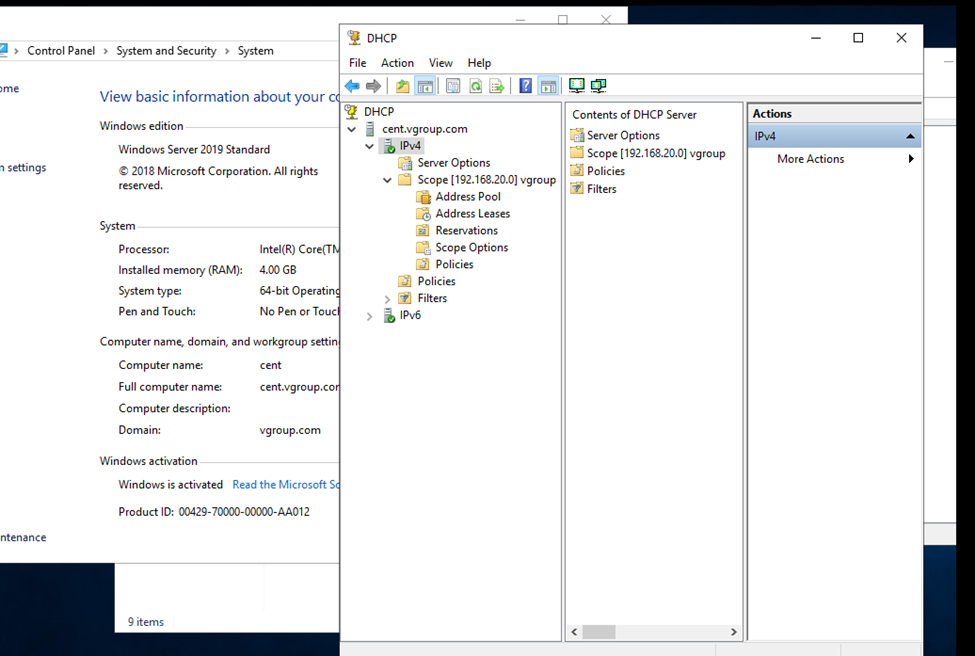
Windows Server Backup.
Installation and Configuration windows server 2019 backup solution.
Click Tools
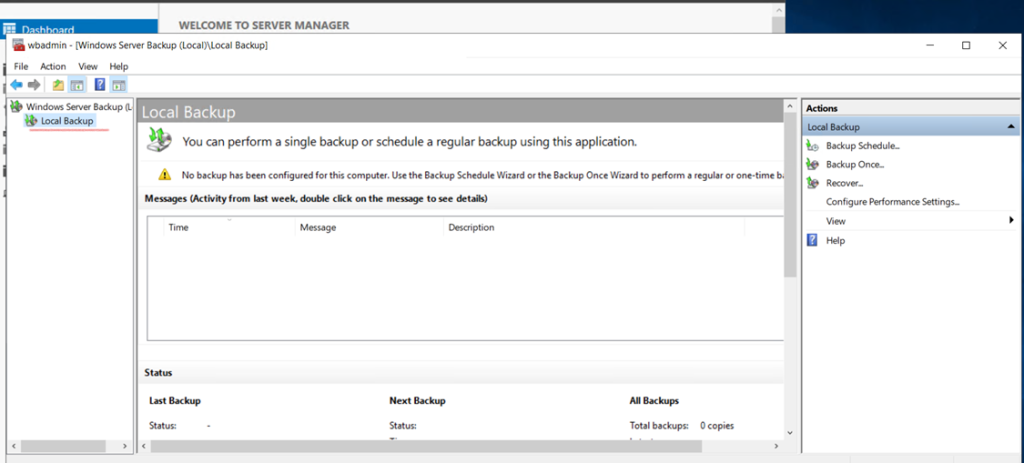
Here we are in Windows Server Backup
Daily Backup
Select window server backup
As you can see, it’s pretty bare-bones at the moment. Not a lot of action. Don’t worry, we’ll change that nice and quick. Click the ‘Local Backup‘ link on the left tree view.
here selecting the Backup schedule.
Backup schedule
only taking the C Drive Backup
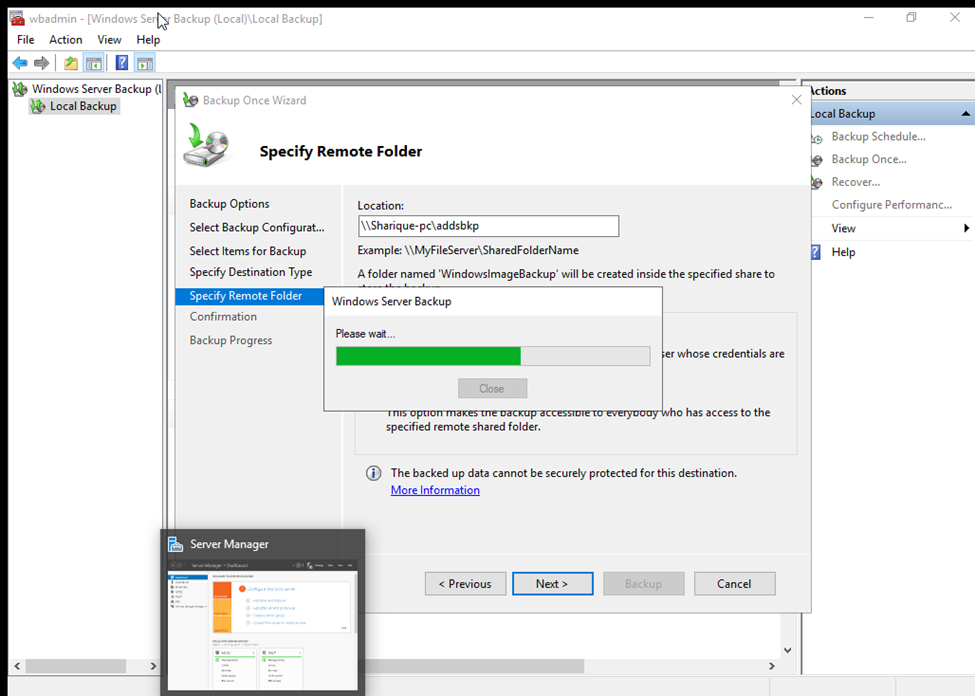
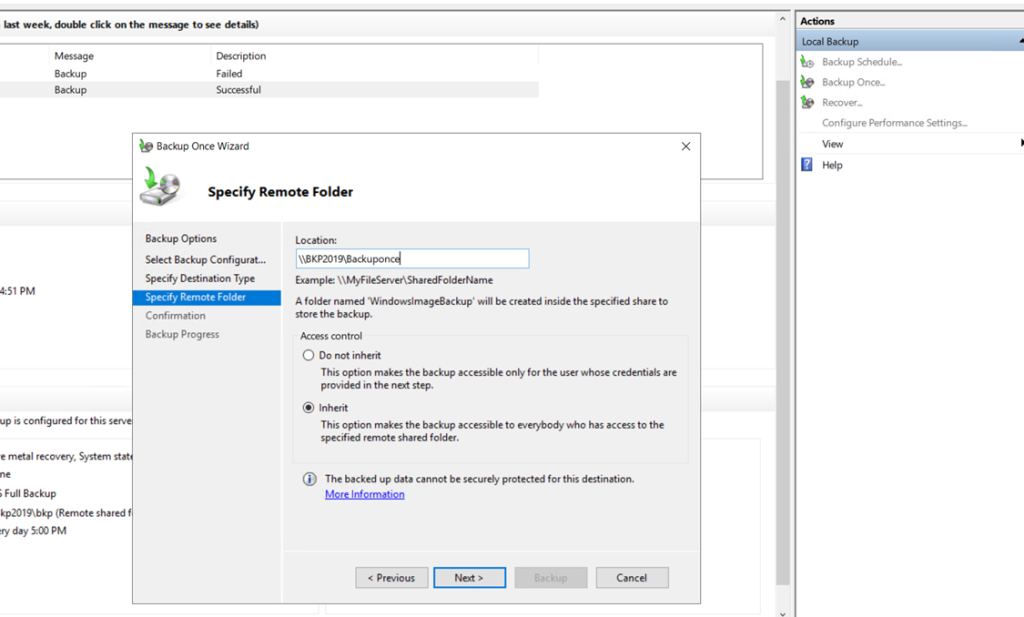
Taking the backup in network folder.
So, now type the username and password central server username and password
System State taking backup only for Active directory
here i m tacking specific ADDS Backup
Click on Advanced Setting select vss setting and click to vss full backup if you’re not running any backup.
Backup scheduled
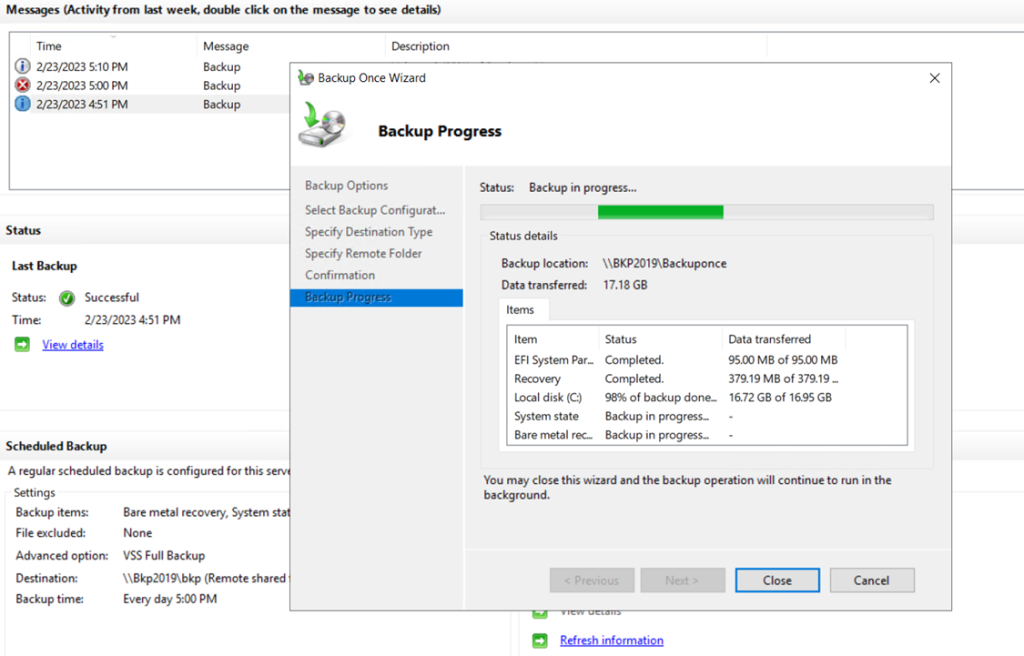
Backup once.
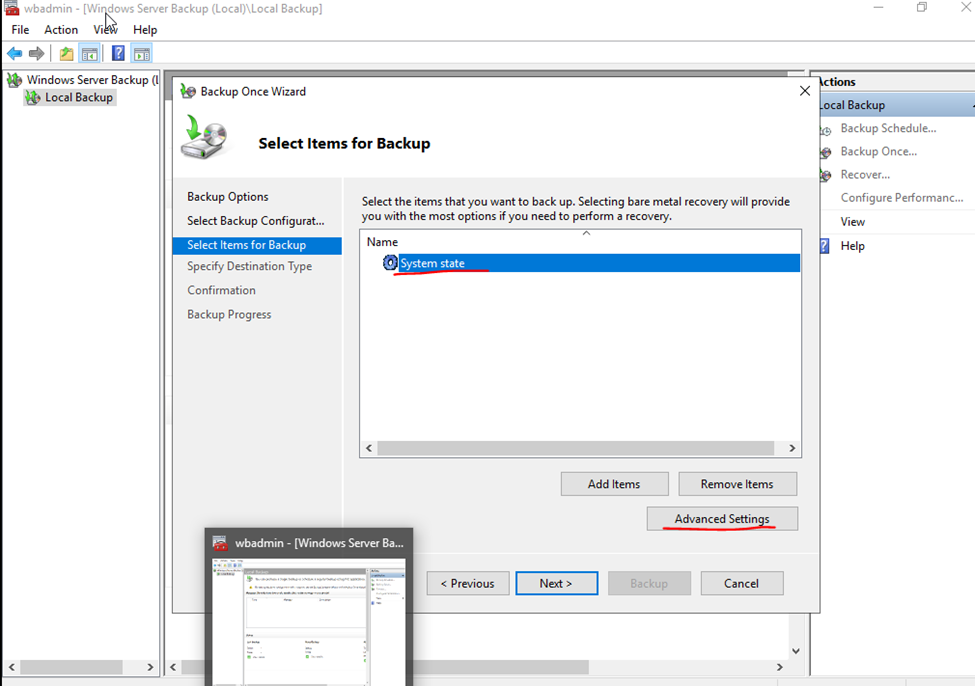
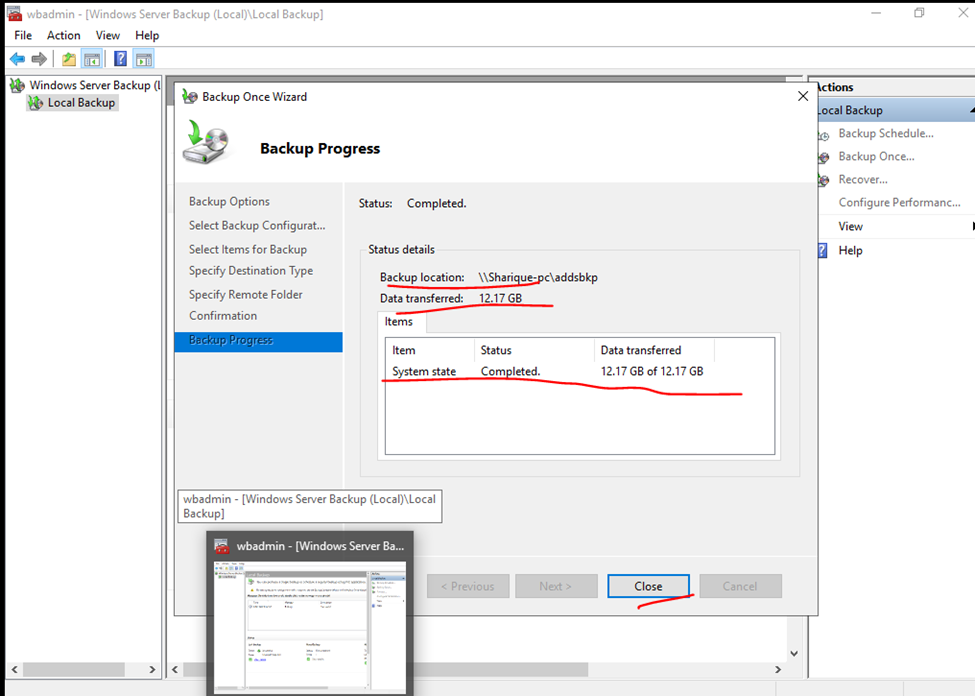
First, let’s do a single backup. Then, I’ll show you how to create an automated task/schedule. Click the ‘Backup Once…‘ link under the Actions menu on the right-hand side.
The ‘Backup Once Wizard‘ opens. As we haven’t created a scheduled backup yet, you can just click Next.
The ‘Full server (recommended)‘ option is selected by default – that’s what we want. Click Next.
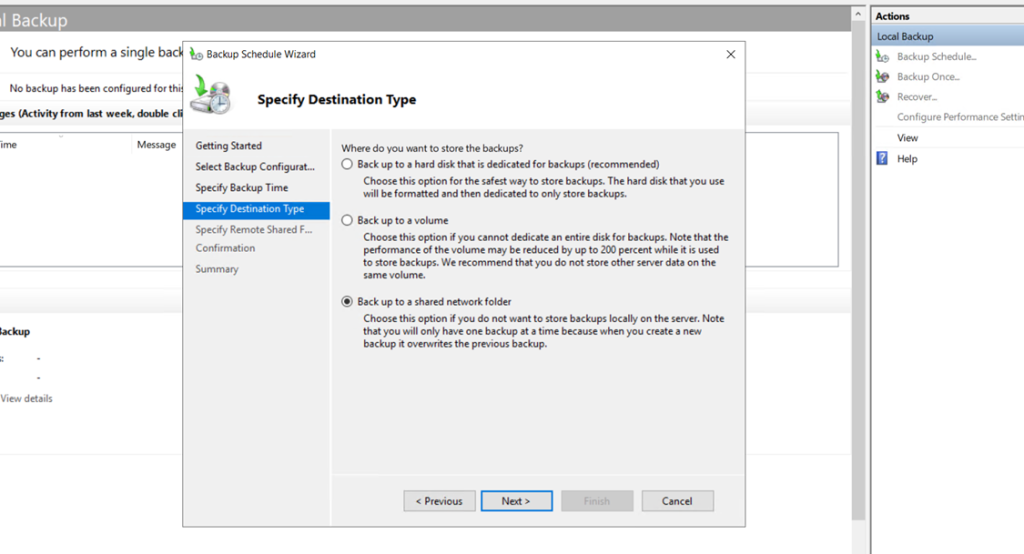
On the ‘Specify Destination Type‘ screen, typically, you would choose the ‘Remote shared folder‘ option to use another disk.
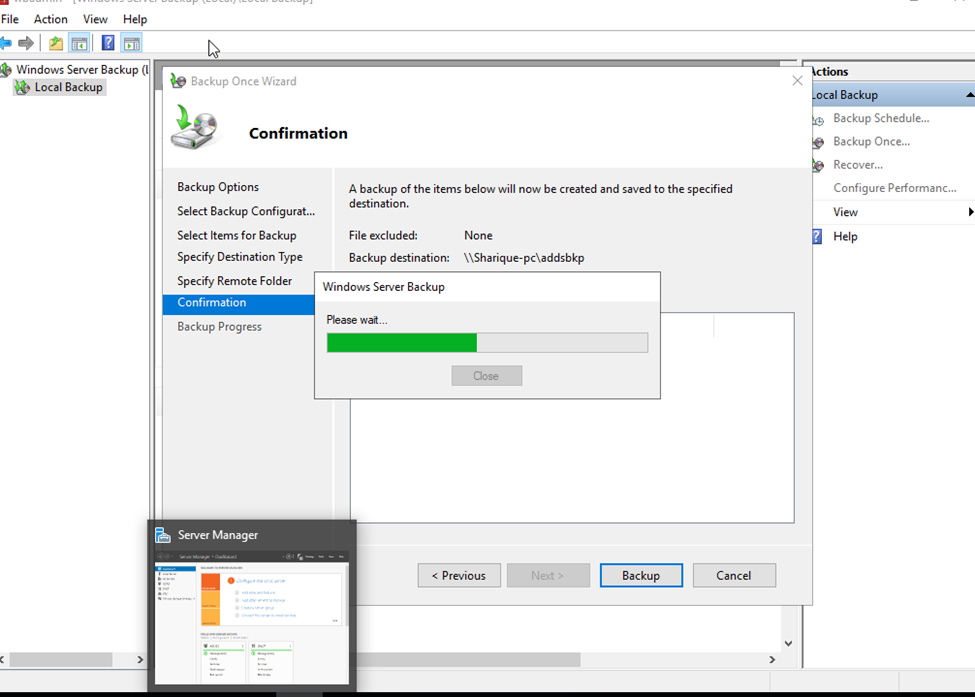
OK, we are at the Confirmation screen. Click Backup.
We can monitor the job’s progress in the dialog box or in the main interface window.
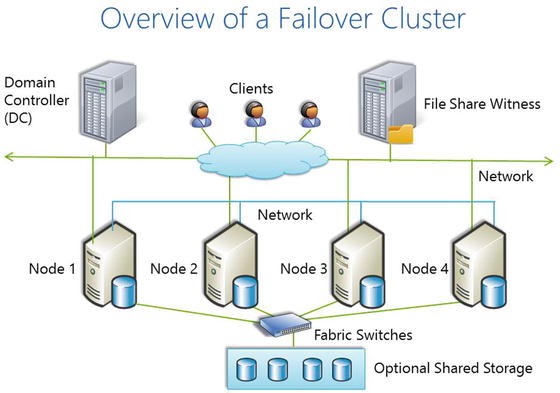
In order to increase high-availability for your business-critical data using Windows Server, you need Failover Clustering in Windows Server to achieve it.
Failover clustering will enable you to make you Windows Server services highly available. In this guide we will go just through simple setup of failover clustering on Windows Server 2019 without setting up any services.
Steps to Create HighAvailability Cluster Environment in Windows Server.
HighAvailability Server
Steps:
Windows Server.
Minimum Requirements:
Same windows server operating system.
Main Machine- example: win server 2019 DC- Domain Controller, – DC IP – 192.168.20.2
First Node 1 – win server 2019 (Active – Active) – Adaptor 1 – 192.168.20.51, Adaptor 2 – 192.168.21.51
Second Node 2 – Win Server 2019 (Active – Passive) Adaptor 2 – 192.168.20.52, Adaptor 2 – 192.168.21.52
if do you already working on DC Environment it’s okay otherwise need to install and Configure DC.
because Failover cluster will communicate with same network DC Environment.
– Suppose i am having DC Environment.
Need to install Node1 and Node 2. and join DC.
node pc name need to rename as per you. Nodes will join DC Environment
win+r = sysdm.cpl (shortcut key)
(win dc and nodes IP Will be Static)
once you will attached the NODE1 AND Multiple node pc to dc
you will login that pc from administrator account.
in Node 1,node 2 – nedeed to Network Adaptor.
IN DC
so now,
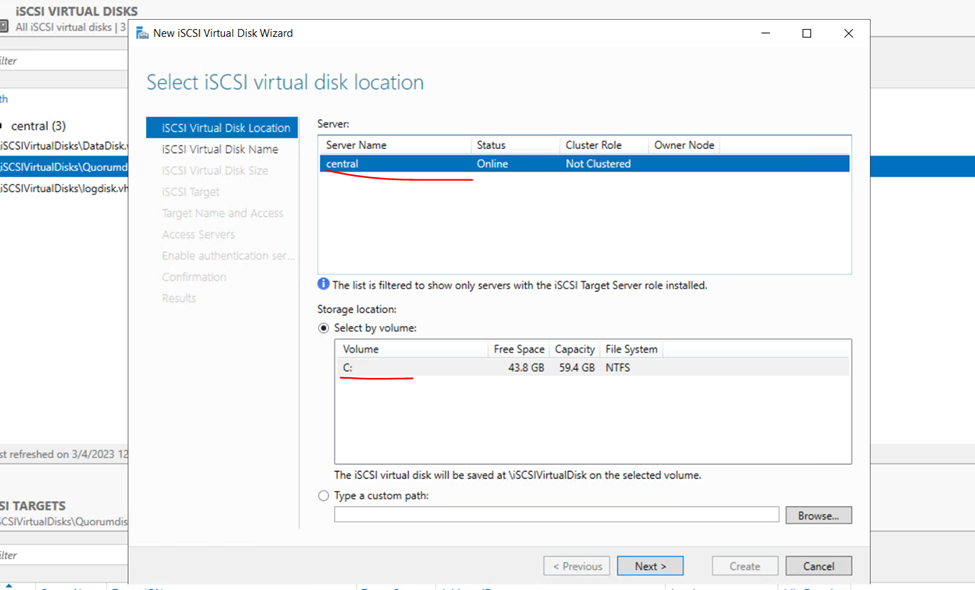
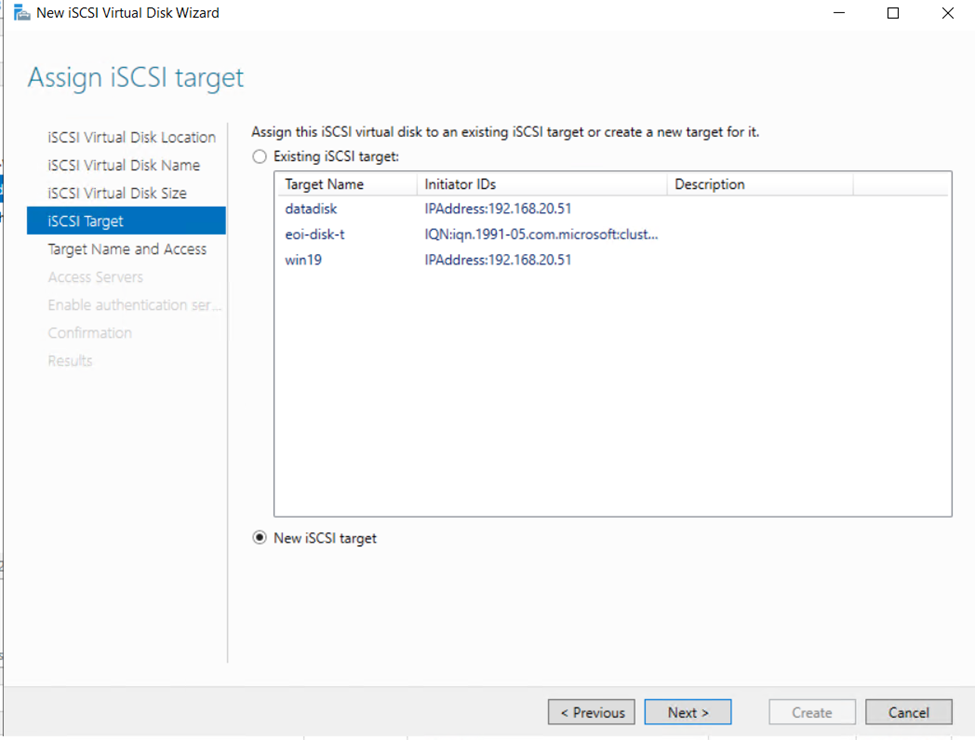
iscsi target and iscsi storage in DC.
install failover cluster.
IN DC
create storage drive using iscsi.
new isdcsi virtual disk as per need
minimum as per your requirment.
DataDisk
Log Drive
Quorumdisk
MSDT Disk
WHILE Creating Virtual Disk
Access Server- add-ENTER the node 1 and node 2 ip address.
IN All NODES
iscsi Initiator.(Default Installed)
run iscsi Initiator.
IP will be Server dc, so we created ISCSI File in DC.
find the created dc – attached machine node1 and node 2.
attached them with your node.
volume + autoconfigure.
so now available disk will be available in node 1 and node 2.
win+r – diskmgmt.msc
make the disk online and active disk.
So here,
I AM Already having DC Environment.
Now need to create NODES.
So, my Domain Controller is vre.local
And I already having nodes windows server.
Once join to the Domain Controller need to login from Same Admin User.
If you have already joined to DC your pc can login from DC Administrator.
So here,
And assign the static IP.
Implementing Failover Cluster in Windows Server 2019
So now,
GO to DC
Click add Features and roles.
Select server
Select
iSCSI Target and Storage Provider
And other make as default install it
Once install click on
File storage services
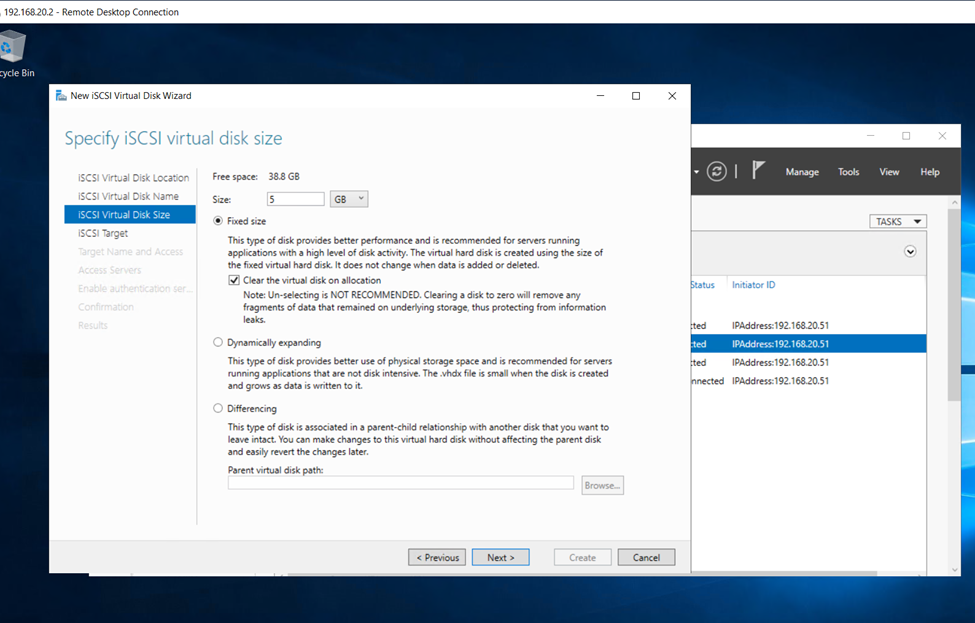
Click on Iscsi Virtual task and click on create
You can create on external drive also
So here I am creating as default.
Assign the name as per your need
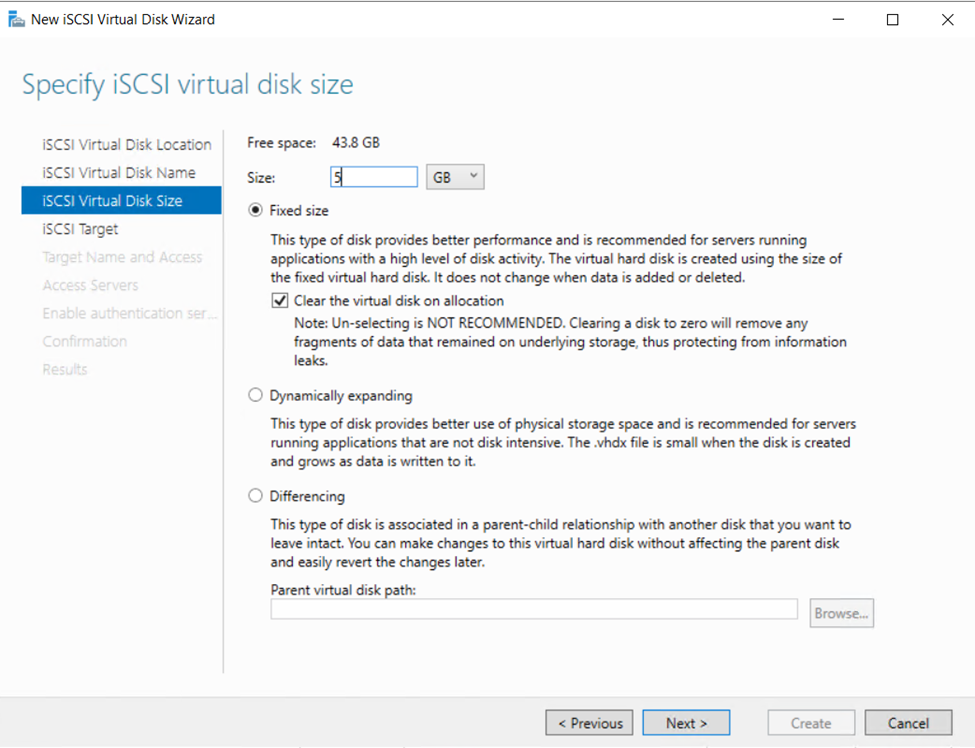
I am giving here 5GB
Click on new iSCSITarget
Allocate name
Check your name attached with Cluster
Or search from ip address
Click to Next
Leave as default
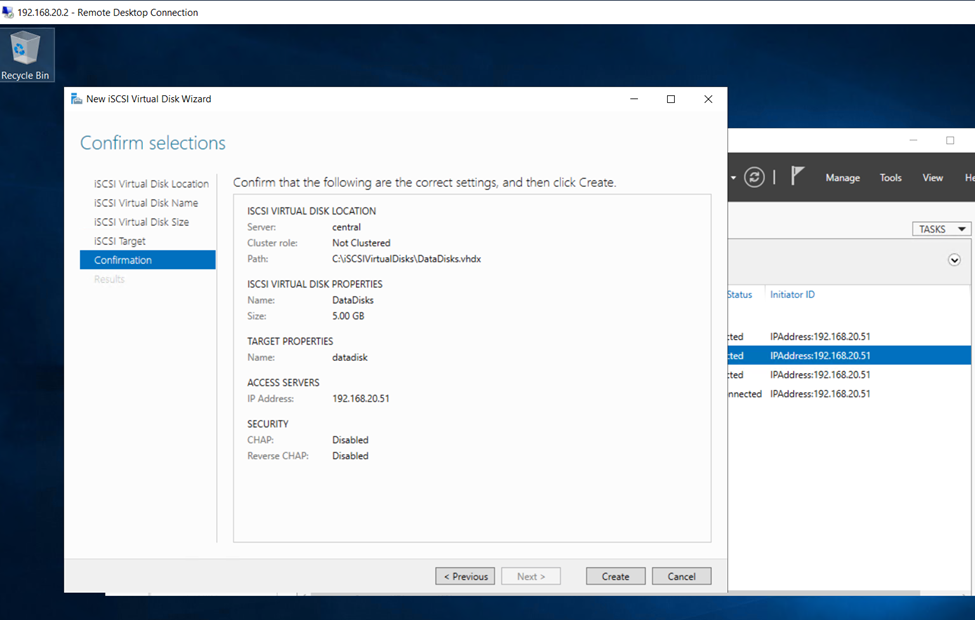
So, click on create and create first iSCSI Disk
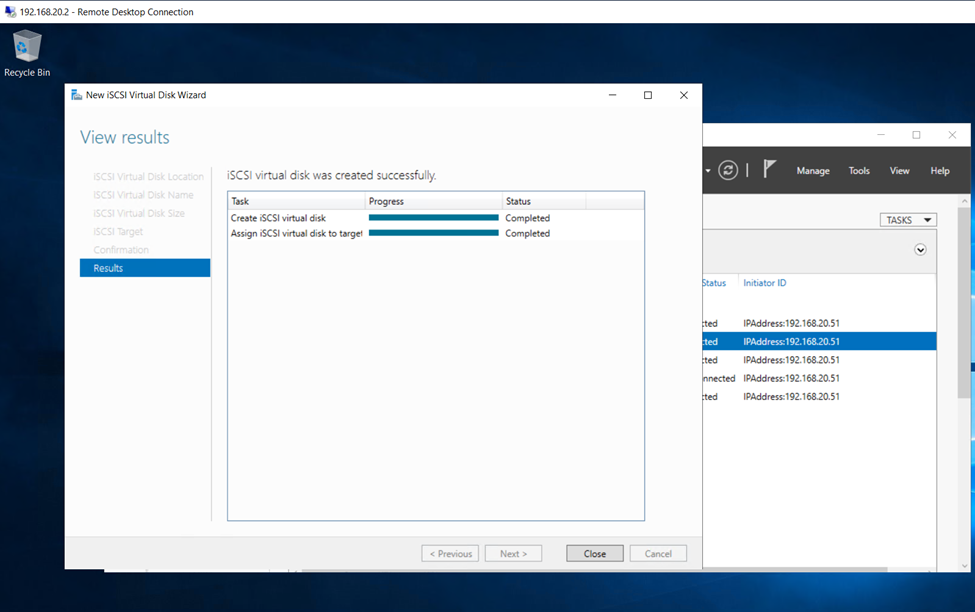
Iscsi Disk Created
We ned to create minimum – Iscsi Disks
Quorumdisk
DataDisk
Log Drive
So, again I m creating disks.
Assign size
Click next
Click on create disk
Created disk and close
Now,
Login to Node1 and Node 2 for Iscsi initiator
Click to quick connect
Click to Done so bellow screen connection established
Click on volume and device and click auto configuration
Right click on both disk which is not current activated make it online
Click on initialize disk
Select as default
Now assign name
Once done
So after this check DC Iscsi EMVIROMENT NOW YOU ARE CONNECTED.
Now install the Cluster in both nodes.
So, in feature select and install.
Once cluster install need to install File Server also.
Click to start Failover Cluster. Node 1 and node 2
Click to validate and create cluster in node1 node 2.
Select both servers (in my case Failover1 and Failover2) and select Next
Next
Run all tests | Next
Next
All test were success | Finish
Confirm the next options, and we will reach the confirmation screen, where we can check the information to create the cluster before hitting Finish and really create our Cluster.
We can proceed to creating cluster
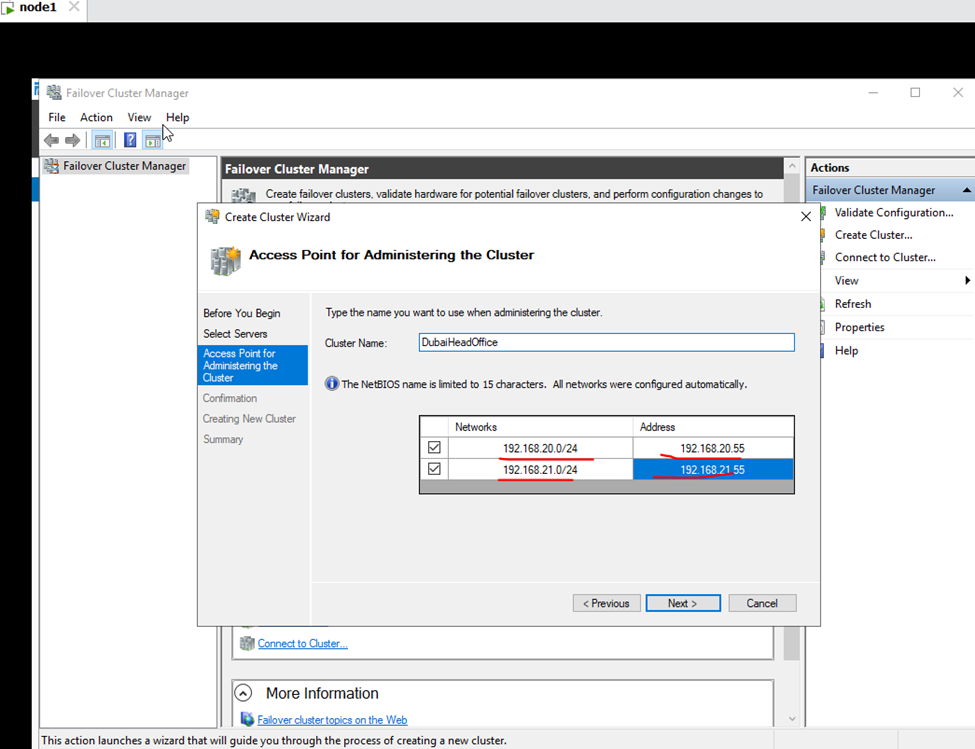
Create Failover Cluster
Once validation done in node 1 and node 2.
Now Create cluster in node 1 and node 2.
Next
Assign the Cluster IP
Next
Once the Cluster is created, we can move on to define what kind of role (resource) we’ll need to use.
Finish
So, cluster validate and created.
So, now adding Disks
Select the disks
Once disks attached the disks will be online
You can assign disk as per the need
Log Disk
Network Interface
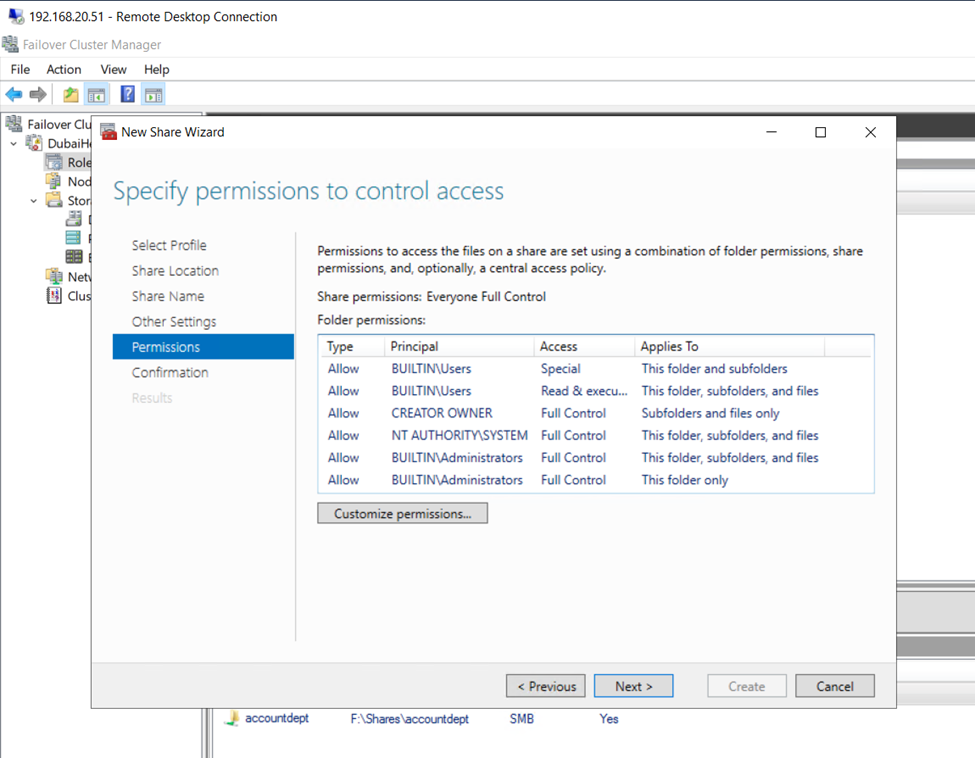
Creating file server in cluster environment
File Server and next
As you can see I have selected file server for general use